|
|
Post by alanw on Nov 2, 2009 20:59:10 GMT 12
Hi all
Not sure where to post this, but I thought we may have some
current/previous Airframe fitters who will know about Aircraft
skin repairs (metal specifically)
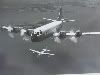
Watching an old WWII documentary I saw a Black Catalina
had a bullet/flak hole, which had the torn metal cut out
and a plate riveted over the top made me wonder, how much that
would affect the airflow(if at all) and ultimately the skin panel
life span.
Now I have a basic understanding of skin repairs, but knowing what happens and having physical experience two different things.
Question I have is this,during the course of your service, have you ever done bullet hole repairs (even simulated ones)?
If so when would you
1) Rivet a plate to the existing skin (after cutting out the
damaged metal)
1a) did you spray or brush paint the repaired portion?
2) Use metal tape to make repairs (even if temporary ones)
You may ask where is Alan going with this question, and I have
an answer for you.
As crazy as it may sound, I thought of asking our current folks
as I don't suppose any of our WWII veterans would frequent this forum (apologies if you do).
My Brewster Buffalo is not far off finally being finished and in the
book "Last Stand in Singapore" the 488 Squadron aircraft were
bullet damaged on a frequent basis, so I would like to at least show
some sign of damage repair albeit in 1/32 scale.
Thanks
Alan
|
|
|
|
Post by Bruce on Nov 2, 2009 21:59:00 GMT 12
Modern approved civilian repair techniques would be a bit different to doing a repair under fire in a war zone. However "FAA advisory circular AC43-3 acceptable repair methods" provides the basic principle we use today over "puncture" type skin damage.
In most cases for non - pressurised, lower speed aircraft, an external patch is satisfactory. The puncture area below the patch would be ground or cut out to remove stress points where cracks progate from. The external patch is made from material of the same thickness as the original, cut to allow generally 1" all around the damaged area. All corners are radiussed and the edge chamferred. it is generally rivetted in place with solid or blind rivets (It would be solid rivets on WW2 aircraft - providing you can get to the back of the skin - otherwise they would probably use screws) at a rivet pitch equal or less than the rivets used top secure the original skin. 1/8" round heads would be normal. the rivets would generally be about 3/8" in from the edge of the patch, following its profile. There is no specific instruction regarding painting in the modern spec, and it may have been an undue niceity in Singapore, but they would probably have brushed some Zinc cromate on if they had time.
the outher method is to cut out the damage and make a patch exactly the same size and shape as the cutout, then make a larger patch and rivet it inside (if you can get to it) this would give two rows of rivets around the hole, one row on the inset patch, inside the damage area, and another row outside holding the internal patch in place. These would only be used on larger holes and would be a bit fiddly to do in the field.
Metal tape would have been unlikely to have been used in WW2.
Hope that helps.
|
|
SeanG
Warrant Officer
 Me in my Sim....
Posts: 43
|
Post by SeanG on Nov 3, 2009 11:11:49 GMT 12
I have seen photos of F-4's and A-4's repaired in the field in Vietnam with flattened beer cans used to patch holes. I know a guy who bought the cockpit of an F-4 which ended it's career as a battle damage repair trainer... he said you would not believe some of the materials used in patch jobs  SeanG |
|
|
|
Post by alanw on Nov 3, 2009 15:53:51 GMT 12
Bruce/Sean
Thanks for your replies -much appreciated
Bruce; the first way of patching you describe (rounded edges etc)
is pretty much the way the Catalina was repaired .
Sean; from what you describe with the Vietnam repairs, It
would not surprise me what the 488 Squadron guys would
have used, especially when the material' began to become
harder to find as supplies were exhausted.
That's given me some to go on.
Regards
Alan
|
|
|
|
Post by chewy on Nov 3, 2009 21:02:21 GMT 12
I did time in the skin bay and the type of patch is determined by the type of aircraft and the time available. Slow aircraft you can get away with scab patches, high speed aircraft with flush rivets require flush patches. I did a battle damage repair course and all you have to do is get the aircraft back into the sky for another mission any way possible. Scab patches, pop rivets and duct tape.
|
|
|
|
Post by yogi on Nov 3, 2009 21:38:24 GMT 12
I did time in the skin bay and the type of patch is determined by the type of aircraft and the time available. Slow aircraft you can get away with scab patches, high speed aircraft with flush rivets require flush patches. I did a battle damage repair course and all you have to do is get the aircraft back into the sky for another mission any way possible. Scab patches, pop rivets and duct tape. that reminds me of a couple panel beaters i know.... all that plus a liter of bog. |
|
|
|
Post by 14liney on Nov 4, 2009 5:27:40 GMT 12
A few years back I was working in Somalia and one of the company aircraft (Bell 212) came back with a bullet hole in the left hand engine intake fairing. Just cleaned it up like AC43 says and put a scab patch on it. Probably still flying around like that. Other company aircraft had similar damage but this was the only one that I saw.
|
|
|
|
Post by tbf25o4 on Nov 5, 2009 10:47:17 GMT 12
Battle field repairs as stated can be effected by a variety of quick fix methods depending on the type of aircraft. One of our freighters got holed over Borneo in the 1960s with a standard skin patch applied. In the latter days of the Blunty's the inspection holes for wing cracks were taped over with high speed tape which worked perfectly well.
The avenger in the museum was extensively re-skinned around corrosion areas on the cowls etc, and such was the quality of the repairs they are very hard to spot. Most involved double skinning with a patch under the affected area, and a flush surface insert in the upper skin
Paul
|
|
|
|
Post by chewy on Nov 5, 2009 16:07:48 GMT 12
If you look under the wings of the Blunties around the undercarriage bay you will see the "Ozzi" patch made of titainium. The Avro 626 has scab patches on the Townsend Ring Cowls.
|
|
|
|
Post by alanw on Nov 6, 2009 23:01:00 GMT 12
Hi Gents
Thanks to all of you for your input, very much appreciated.
I have a good lot of information now to go on.
Regards
Alan
|
|