|
|
Macchi
Feb 23, 2007 19:21:56 GMT 12
Post by mumbles on Feb 23, 2007 19:21:56 GMT 12
Tackling the Flying Kiwis Supermodel MB339.... The shape isn't right for a CB so the first thing to do is hack off the nose and tail 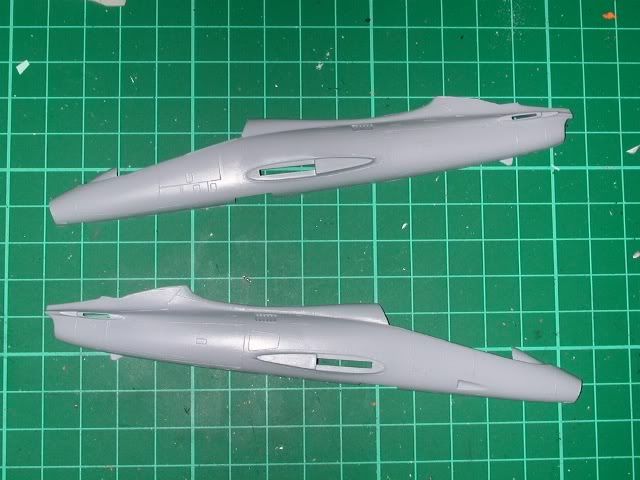 And the flaps if you want to make it look right on the ground... 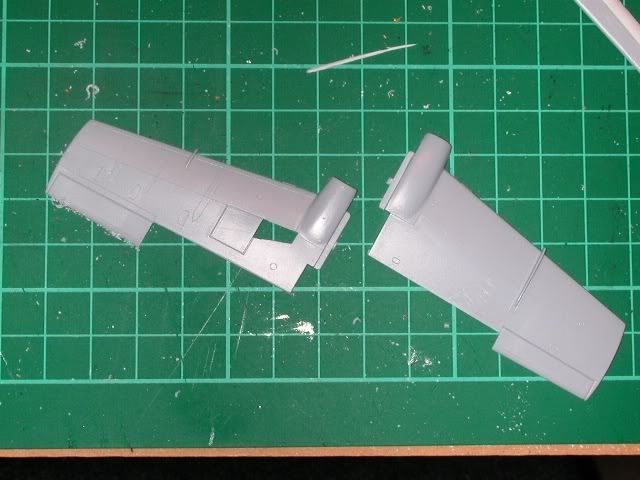 Anyone know what colour the wheel bays and airbrake bay are? Can't tell if it is white or grey from photos I've seen.  |
|
|
|
Macchi
Feb 23, 2007 20:55:33 GMT 12
Post by agalbraith on Feb 23, 2007 20:55:33 GMT 12
Hi there, great start and nice to see you are going to get it right from the start with nose & fin etc.
Just looking at my photos it seems that the u/c & bays are a dull alluminium. The airbrake inside face is an interior green colour and the well is possibly white or alluminium.
Some of the others I am sure will be able to confirm extra details.
I had my 1/48 FREMS kit (with the CB fuse/fin/cockpit conversion from Alitaliane, eduard etch, 14sqn decals etc) out the other day, so this isnt helping my cause seeing you start your build when I have some stinkin car kits to build for people at work!!
I will enjoy your progress as I really like the Macchi, thanks for the inspiration!
Cheers
Anthony
|
|
|
|
Macchi
Feb 26, 2007 11:23:48 GMT 12
Post by Craig Sargent on Feb 26, 2007 11:23:48 GMT 12
Not to hijack the thread, but I have to ask what you think of the Alitaliane conversion Anthony. I have a pair of the Pavla seats which are very nice, to correct the crappy FREMS ones, and was going to do the rest of the conversion myself. If the Alit. set is okay, might save myself some time and hassle and just get that.
|
|
|
|
Macchi
Feb 26, 2007 21:02:57 GMT 12
Post by agalbraith on Feb 26, 2007 21:02:57 GMT 12
Hi,
Well the Alitaliane conversion is very nice, but I dont think that doing it yourself would be very difficult. Nice interior (will need some modifying to Kiwi spec). Although I am pleased to have it, it isnt essential. But if you do get one than I am sure you wont be dissapointed.
Hope that helps??
I am off in the morning for a conference on the Gold Coast for nearly a week but when I am back I can start a new thread with some pics of it if you like?
Cheers
Anthony
|
|
|
|
Macchi
Feb 27, 2007 20:54:03 GMT 12
Post by mumbles on Feb 27, 2007 20:54:03 GMT 12
Thanks for the encouragement Anthony Progress is slow but steadyish  Cut off flap sections assembled with plastic tube to create the missing aerofoil sections on the upper surface, plastic tube jetpipe installed to prevent a see through model, replacement resin cockpit shell and seats coming together.... The supermodel kit is really a bit 'FROG on a good day' detail and assembly wise, but it is the only game in town in 1:72. |
|
|
|
Macchi
Feb 27, 2007 21:00:49 GMT 12
Post by Bruce on Feb 27, 2007 21:00:49 GMT 12
I've done that kit as well with my own CB nose and tail mods - not having done many modern jets I quite liked the way it went together. great looking aircraft and a great start on the kit there!
|
|
|
|
Macchi
Apr 2, 2007 12:13:06 GMT 12
Post by mumbles on Apr 2, 2007 12:13:06 GMT 12
Progress has been slow due to holidays and the like, and some feocious hand to resin combat with the cockpit. The replacement resin cockpit is nice, but doesn't fit. It was sized from the original plastic cockpit. Which doesn't fit  . After numerous attempts and much fettling, I discarded the cockpit altogether, as it was getting to the point of it going or the model going. I have seldom admitted complete defeat on a model, but this Macchi is going to have a blacked out canopy  . Anyway, starting to look like a Macchi now 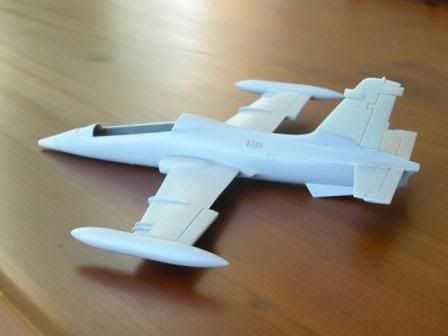 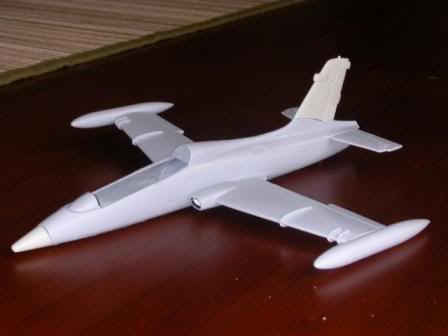 |
|
|
|
Macchi
Apr 2, 2007 12:23:17 GMT 12
Post by Craig Sargent on Apr 2, 2007 12:23:17 GMT 12
Looks like it has gone together pretty well, although to me, it looks like that nose is too long and pointy.
|
|
|
|
Macchi
Apr 3, 2007 7:40:44 GMT 12
Post by mumbles on Apr 3, 2007 7:40:44 GMT 12
Looks like it has gone together pretty well, although to me, it looks like that nose is too long and pointy. The new nose looks correct in the flesh. Once the canopy is on the proportions should look right. |
|
|
|
Macchi
Apr 22, 2007 21:54:30 GMT 12
Post by mumbles on Apr 22, 2007 21:54:30 GMT 12
I think I hexed this thing when I mentioned it as a short enthusiasm generating build (before I started it  ). Is there any better way to spend an hour or two than laying intricately patterned rolls of blu tack on a small plastic aeroplane? 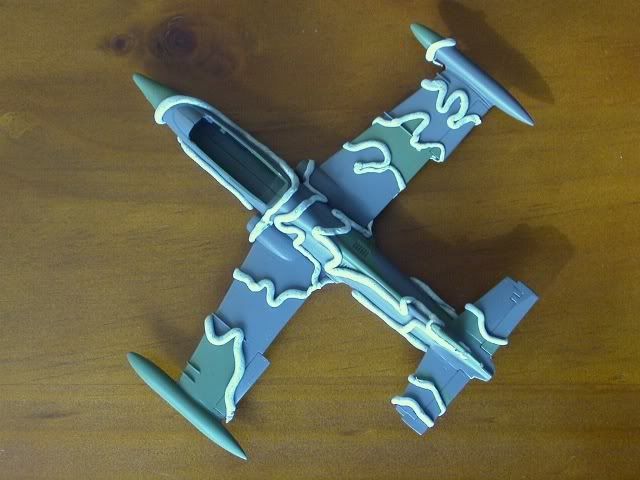 That's right, plenty! Shortly after this shot was taken, a good deal of the liquid mask, erm, didn't and now it is looking for a total repaint  . Meh. Am I having fun yet? ;D |
|
|
|
Macchi
Apr 5, 2008 22:32:22 GMT 12
Post by mumbles on Apr 5, 2008 22:32:22 GMT 12
Well, shortly after the previous post was put up, there was something of a disaster involving maskol and paint coming off here there and everywhere  The model was lucky not to get scrapped then and there (which my wife advised me to do, and I gave serious thought to). However, the record of not having scrapped a model yet stayed my hand, and it became a bench queen. So anyway a year later, Silverfox's Macchi post helped banish the trauma and I dusted it off and prepared for battle. For such a simple kit and conversion this really has been a struggle. After some cleaning up, about 4 hours masking, a few bottles of Oraanjeboom, and about 4 minutes painting the thing is almost looking presentable  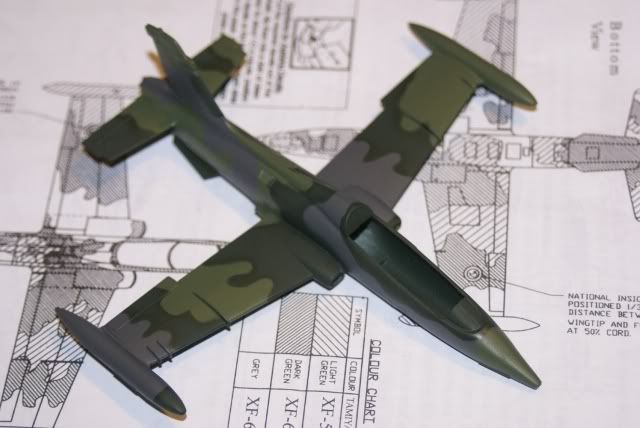 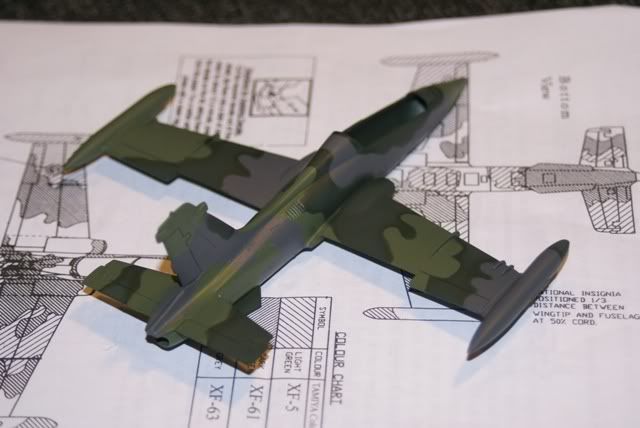 I'm even thinking about ways to get a cockpit in there! |
|
|
|
Macchi
Apr 6, 2008 3:23:18 GMT 12
Post by silverfox on Apr 6, 2008 3:23:18 GMT 12
looking really sharp. I'm glad it isn't just me who finishes models no matter how long it takes. Your on the home stretch now. |
|
|
|
Macchi
Apr 6, 2008 12:44:53 GMT 12
Post by Dave Homewood on Apr 6, 2008 12:44:53 GMT 12
It's looking good Sam.
Is that 1/72nd scale?
You think you've taken a while to build the Macchi, in 1990 when the purchase of the Maachis was imminent I bout the Esci MB326 kit, and soon after bought drawings for the MB339. I then set about converting it, as that was the only thing you could do to get a Maachi 339CB back then in 1/48th. I worked on it off and on whilst based at Whenuapai, Hobsonville, Wigram and Ohakea, and the conversion was actually going really well. I even bought resin seats for it. And it is still only half built! It sits in a box awaiting either finishing or scrapping.
|
|
|
|
Macchi
Apr 7, 2008 10:47:20 GMT 12
Post by flyjoe180 on Apr 7, 2008 10:47:20 GMT 12
Nice looking job Mumbles. Dave, you can't scrap your model, finish it man.
|
|
|
|
Macchi
Apr 7, 2008 23:08:52 GMT 12
Post by mumbles on Apr 7, 2008 23:08:52 GMT 12
Decals done ;D 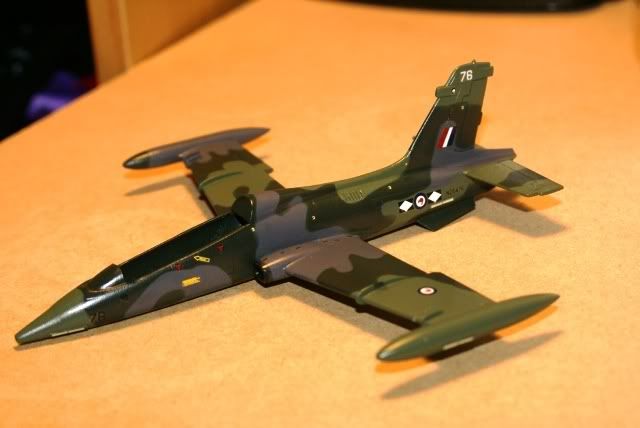 Yes Dave, it is 1/72 Just the finishing and fiddlys to do now |
|
|
|
Macchi
Apr 8, 2008 22:03:12 GMT 12
Post by smithy on Apr 8, 2008 22:03:12 GMT 12
I'm pleased you didn't bin this Mumbles as you've done a good save on it. The colours seem to be bang on as well.
I've got exactly the same kit and the Kiwi Resins conversion set which I've been meaning to make some more progress on. Only painted the cockpit and the interior of the intakes so far. Your build might just spur me on to do some more.
If it was me, I'd definitely do the best you can and fit the cockpit (even if it's just the Superscale kit offering) and close the canopy up. Most won't notice the difference and it'll look better with something inside. Just my 2c worth.
|
|
|
|
Macchi
Apr 17, 2008 21:30:49 GMT 12
Post by mumbles on Apr 17, 2008 21:30:49 GMT 12
If it was me, I'd definitely do the best you can and fit the cockpit (even if it's just the Superscale kit offering) and close the canopy up. Most won't notice the difference and it'll look better with something inside. Just my 2c worth. Thanks Smithy, I'm pleased I didn't bin it as well!  Persevering with the cockpit. Firstly I removed the locating tabs inside the fuslage that were the main cause of the problem. Then I sawed the resin insert in half (airbrake will be repainted if you're wondering....). 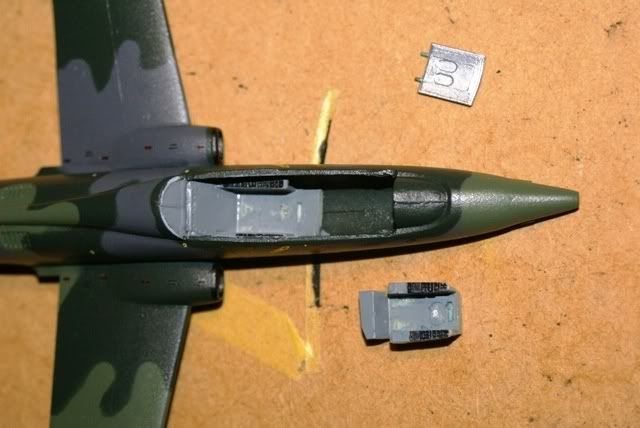 The only way to get it in without separating the fuselage halves, which you might be able to guess by the finish, was not an option Now separate tubs installed: 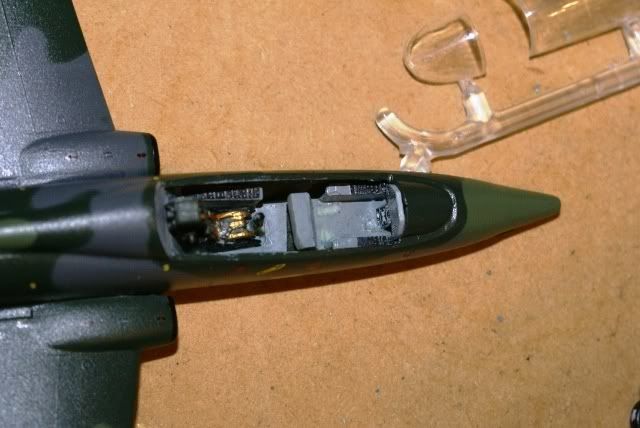 And instrument panels. I could be wrong, but I think the instructions would have you install the panels reversed. I used the 'front' panel in the back and vice versa as they fit better that way. 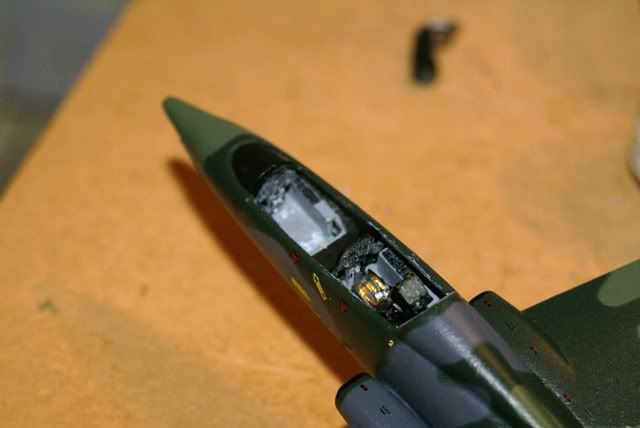 There is also no positive location for the rear instrument shroud. Meh, thats what superglue is for..... Now I just have to find a new stick for the front, scratchbuild a couple of HUDs and the cockpit is back from the dead. |
|
|
|
Macchi
Jun 16, 2008 23:44:24 GMT 12
Post by mumbles on Jun 16, 2008 23:44:24 GMT 12
Progress has been slow again, due mainly to about of online job hunting, but progress has nonetheless been made. Still fighting me every inch of the way Cockpit is finally done, with a couple of generic representative scratchbuilt huds, as the kit doesn't give you anything here. Bit of shoehorning involved to get all the resin bits to agree with the plastic bits.  Various scratchbuilt bits and bobs are being added to the underside 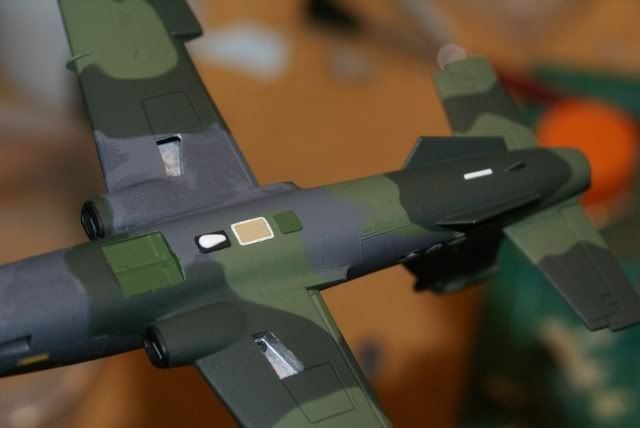 Nose gear modified to give something approaching a representative sit. About 3 mm removed from the leg, and the oleos detached, levelled, and reattached. Supermodel moulded the thing as it would look if the aircraft was airborne for some reason. The mains are okay, and don't appear to need any changes for a parked aircraft 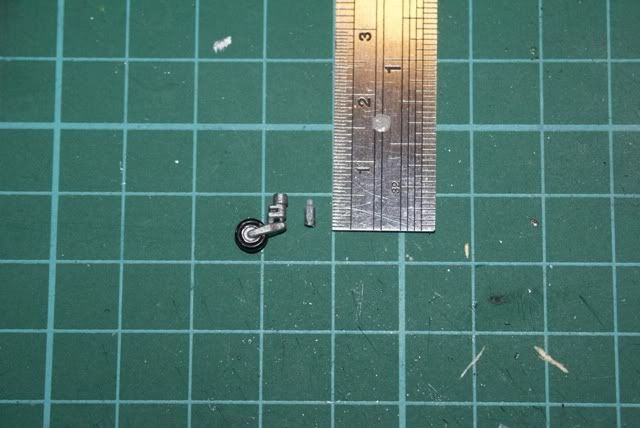 I also tried out the new tamiya rattle can flat coat, which provided no complaints, despite the 'do not use on decals' prohibition on the label. These particular decals are protected by a coat of citadel sealer anyway, so the jury is out on whether or not the flat coat will melt your markings. 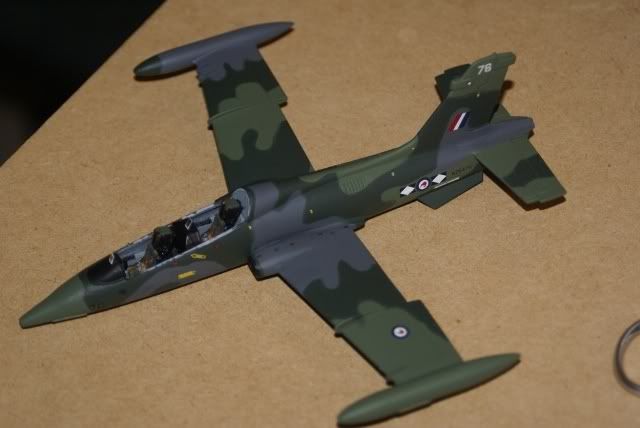 |
|
|
|
Macchi
Jun 17, 2008 9:31:58 GMT 12
Post by flyjoe180 on Jun 17, 2008 9:31:58 GMT 12
Smashing work Sam. Your Macchi is going to be a stunner.
|
|
|
|
Macchi
Jun 17, 2008 10:20:15 GMT 12
Post by phil on Jun 17, 2008 10:20:15 GMT 12
I hope mine looks as good when...(if) I ever get it finished. (only eight years and counting, all the hard works done, just needs a few details and a paint job!)
|
|


 .
. .
. ).
). .
.


