|
|
Post by emron on Jan 21, 2024 17:47:52 GMT 12
First Sunday back for the workshop team and we were admiring the reflective rescue signs on helicopter ISJ, that were refreshed over the break. 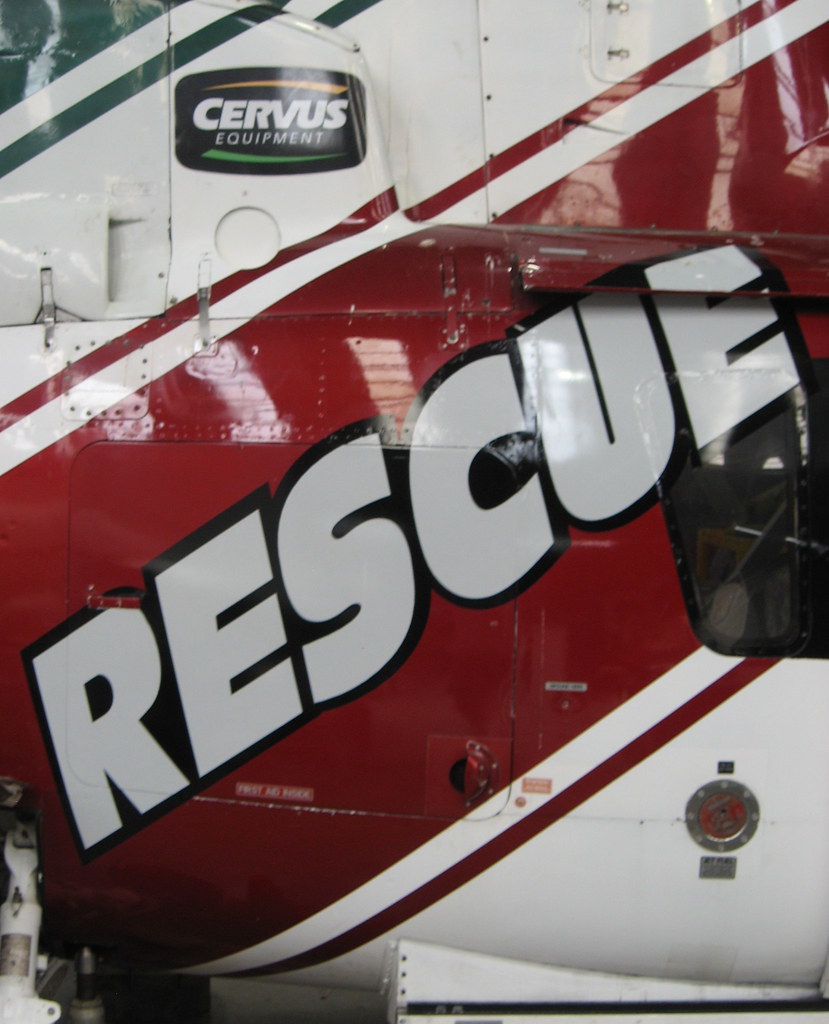 isj_rescue isj_rescue by Ron Wilson, on Flickr Peter returned to where he left off, to work on the instruments and electrics. Most of the gaps in the main panel are now filled.  isj_panel isj_panel by Ron Wilson, on Flickr Taillights lit up and raring to go.  isj_tail_lights isj_tail_lights by Ron Wilson, on Flickr Looking for any excuse to get into the air-conditioned display hall, I sortied down to the Sunderland to finalise the measurements of the three panels that cover the rear bulkhead forward of the rear turret. Between water breaks, back in the workshop I got them cut out and trimmed and made a replacement for a small missing bracket to support them. Next time, I’ll trace out the screw holes and they’ll be ready to fit. |
|
|
|
Post by emron on Jan 17, 2024 14:49:54 GMT 12
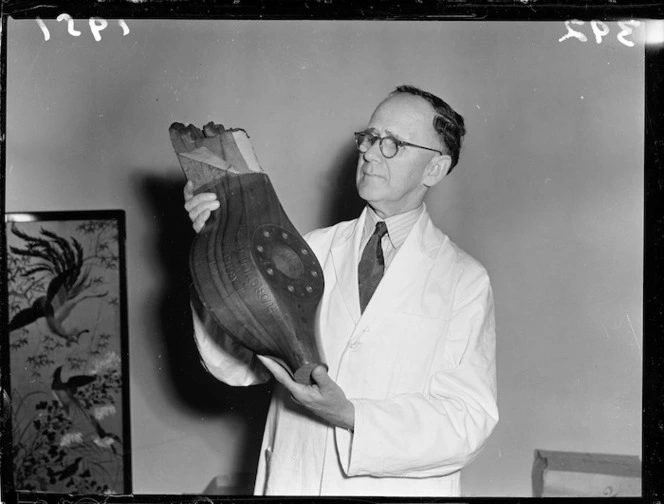 Date: [ca 5 April 1951] Ref: 114/274/07-G "Man holding a portion of the propeller of the plane of Guy Menzies, first aviator to fly across the Tasman Sea, photographed circa 5 April 1951 by an Evening Post photographer." National Library Collection Actually Menzies was of course the first to fly solo across the Tasman Sea. I wonder if this artifact is in a museum now? The prop is in the Te Papa collection, their Acc. No. GH010354. This photo is likely taken at the Dominion Museum when it was gifted to them by Guy Menzies’ widow. |
|
|
|
Post by emron on Jan 16, 2024 11:35:05 GMT 12
I stopped by at the workshop yesterday and checked in with Steve. The year’s got off to a good start and here’s a snippet of what he’s been doing while the rest of the team are away, including the DC-3 ailerons with new paint. I’ll post more once we return to work and the others have a chance of a first look too.  dc3_ailerons dc3_ailerons by Ron Wilson, on Flickr |
|
|
|
Post by emron on Jan 11, 2024 16:24:46 GMT 12
Please pardon if you have a sense of deja vu but here’s a New Year’s treat for the Sunderland, the new-build starboard beam gun mount mid-way through production.  stbd_beam_mount stbd_beam_mount by Ron Wilson, on Flickr |
|
|
|
Post by emron on Jan 5, 2024 11:57:03 GMT 12
Greymouth Evening Star, 19 August 1947.
Advertisement.
AN APOLOGY
from
PETER THE PILOT
Dear Boys and Girls:-
I am extremely sorry to say that even though I had an extra large supply of Albums for you this year the requests have been so many that there is now not enough to go round.
However the marvellous set of 37 coloured picture cards is still worth collecting and perhaps you could paste them in a book of your own. There are three cards in every packet of Delicious Diamond O-TIS. So tell Mother to keep on buying O-TIS for breakfast. It is really corker and made from the finest grain that grows.
With best wishes to you all,
Your friend -
Peter the Pilot
C/o Timaru Milling Co. Ltd., TIMARU.
|
|
|
|
Post by emron on Jan 5, 2024 11:01:25 GMT 12
BTW this wasn’t the first visit by a US warship named Brooklyn. Nearly forty years earlier a predecessor, armoured cruiser USS Brooklyn (ACR-3), built 1896, made a call.
Brooklyn, at the time flagship of the Asiatic Squadron based in Manila, had been to Melbourne for the Federation Celebrations in May 1901, during which the first Parliament of the newly founded Commonwealth of Australia was opened by the Duke of Cornwall and York (later King George V). Afterwards, Brooklyn under command of Rear-Admiral George C. Remey, sailed for NZ arriving Auckland 26 May. The cruiser remained in port until 1 June when it sailed for Wellington arriving there on the 3rd. The Wellington visit lasted until 10 June when the cruiser departed for Manila, sailing via Sydney for refueling.
Brooklyn (ACR-3) was a Spanish-American War veteran that had taken part in the Battle of Santiago de Cuba in July 1898. She continued on active service until after World War I and was de-commissioned in 1921.
|
|
|
|
Post by emron on Jan 4, 2024 20:01:22 GMT 12
So the Squadron consisted of: The USS Brooklyn (the flagship) The USS Savannah The USS Tucker and three others This visiting Squadron was officially called Task Group 9.2. Light cruisers Brooklyn (CL-40) and Savannah (CL-42) were accompanied by destroyers USS Case (DD-370), Cummings (DD-365), Shaw (DD-373) and Tucker (DD-374). Shortly after their return from the NZ visit, both cruisers were re-assigned to the Atlantic fleet, however all four destroyers were berthed at Pearl Harbour on Dec-7. USS Shaw was in dry dock during the Japanese attack and was struck by three bombs. The ensuing fires spread through the ship, followed by an explosion in the forward magazine. After two months salvage she was made seaworthy and sailed to San Francisco for extensive repairs. She was back in service in Hawaii by August 1942. USS Cummings sustained minor casualties from bombs that fell ahead and astern but was ready to sortie on patrol almost immediately after. Both USS Case and Tucker were undamaged. USS Brooklyn’s wartime service included Atlantic convoy escort duties and later in the Mediterranean, naval support of Allied landings in North Africa, Sicily, Italy and Southern France. Decommissioned after the war, held in reserve, she was transferred to the Chilean Navy in 1951. Renamed “O’Higgins” she served a further 40 years with them. USS Savannah saw similar war duties, but while taking part in a naval bombardment of shore defences during the amphibious invasion of Salerno, Italy, on 11 September 1943, she was attacked by a German bomber which released a radio-controlled Fritz X bomb. The bomb hit and pierced the Savannah’s No.3 turret and exploded three decks below, blasting a hole in the keel and tearing a seam in the port side. The crew were able to seal the flooded compartments, control the list and then escorted by tugs, sail to Malta for emergency repairs. 206 crewmen had been killed and 13 other sailors seriously injured in the attack. Although final repair of her battle damage and an upgrade of weapon systems was completed at the Philadelphia Naval Shipyard in September 1944, she was never sent to a combat zone again in the war. USS Case took part in various operations across the Pacific, including most of 1943 based at Espiritu Santo. Later, as US forces moved north, she saw action in the Battle of the Philippine Sea, bombardment of Iwo Jima and finally accepted the surrender of the Bonin Islands. USS Cummings also served through 1942-43 in the South Pacific region and often in NZ waters. She stopped again at Auckland in May 1943 for a brief overhaul. In early 1944 she joined British Force 70 for screening duties during air strikes on Sabang, Sumatra and Soerabaja, Java. In July she carried President Roosevelt aboard from Juneau, Alaska to Seattle, on the final leg of his Pacific tour. She later participated in the Battle of Leyte Gulf, bombardment of Iwo Jima and supervised the occupation of Haha Jima. Barely two months after her return to the Pacific combat zone after Pearl Harbour, USS Shaw ran aground at Noumea Harbour on 10 January 1943, with extensive damage to her hull, propellers and sound gear. Lengthy repairs and upgrades at Pearl Harbour took until September. From October to December Shaw operated in support of Allied action in Papua New Guinea. During an assault on Cape Gloucester on 26 December, she sustained injuries and damage when attacked by two Japanese “Vals”. 36 men were injured, three of whom later died of their wounds. Temporary repairs were made at Milne Bay and permanent ones at Hunter’s Point, California took until May 1944. Afterwards she was involved in the invasions of Saipan and Guam. During operations in the Visayan Islands, Philippines Shaw struck an uncharted pinnacle which forced her return to the USA for repair and subsequent decommissioning. USS Tucker commenced escort duties based at Suva in early June 1942 which included a trip to Auckland in July. On 4 August, while escorting a freighter to Espiritu Santo, she struck a defensive mine laid by the US Navy at the western entrance to Segond Channel. The explosion nearly broke the ship in half and killed three crewmen. The stern sank the following morning, and a diving party scuttled the bow. The wreck of USS Tucker remains as a popular dive site. |
|
|
|
Post by emron on Dec 26, 2023 14:04:51 GMT 12
As mentioned in Richard’s message above, if you are planning a trip to MOTAT’s Aviation Hall in the next 6 weeks, then it’s best to know that Meola Rd will be closed to vehicle through traffic past MOTAT 2, but that should little impact on your visit. The footpath alongside remains open, although narrow in places, so you can still access on foot or bike from Pt Chevalier and Westmere as usual. The tram journey to and from MOTAT ‘s Western Springs site isn’t affected by the roadworks. Nor if you are coming by car and parking in the Museum’s car park off Motions Rd, (where parking fees apply) as you will be approaching from either Old Mill Rd or Motions Rd. The City Outer Link bus service that normally uses Meola Rd has been diverted for the duration too, via Old Mill Rd and Motions Rd and it has temporary stops in both directions nearby to the Museum’s Motions Rd entrance. Quiet holiday scene at Meola Rd. Auckland’s take on Christmas decorations.  meola_rd_closure_1 meola_rd_closure_1 by Ron Wilson, on Flickr Now difficult to recognise the well-travelled flying boat crossing from the mid 1960’s.  meola_rd_closure_2 meola_rd_closure_2 by Ron Wilson, on Flickr |
|
|
|
Post by emron on Dec 17, 2023 17:18:25 GMT 12
Described by the Federation Aeronautique Internationale as “the first sustained and controlled heavier than air, powered flight,” took place at Kill Devil Hills, near Kitty Hawk, North Carolina, on December 17, 1903.
At 10:35 am, Orville Wright was at the controls of the “Wright Flyer” for the brothers’ first attempt when it was airborne for 12 seconds and flew 120ft. Wilbur Wright was at the controls for the fourth and final flight of the day which lasted for 59 seconds and covered a distance of 852 feet.
|
|
|
|
Post by emron on Dec 10, 2023 15:08:58 GMT 12
|
|
|
|
Post by emron on Dec 6, 2023 16:59:46 GMT 12
Finally able to pull up all the bolts tight on the Sunderland’s elevator torque tube, then rig the trim-tab chains and re-attach the chain guard. After a little adjustment of the elevator lock and the control column, the control rods were also joined to the crank arms successfully. Good to see the elevators moving in unison for the first time in ages.  elevator_torque_tube_2 elevator_torque_tube_2 by Ron Wilson, on Flickr A little late for Santa Parade but Rex has done a great job of wrapping the floats. Now they just need a splash of festive colour and they’ll be ready to decorate the Porcupine’s tail (trolley).  flotation_blocks flotation_blocks by Ron Wilson, on Flickr |
|
|
|
Post by emron on Dec 3, 2023 16:52:35 GMT 12
Confident that I got the elevator torque tube fitted the right way around last time, I started today by clearing out corrosion and excess paint from the bolt holes on the starboard end. I had already clamped it up tight with a few undersize bolts but when I tried a podger to align the two holes in the hinge bar, they wouldn’t shift. So, I slackened off the bolts, prised the three pieces apart again and with the help of a tapered punch I was able to set the first of the permanent bolts. The rest followed more easily, and I moved over to the port end to do the same there.
Once I fitted enough bolts for it to be secure, I reached for the top control rod to link it back on to the crank arm. Soon there was an “Oh Bother” moment as it dawned on me that they didn’t connect. I’d been careful to fit the tube to the correct end but was 180-degrees out! The offset arms were angled forward instead of back. An hour or two later it was wrestled back in the correct position, secured again and time to go home.
|
|
|
|
Post by emron on Nov 30, 2023 15:22:39 GMT 12
Yesterday I got all of the major elevator control parts back in position and began to secure them in place, starting with the two bearing brackets on the front of the bulkhead which share four bolts each with the cross-tube mounted on the back. Next, I fitted the hinge bars into the brackets and then levered the torque tube in and engaged its end slots over the bars. There are now enough bolts in the torque tube to hold it in line until I can get back to finish off the rest.
|
|
|
|
Post by emron on Nov 26, 2023 16:10:29 GMT 12
On Wednesday, all of the elevator fittings that had been previously paint stripped, were first passed through the blasting booth to remove any corrosion, then had primer and finish paint applied and bearings re-greased, In advance, I’d also shaped up the new bumper pad for the chain guard, so that was riveted back on too. Today, I took all the finished parts, as well as the torque tube, back to the Sunderland and started bolting them back on. Before I could fit both brackets for the elevator bearings I had to punch out two sheared off bolts on each side. Once I had done this I realised that it left only one bolt holding this cross-tube at each end. I took the opportunity to take it off as well. It was soon back in the workshop, cleaned up and ready for return next time.  cross_tube_support cross_tube_support by Ron Wilson, on Flickr During an earlier paint strip session, the anti-glare shield was also done. With a little more cleaning it will be ready for etch priming next too.  antiglare_shield antiglare_shield by Ron Wilson, on Flickr |
|
|
|
Post by emron on Nov 20, 2023 10:21:45 GMT 12
You were lucky to get the chance and capture that video of the Solent, back in the day. The interior is still not as good as it was then, waiting for funding and expertise to finish relining the upper deck. Even when the insides of both flying boats are back to their presentable best, it’s unlikely that either will be open to public viewing, apart from the most special of circumstances. These days the Museum’s approach is to provide virtual access through interactive 360-degree images. Once we’ve completed painting of the lower deck of the Sunderland and installed the rear turret and all loose equipment throughout, that will open up more options for enhanced views and detailed video walkarounds. With that in mind, yesterday I managed to remove the starboard elevator bracket and trim tab sprockets and they have been paint stripped. Once they are overhauled and painted again and the bumper pad replaced on the central chain guard, that will allow us to complete the rigging of all the flying controls in the tail as well as secure the rudder and elevators to their torque tubes. That will leave only a few minor repairs to be done in the entire rear compartment. Talking about interior photos, here’s a couple of helicopter, ISJ, from the patient’s point of view.  ISJ_cabin_1 ISJ_cabin_1 by Ron Wilson, on Flickr  ISJ_cabin_2 ISJ_cabin_2 by Ron Wilson, on Flickr |
|
|
|
Post by emron on Nov 13, 2023 16:34:20 GMT 12
Last week, while searching for tubing adapters and blanking plugs to complete the air dryer assembly, I uncovered more, small roller chain and enough to finish the trim tab connections in the tail. It proved too difficult to reach the gearboxes inside the elevators, so I’ll run a shorter loop around the closest sprockets. Here’s the port one, ready for a test fit for length.  chain_loop chain_loop by Ron Wilson, on Flickr To remove the old pieces of chain I found it easiest to take off this protective guard. It hangs down in the lowest point within the tailplane and you have to duck below it to pass through to the turret. We’ll paint strip and repair now that it’s off. I discovered on an earlier occasion, at my cost, that one of the bumpers was missing. So, there’s added incentive to mend that.  chain_guard chain_guard by Ron Wilson, on Flickr Returning to the cockpit, another item that was once installed on the starboard side is this recuperator. It regulated the hydraulic pressure feed to the front turret. Although it was removed in the later service life of the Sunderland along with the rest of the turret plumbing, there’s still the bracket where it can be re-mounted.  recuperator recuperator by Ron Wilson, on Flickr |
|
|
|
Post by emron on Nov 10, 2023 10:44:09 GMT 12
Any significance to the new rego? Or does this one sum up our sentiments:
Brendon’s--- Hot(as)‘ell---‘Tang (Oohh!!).
|
|
|
|
Post by emron on Nov 5, 2023 20:31:05 GMT 12
Denys, you have the air dryer bracket in the correct position. Here’s a pic of 4115’s cockpit, forward of the dryer, that might help you to identify more parts. I’ve found that Air Force Museum’s photo MUS19100 has the best detail of this area and has already been most useful when trying to fill in the remaining gaps in MOTAT’s one. I’m sure you will enjoy the other ones in the series too, MUS19102 and MUS19103.  cockpit_port_side cockpit_port_side by Ron Wilson, on Flickr |
|
|
|
Post by emron on Oct 30, 2023 16:46:01 GMT 12
Things got off to a subdued and late start yesterday, but I returned a couple of items to the Sunderland for a test fit. The fuel jettison panel is now back in place in the cockpit, although still waiting for final adjustments before all the screw holes will line up. The bridle cable was then secured on the bow and tied to the lower shackle until we can budge its rusted pin. Afterwards I resumed my search for parts in the store shelves, especially looking for more of the small UV lamps that illuminate the instrument panel. The sole remaining example in the cockpit is shown in the previous photo above. I’ve located parts of 3 or 4 others but need more reflectors for them. The Stores Ref for this type is 5C/2454 and its common to the Hastings as well. Earlier in the week I’d been looking at an old photo of a Sunderland cockpit and recognised another assembly that I’d often passed by in the store but not realised it was S25. This is the filter and air dryer that’s installed in the pressure line between the compressor on No. 2 engine and the servomotors for auto flying controls. It's mounted on the cockpit wall alongside the left-hand seat. Once we’ve refreshed the paint it can be connected back into the circuit.  air_dryer air_dryer by Ron Wilson, on Flickr |
|
|
|
Post by emron on Oct 26, 2023 12:59:56 GMT 12
The elevator hinge now repaired and bearing cleaned. I found no chain inside the elevator, but we may be able to get a pull cord around the sprocket and draw the chain through with that.  elevator_hinge elevator_hinge by Ron Wilson, on Flickr The mooring bridle has been overhauled and restrung with fresh binding over the wire strands. The existing shackle on the bow is stuck fast in place and we’ll have to get the pin out, that’s proving defiant, before we can attach this cable properly. 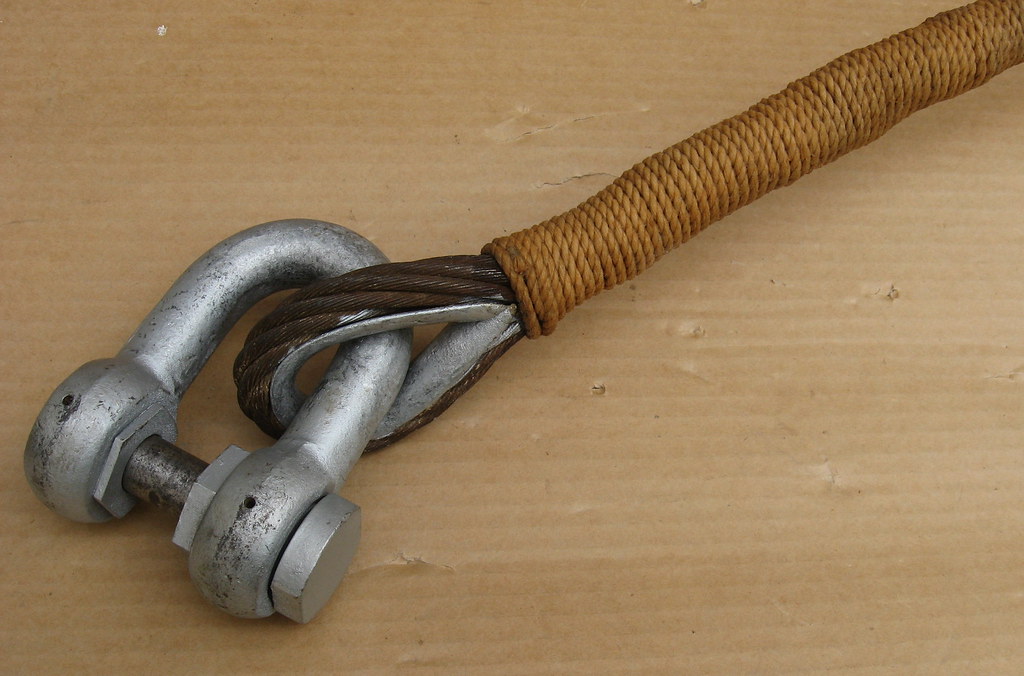 mooring_bridle mooring_bridle by Ron Wilson, on Flickr While checking out how to re-attach the shield over the instrument panel, I remembered that the wedge plate for the camera control had been inadvertently mounted upside down. So yesterday, I swapped it back, connected the plugs and slid the controller down into position on the wedge.  camera _controller camera _controller by Ron Wilson, on Flickr |
|


