|
|
Post by Dave Homewood on Nov 3, 2019 15:31:41 GMT 12
Looking great!!
|
|
|
|
Post by johnnyfalcon on Nov 3, 2019 21:18:28 GMT 12
"...As always hope there some interest in this."
As always, there is.
|
|
|
|
Post by ZacYates on Nov 4, 2019 15:53:06 GMT 12
Interest here too. Looking great!
|
|
|
|
Post by baz62 on Nov 4, 2019 16:37:32 GMT 12
Always enjoy your posts! So is the NAC colour a lighter grey or white?
|
|
|
|
Post by denysjones on Nov 5, 2019 8:04:21 GMT 12
Hi Baz,
It's an interesting colour that seems to adopt quite a sandy hue when viewed in certain lights and from certain angles.
If you've got Waugh, Layne & McConnell's NAC book compare pages 171 and 186. It looks like the same shade was used on the early 737s and a really good comparison is between 210 and 214 for them.
We've settled on using Resene paints shade "Half Tapa" which in itself displays a decided sandy look when applied but dries out more toward RAF medium sea grey.
Various ex NAC folks who've looked at BXG have said to me that the result seems right to them as they recall things.
Drop by some time and have a look yourself.
I've now got to find an answer regarding the ailerons. On the wing the aileron is currently either white or some grey that has gone off to near white (but it has done so top and bottom which tends to rule out sun bleaching) much lighter than the main wing colour. Like the issue with the upper views of Viscount wings outer plane upper views of Friendly wings aren't easy to come by!
cheers
|
|
|
|
Post by denysjones on Nov 16, 2019 17:35:31 GMT 12
Nothing too stunning to report since the last. The upper surface of BXG's wing is now finished complete with wing walk area demarcations and fitted with a refurbed wingtip and denuded of aileron.  Said aileron has already had one side dealt to, after removal of one segment of the trim tab the other half putting up a fight at the moment, and today got flipped over and surfaced off and spot primed ready for it's turn and repaint.  cheers |
|
|
|
Post by Dave Homewood on Nov 16, 2019 18:47:19 GMT 12
Great stuff.
|
|
|
|
Post by agalbraith on Nov 16, 2019 20:07:38 GMT 12
Looking great Den...give me a yell when it's time to lift it on!
Cheers Ants
|
|
|
|
Post by baz62 on Nov 17, 2019 12:58:46 GMT 12
Looking great Den...give me a yell when it's time to lift it on! Cheers Ants Give me a shout too Den (via Ants) as his wee arms wont cope un-aided! |
|
|
|
Post by davidd on Nov 17, 2019 19:49:07 GMT 12
I should think Friendship wings will be a good deal heavier than the Auster equivalents - perhaps I will watch just from the side-lines thanks all the same!
David D
|
|
|
|
Post by johnnyfalcon on Nov 17, 2019 20:14:40 GMT 12
Hmmm...Baz trying to help Ants, hope it doesn't strain the friendship...
|
|
|
|
Post by denysjones on Nov 17, 2019 20:17:55 GMT 12
At approx 846Kg for an F27 wing Ants and Baz will have to have a hellava lot of weatbix for breakfast.
|
|
|
|
Post by denysjones on Nov 30, 2019 21:04:08 GMT 12
It's always uplifting when things start to go back together and so today saw a bit of that now that the main work on the aileron is dealt to so then various sub units can be re-installed. First the seven mounts for the trim tabs have gone back on, with newly made earth bonds, and the stems which go through the mounting blocks in the trim tabs duly cleaned up to allow the tabs to easily slide back on, hopefully. 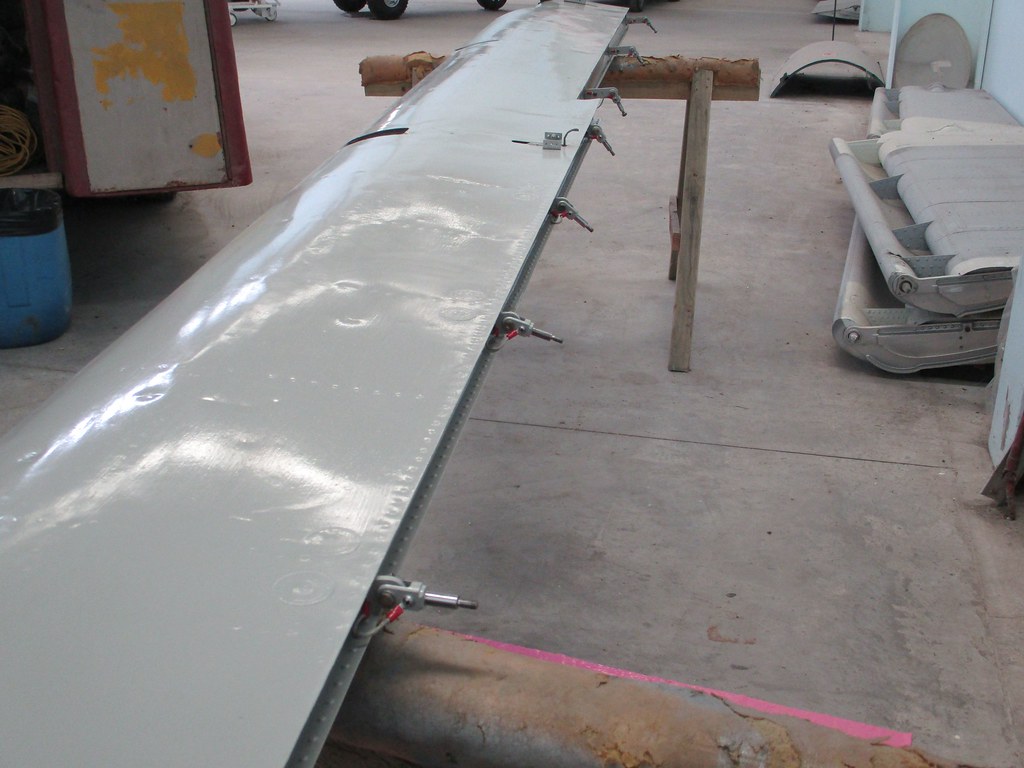 Then in the root end of the aileron is the spring tab actuator now refurbished and repainted, hopefully rightly so, in its original colour being the first of four coats found through stripping it from as found  to as reinstalled.  don't be confused that the aileron is upside down between those two images! Then a quiet couple of hours of initial surface prep work on the two segments of the trim tabs to start their refurb.  cheers |
|
|
|
Post by denysjones on Dec 14, 2019 21:29:37 GMT 12
Here we are after a fortnight of tedious but productive work which results in an aileron with trim tabs reinstalled.  As luck would have these things we still hold a pair of F27 elevators, not that BXG has any need of them, and so from them we reclaimed the static discharge wands needed for it. So today's task was the front face of the aileron bay, aka the rear face of the wing. After the removal of the two access panels, which entailed the drilling off of the heads of numerous screws followed by removal of the captive nuts and then extracting screw stems from them and reinstalling the nuts, and just by way of a change more birds' nesting, we got the surface prep and prime done. 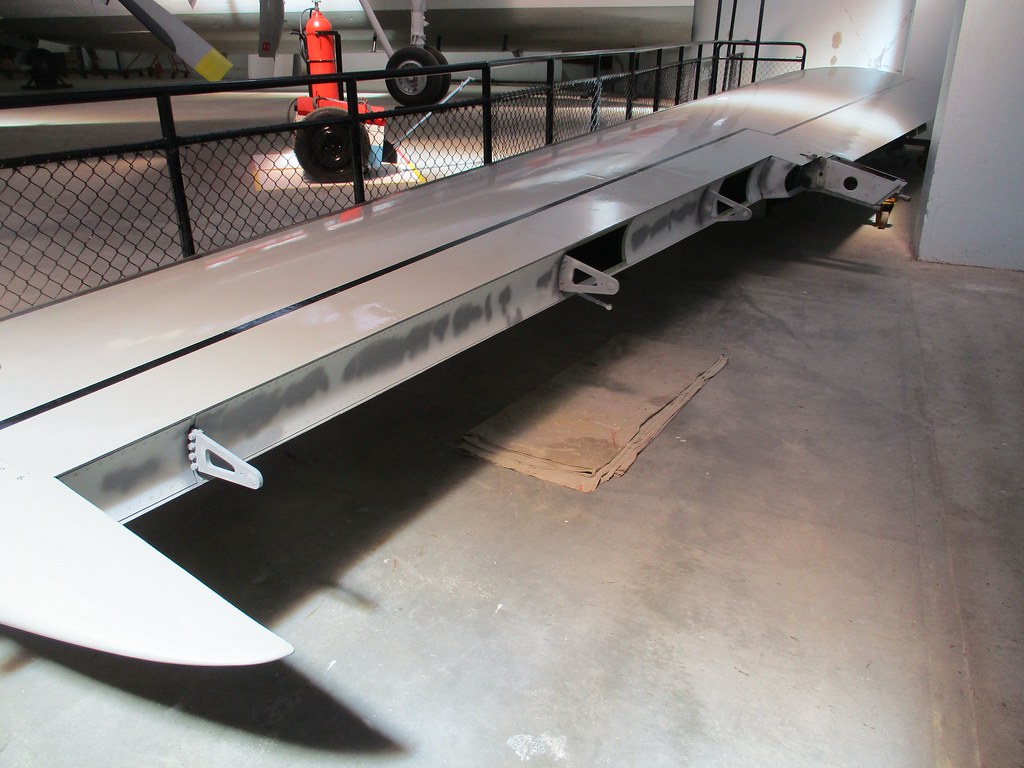 Also a wee bit of detail bling with the appropriate stencils to go with the fuel filler cap with the usual help of Langham Signs a local firm and strong supporter.  All the best for the festive season to all you faithful viewers! |
|
|
|
Post by Dave Homewood on Dec 14, 2019 22:00:20 GMT 12
Superb work Denys and the team!
|
|
|
|
Post by l29 on Dec 15, 2019 18:24:48 GMT 12
Do you have any pics of what remains of your vampire?
|
|
|
|
Post by Dave Homewood on Dec 16, 2019 12:35:24 GMT 12
I have received these photos this afternoon from Ian Bisset of Hamilton. As these show NZ4112, the Sunderland who's cockpit went to Ferrymead, I thought here was a good thread for it. Ian says: "Hi Dave just some pics of interest for you to do what you want with mate! The Sunderland was one of the last broken up at Hobsonville, NZ4112 taken by my friend Dave Lowe in Nov 1967. all the best for xmas mate, sorry I haven't put these on your pages but please feel free if they're of interest, regards Ian" 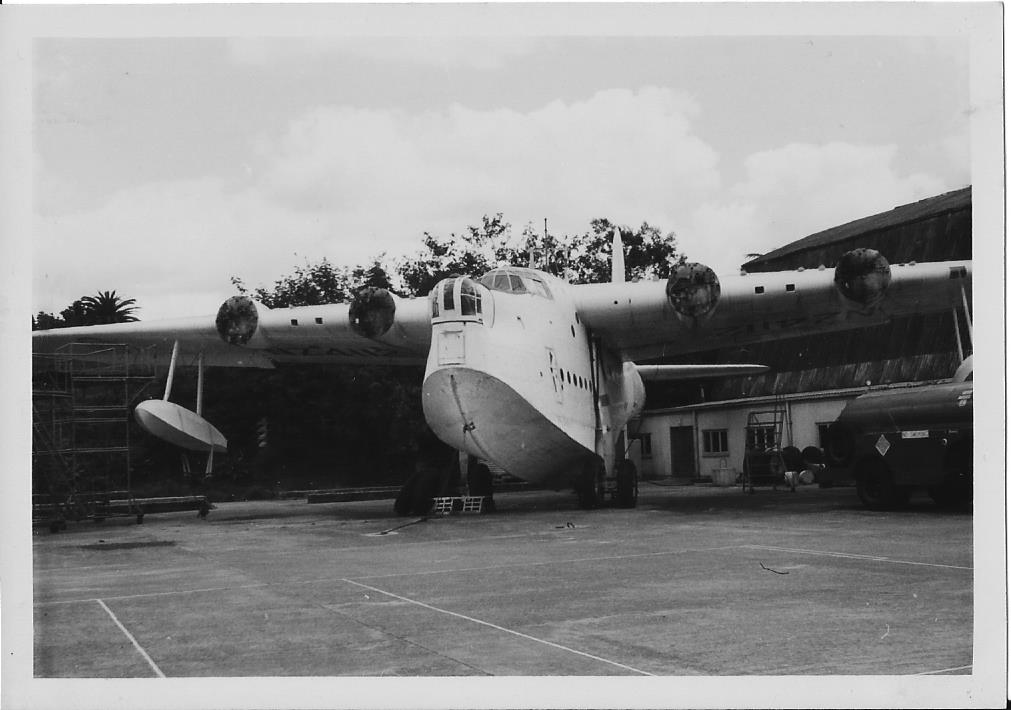 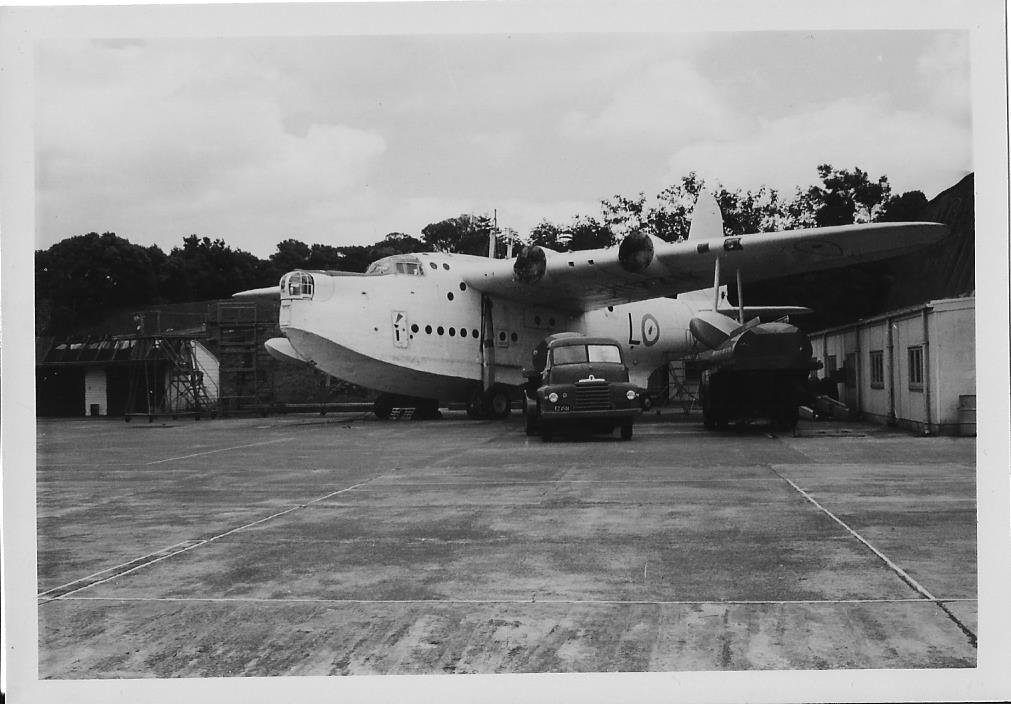 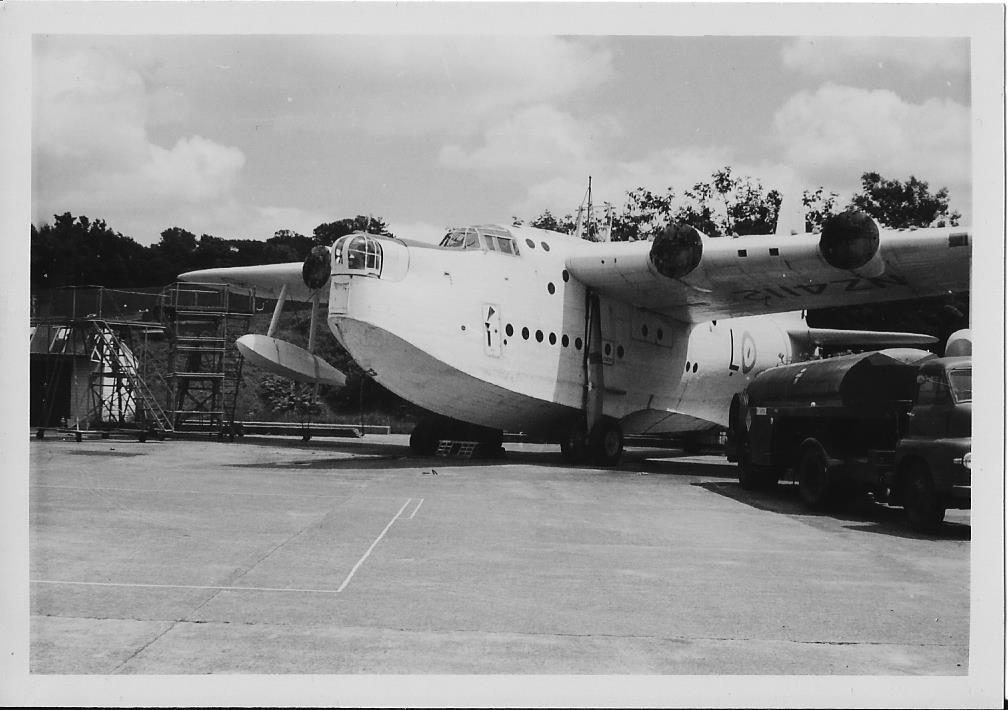 |
|
|
|
Post by agile on Dec 17, 2019 20:21:57 GMT 12
Do you have any pics of what remains of your vampire? 'What remains' is actually a fairly complete airframe, needing not much more than a paint job externally. It's stored in the workshop with the wings and tailbooms separate, so it's tricky to get a photo. I'll try to remember to get some in the New Year, unless Denys beats me to it. |
|
|
|
Post by agile on Dec 17, 2019 21:56:38 GMT 12
(Thanks for the Sunderland pics BTW Dave and Ian) A photo-heavy Mosquito update before I disappear off on my hols. First a question - given the fairly regular updates to the Mosquito FB page do forumites see value in occasional Mossie updates here? I'm a big fan of the forum and I'm certainly not going away but these updates take me ages to write up, upload pics etc and I could save myself the trouble if everyone here has seen it already on FB. Personally I'm not *hugely* into FB other than for Ferrymead stuff and so I only see updates to the likes of the MOTAT and Classic Flyers projects on here, and I appreciate the trouble everyone goes to to with their posts. If there are other luddites like me then I'm happy to continue. Thoughts? Anyhoo, to business:  The instrument panels are getting more complete. We recently acquired a Mk VIII Oxygen regulator to go in the big hole in the RH panel - we are only missing the radiator temp gauges from these panels now. (The pressure and temp gauges will stay uninstalled for the time being - electrical works are the task at hand here). As part of the repairs to the cockpit floor, the rear of bulkhead 2 (the armoured bulkhead behind the crew's legs) got some love: 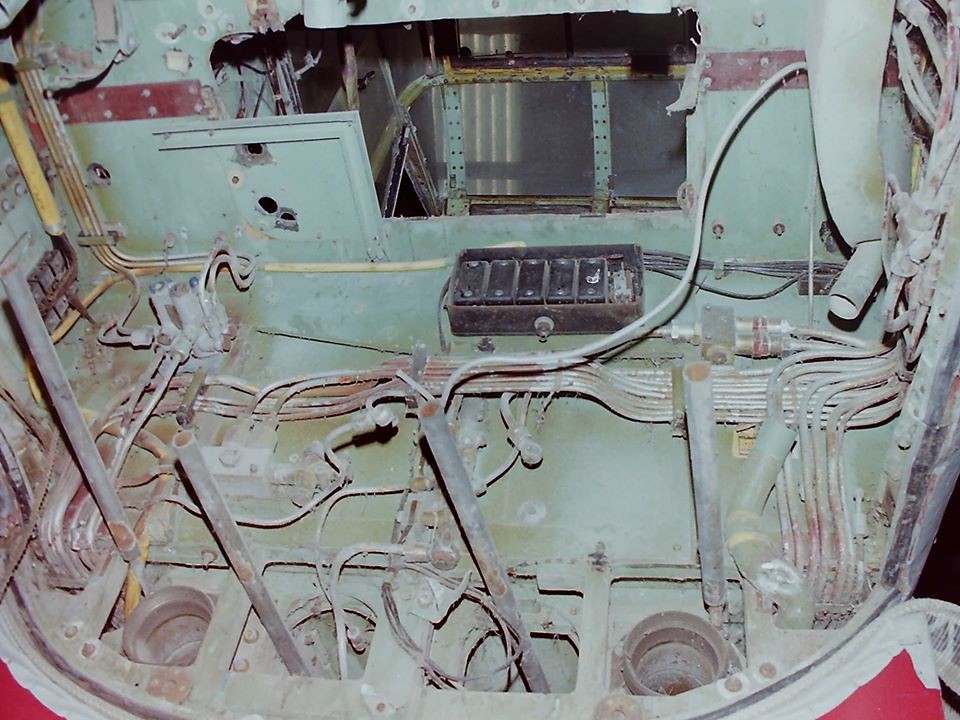 Every metal part has been off, decorroded, painted as necessary and reinstalled. There were also quite major woodwork repairs to the bottom left corner. This is how it looks now:  The next part of the cockpit to receive attention was the navigator's floor, which is where the navigator sits alongside the Gee scope. This wooden structure is in two halves, a front and a rear joined by tuffnol/paxoline joint plates, with a removable hatch in the centre. All of the plumbing connecting the wings to the fuselage runs along the rear of this floor immediately in front of the main spar. This picture looking aft shows what we were dealing with. Years of Otago rain lying in the tray formed by the stiffeners along the rear of the floor had resulted in the rear half being rotten beyond repair. 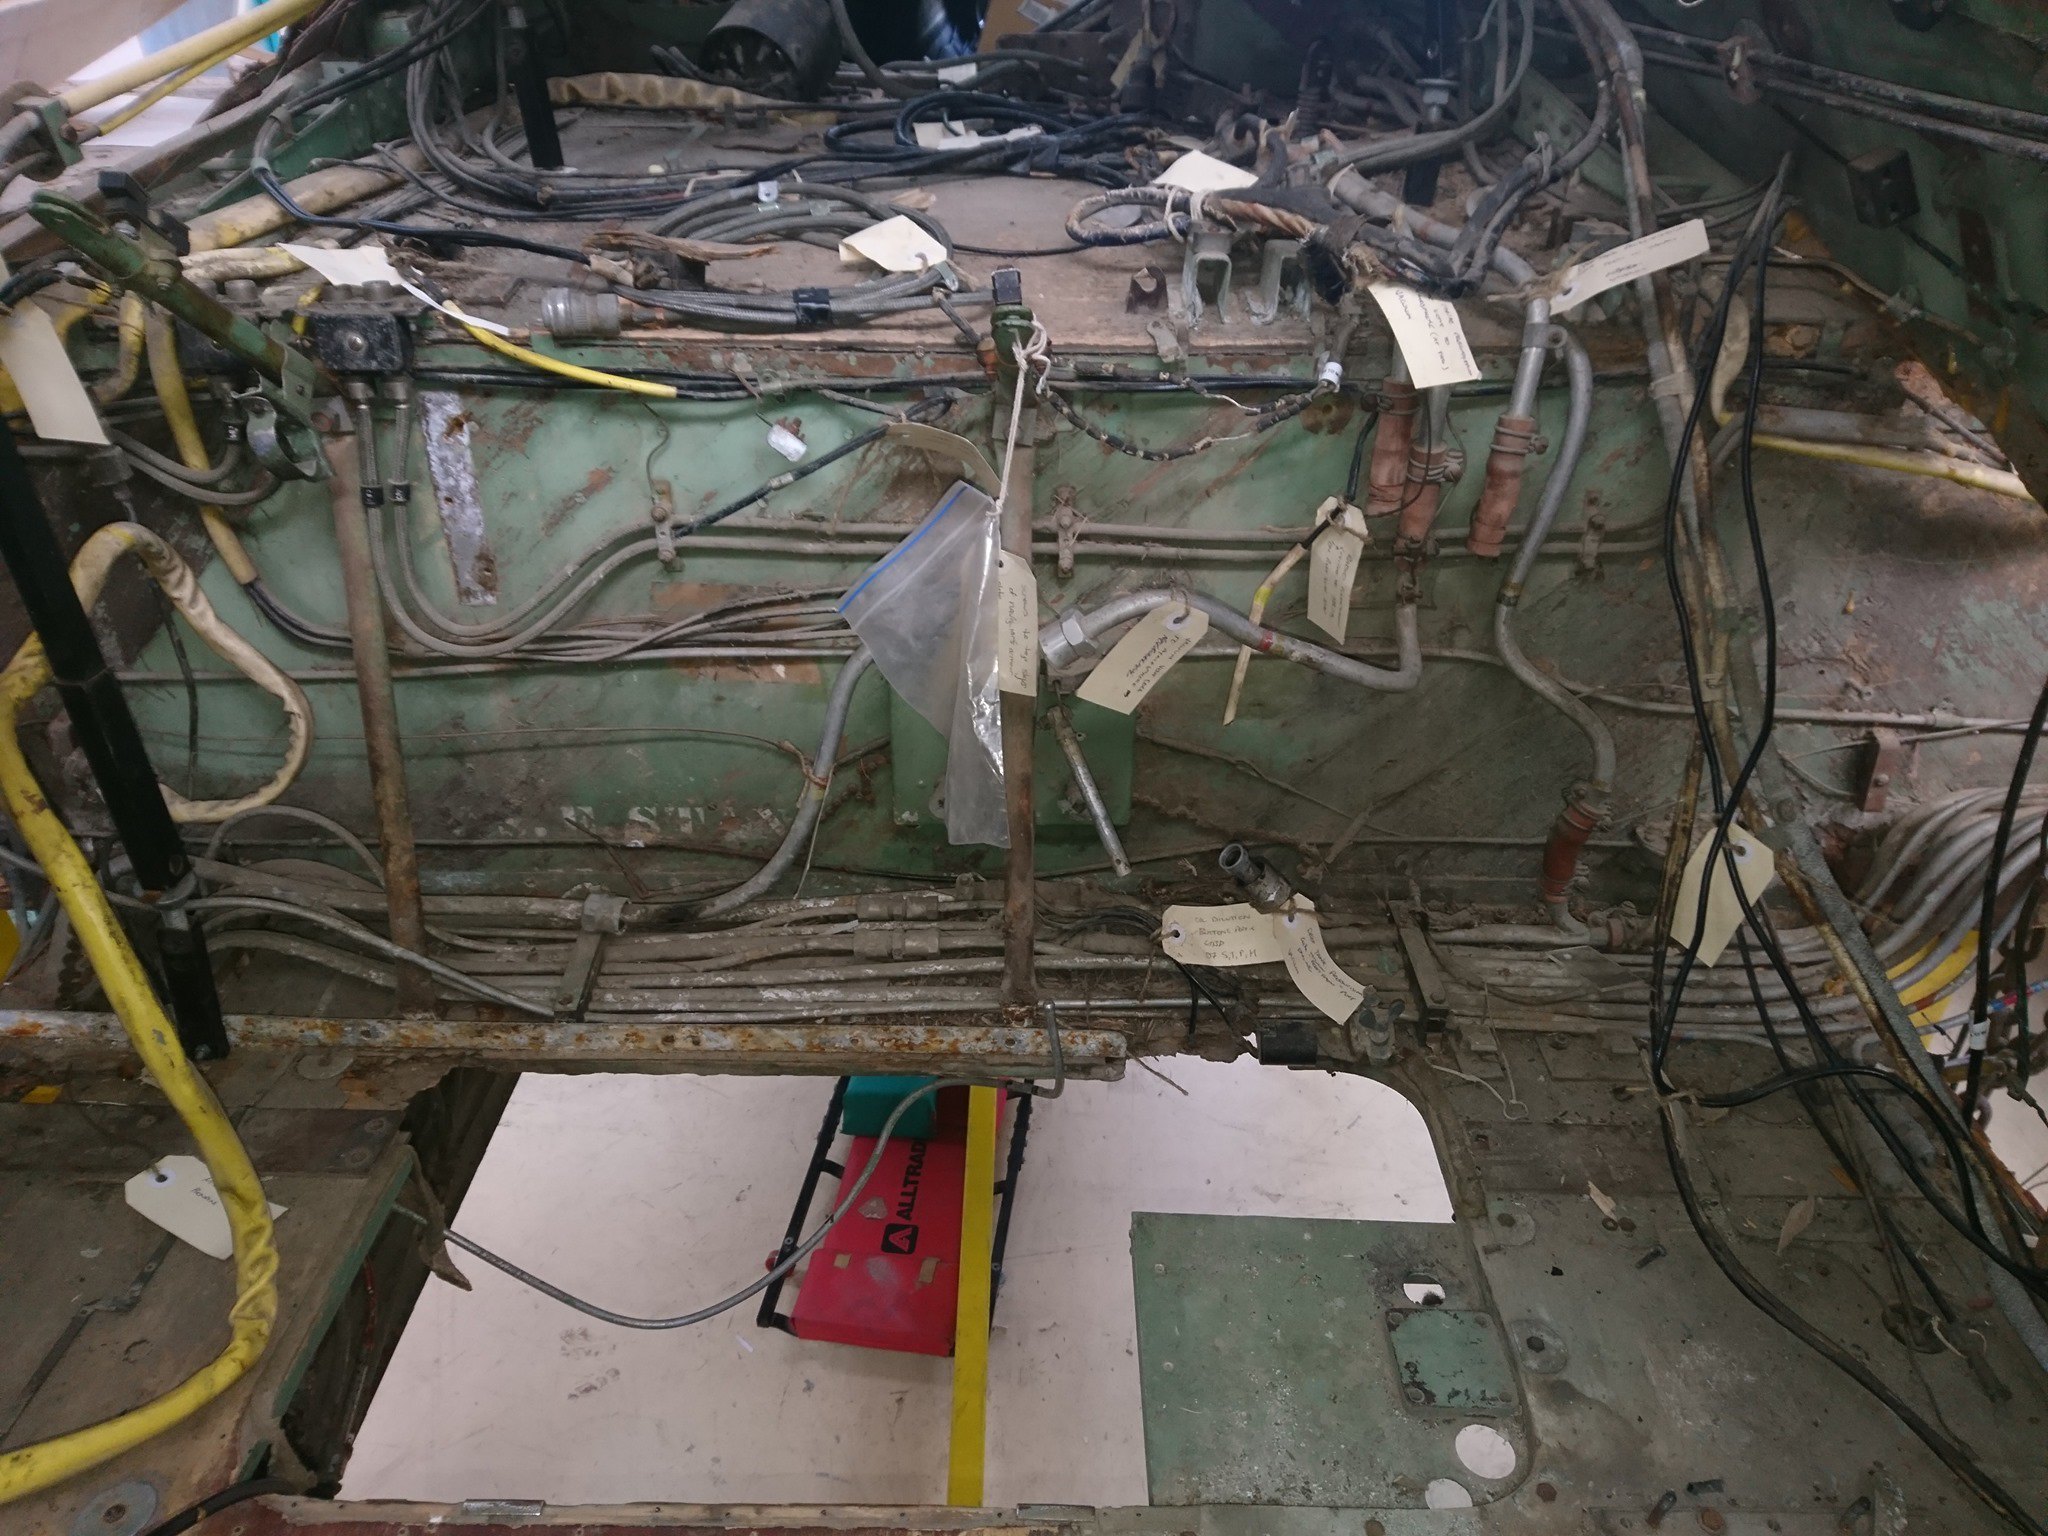 All of the plumbing was identified, tagged and removed and the rear half of the floor extracted. A new floor section was built up based on the original drawings:  The new rear half was fitted and repairs were made where needed to the front half:  Then the area was repainted and all stiffeners etc (which were corrosion treated and painted separately) reinstalled. The 20-odd 2BA CSK bolts joining the two halves had been trimmed with bolt cutters in the factory (Standard Motors folks - true British craftsmen), so each had to have the end dressed up and the threads re-started. It's this sort of thing that makes every quick job on the Mossie into a lengthy one. 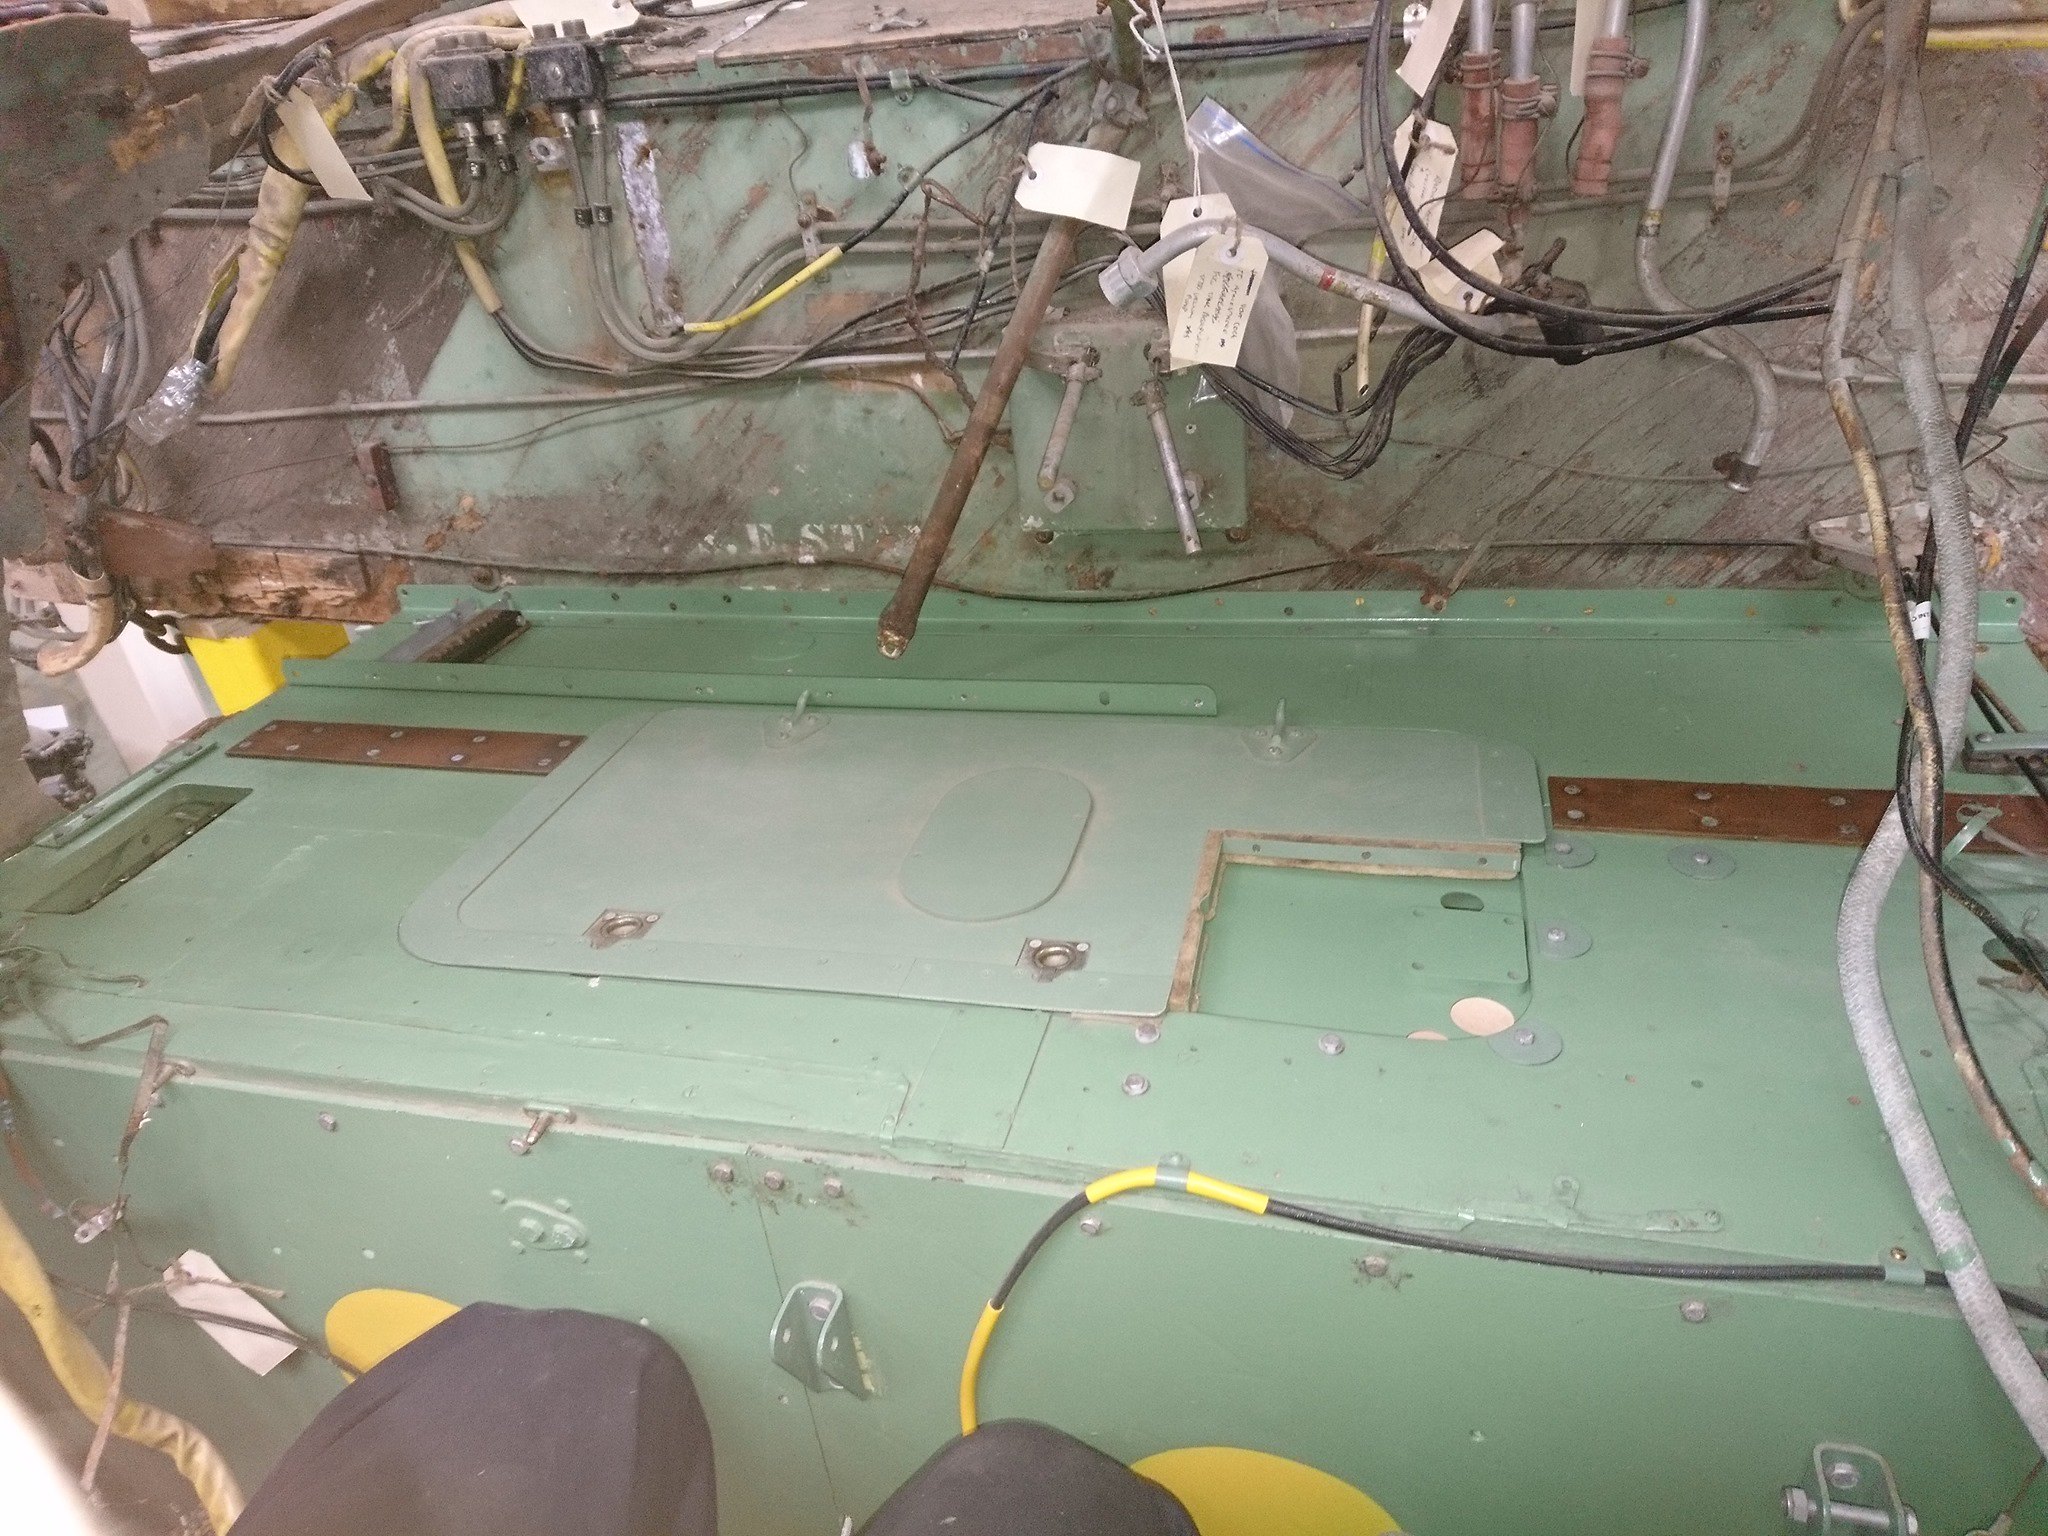 Outside, Dagy is slowly working his way around the canopy. This picture shows the work that goes into a single glue up - all of the perspex strips, bolts and washers (used to make sure the skin curves to match the original structure) are tested fitted, before the whole lot is dismantled, glued and reinstalled, then removed once the glue is dry and the holes filled. Lying on the wing inside the canopy to put nuts on those bolts was uncomfortable *and* tedious. What a great hobby!  With that glue-up done, work moves around to the next missing piece:  Sitting on the fuselage (doing your best Major Kong impression) you get a sense of how much progress is being made, and how much new material is involved. The hole in the foreground is for the HF aerial mounting plate. The big rectangular hole is for the dinghy box. The curved 'bridge' at the front of the dinghy box (made new from the original drawing) along with most of the lightweight bulkhead underneath (on my to do list to make) were missing - possibly cut out to make removing the HF radio power supply units underneath easier. You can see the last piece of outer skin for the port side resting on the top of the canopy waiting to be installed:  Here you can see the strategy for the BIG repair on the starboard side. A new section of inner skin has been attached to the laminated spruce canopy surrounds (made for us by Glyn :-( - RIP). This is one of MANY trial fits, but once it is in place we can add more skin sections curved to the necessary profiles to tie in with the original structure below.  Here are the laminated surrounds for the cockpit hatch (one goes between the two plywood skins, the other inside the cockpit). These will be cut down as required to match the useable original structure that remains: 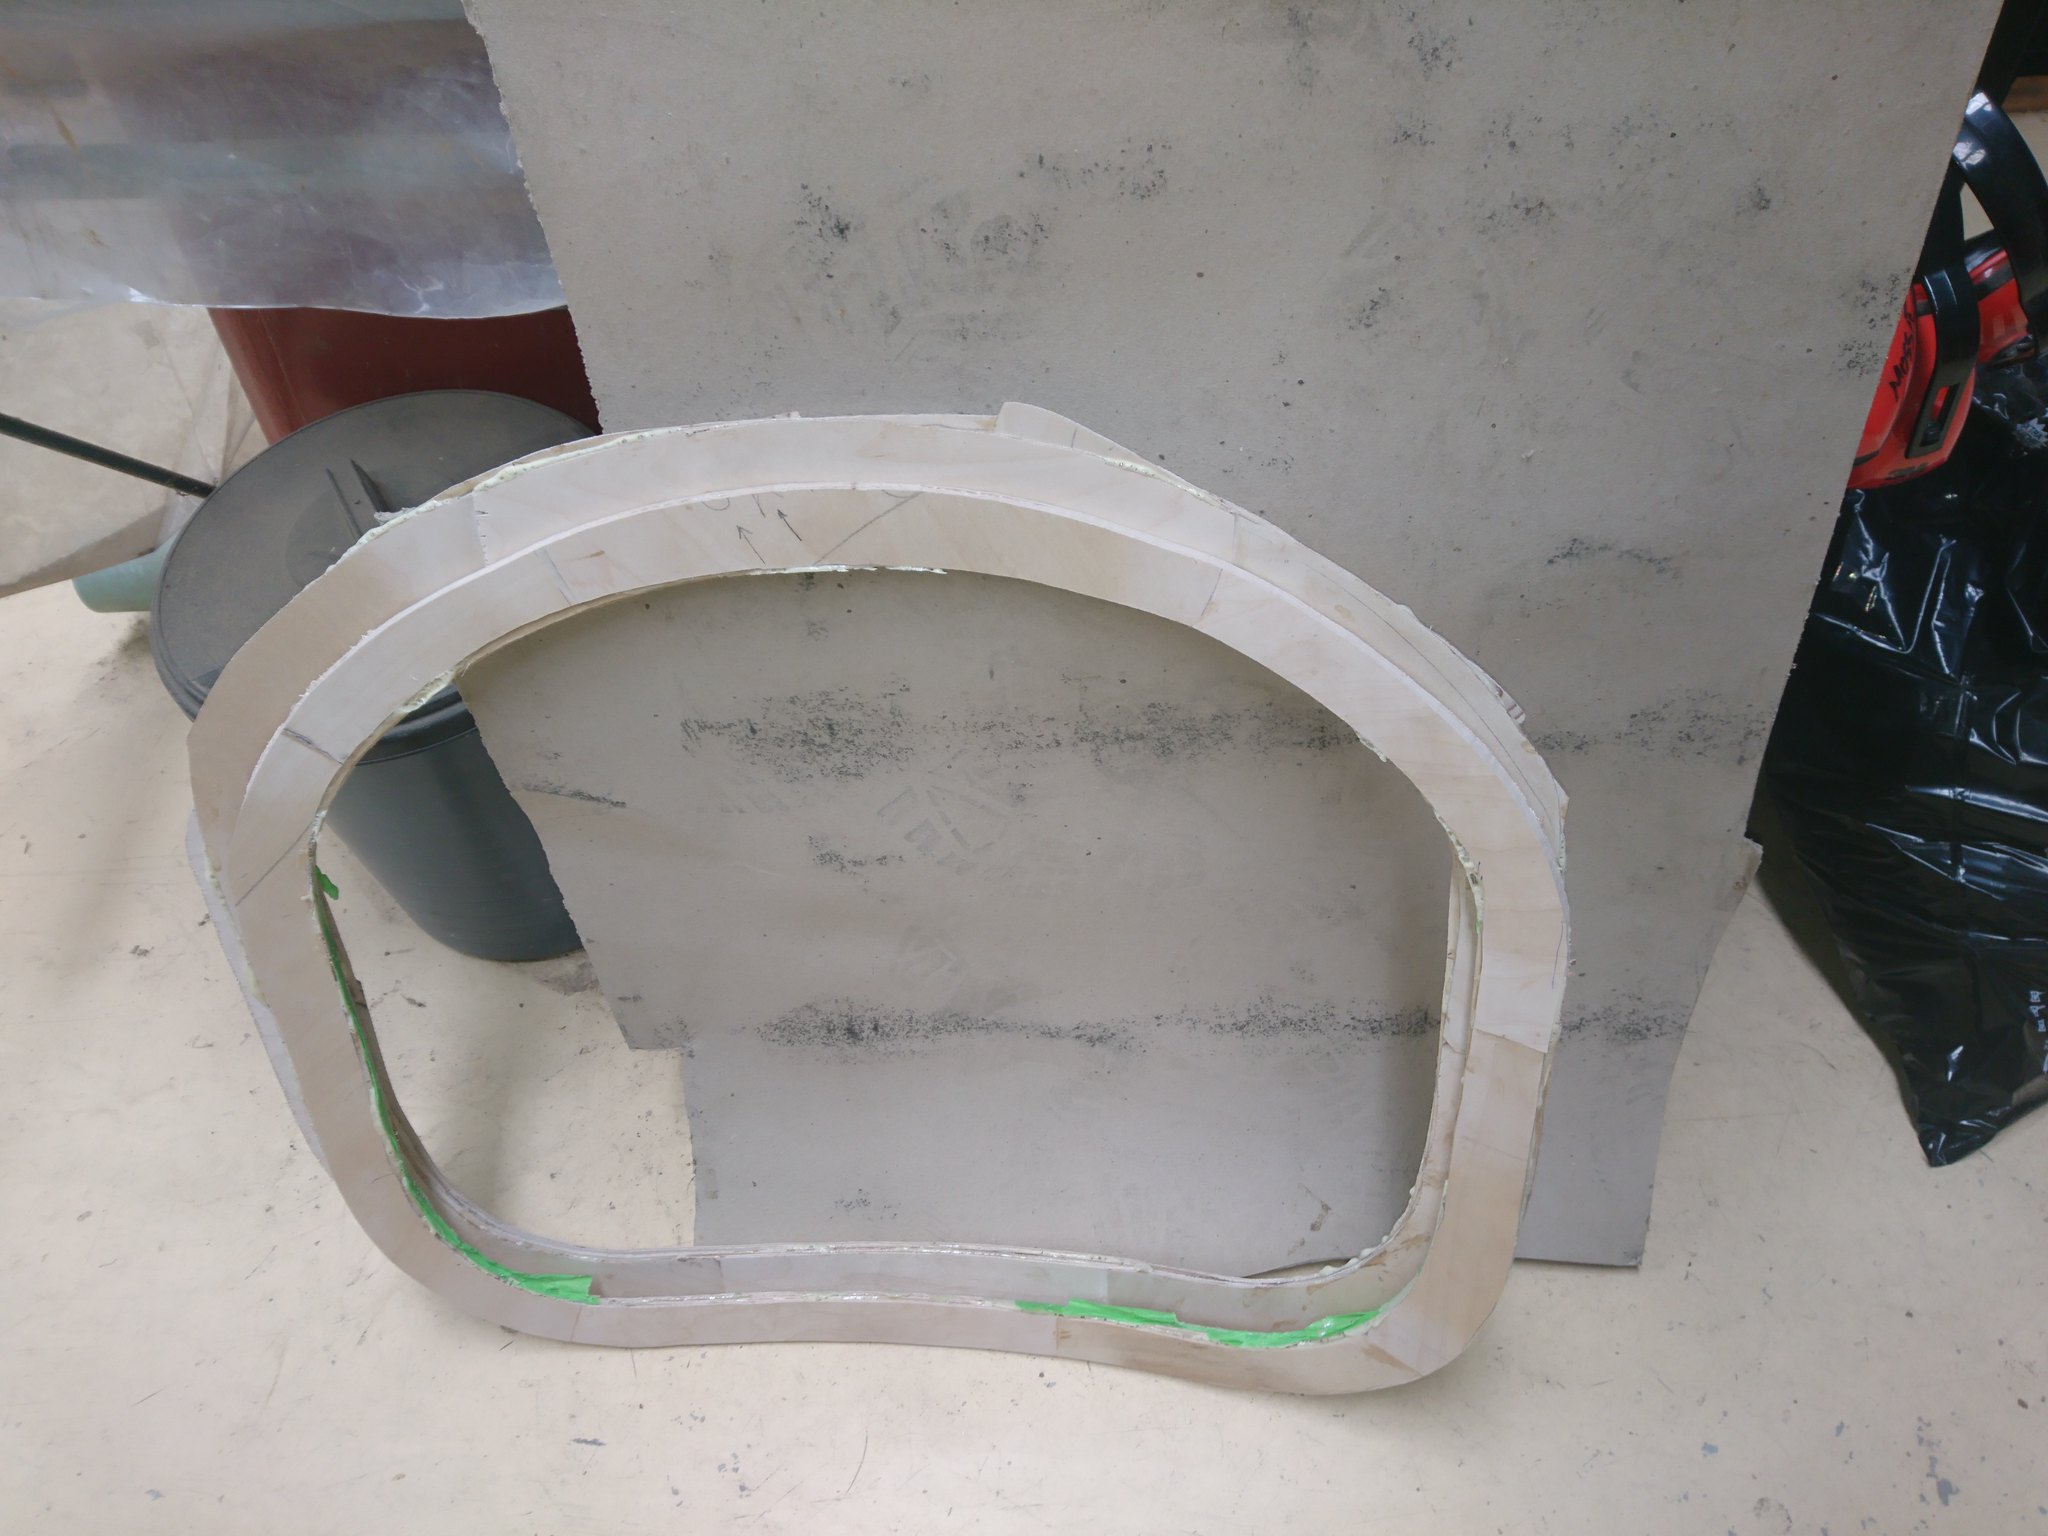 Thanks to Dave and to all of you for your moral and financial support this year. Hope everyone has a great Christmas. Cheers Alex |
|
|
|
Post by davidd on Dec 17, 2019 22:23:21 GMT 12
Wonderful post/photo section Alex! Absolutely first class.
David D
|
|


