|
|
Post by davidd on Feb 11, 2024 9:57:15 GMT 12
Fantastic commentary/detailed explanations and photography from Denys, I think we can say that he (and this inherently includes the vast collective knowledge of his varied team) has definitely (and over a very long period) become quite the experts on the vagaries of the collection of aircraft under their care. Also noticing that fine looking Marstrand tyre on the tailwheel in last image. I was also very impressed with the Mosquito tail cone in my days at Ferrymead (and at Pigeon Bay), and could not but help thinking even then that it would have been made out of different materials if built in another age, although even in wood it was a masterpiece of fabrication.
|
|
|
|
Post by ErrolC on Feb 11, 2024 10:57:59 GMT 12
Great update, thanks!
|
|
|
|
Post by planecrazy on Feb 11, 2024 17:07:36 GMT 12
Wow the Mosi looks great with her tail feathers fitted, awesome progress well done to all involved!
|
|
|
|
Post by denysjones on Feb 17, 2024 20:20:39 GMT 12
The homework task No1 of the week was the twin handle set that goes at the top of the actuating rod of the flare chute door from last week. In the trove of blueprints I found one for each of the two handles and so after some activity with an image manipulator of choice/experience I scaled the plans to real life (well plus or minus 1/32 inch) and printed them out and glued to and cut cardboard templates. Then we were off to the material stock and to the 3in1 (cutter/roller/bender) to make the pieces. 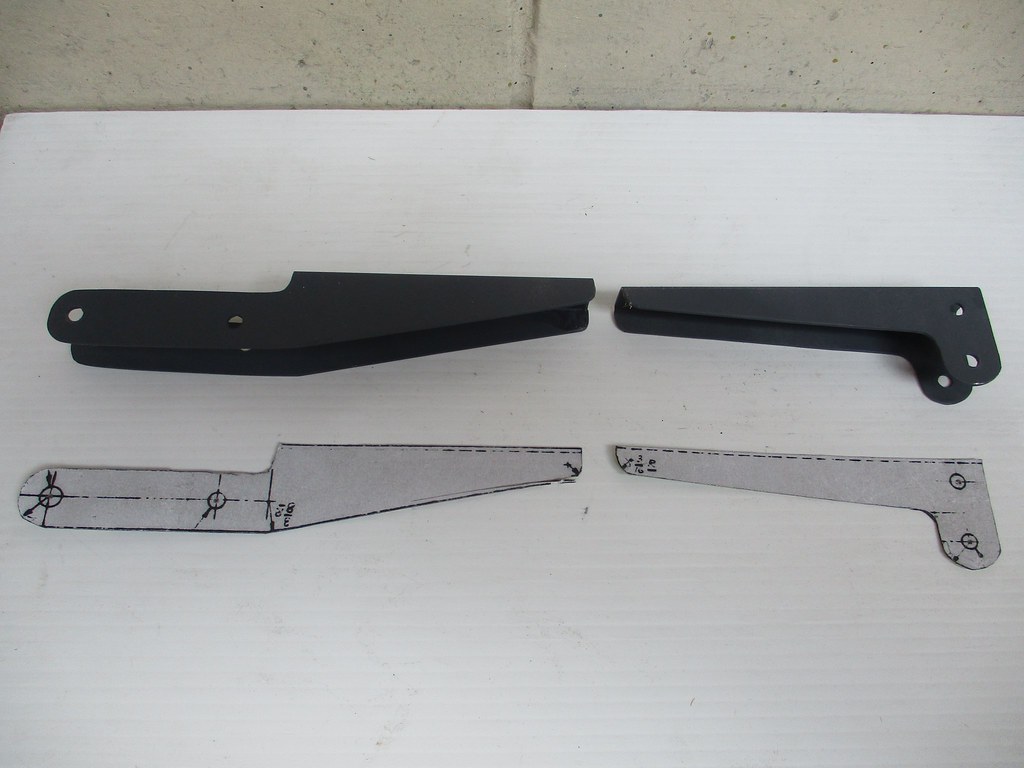 Next up is how they fit together and the only guide we have is this view from the parts book which shows assorted pins and bolts and springs etc. 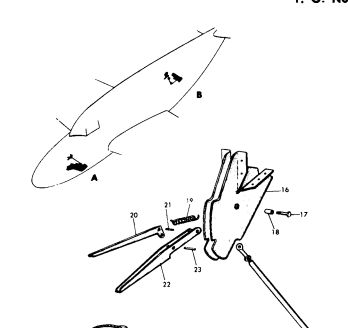 Therefore today I tested them for fit in the fixtures in place in 2035.....temporarily located by a pin punch as the hinge point 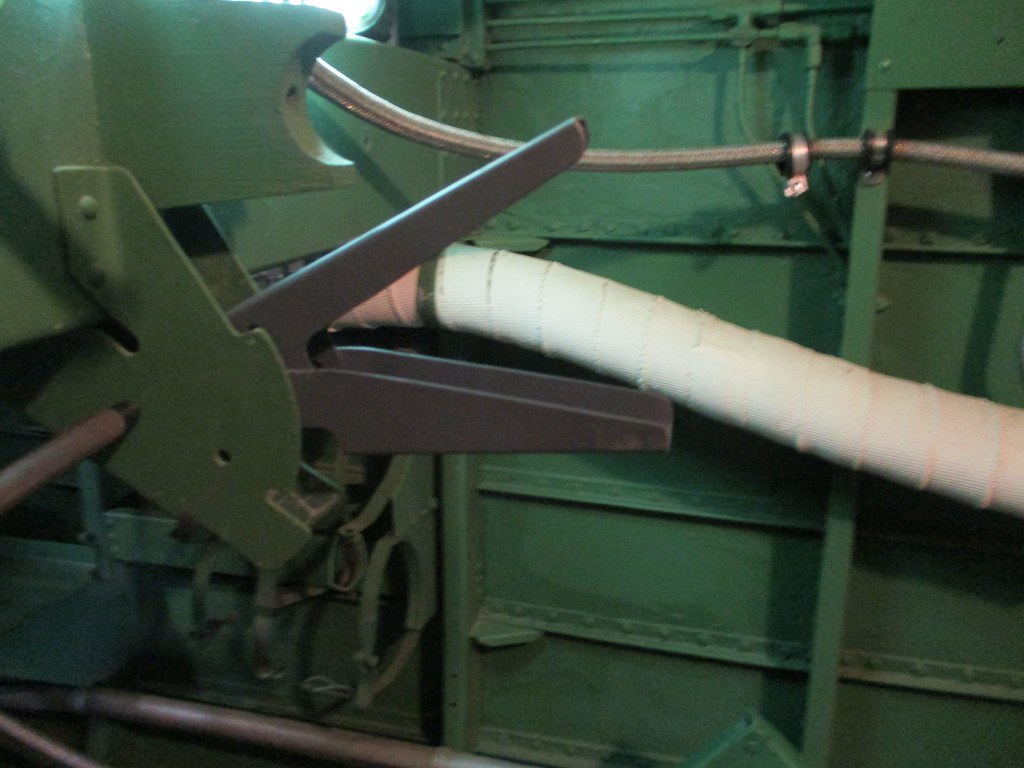 and after some thinking figured how it seem they fit and operate. Of interest was that in the (foreground as shown) side plate of the mounting were two holes and only the leftmost had a corresponding mate in the other side plate. Then looking inside the other plate there is an obvious score mark which leads to the conclusion that the pin, marked as 23 above, is inserted through that aperture and then rubs in the course of use of the mechanism. 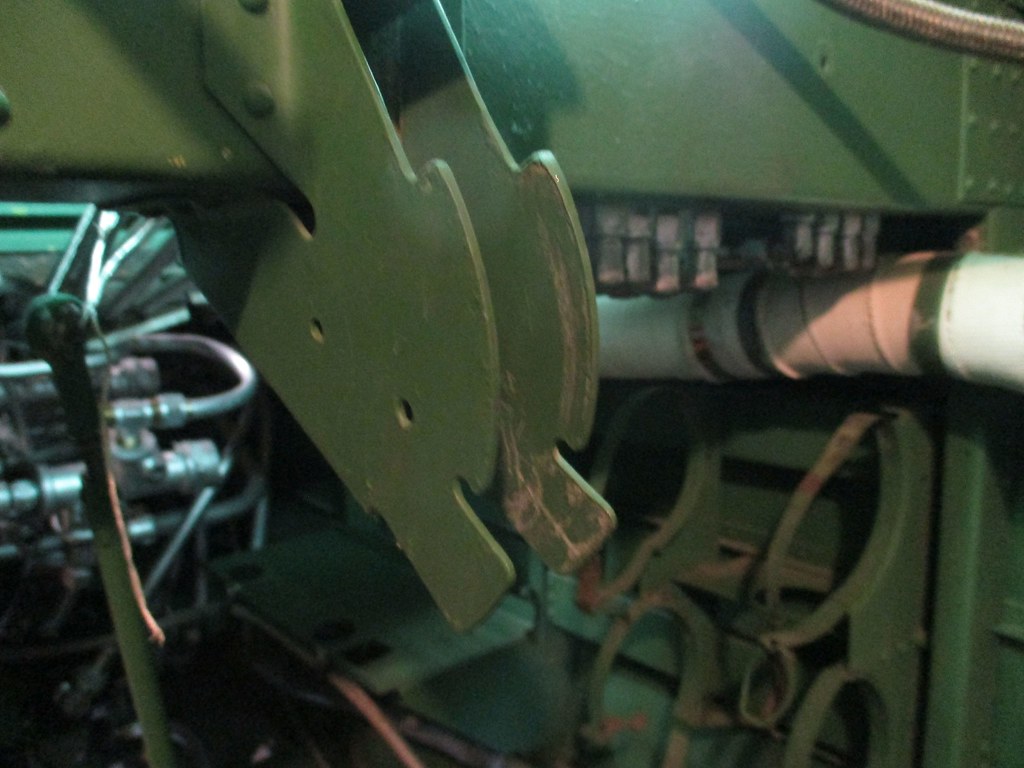 Armed with all this knowledge I'm off this week on the task of painting, and springs and pins etc...next week should be the reveal! |
|
|
|
Post by denysjones on Feb 24, 2024 20:29:29 GMT 12
A fairly quiet day at the coal face today doing some PR work that took up most of the morning but in the afternoon I got on with the fitting of the lever action for the flare chute door. This took a few iterations of applying external force, a jack, to hold the door shut and then adjusting the end pieces of the rod and letting the jack off to see if that setting gave appropriate close fitting. Strangely all the eye ends we have are right handed thread and so the rods aren't like turnbuckles where you can locate both ends and rotate the rod to increase or decrease the length. However in the end we got to a degree of fit where there is a little bit of variance, in lack of closeness of fit, between the forward and rear ends of the door which are probably a bit of the history of its life, over years, which we'll never be able to remove so will live with.  I've now turned my attentions to the next of the three doors on that lower portion of the fuselage, being one that provides access to the fuel control valves, hence the evidence of external light in the left bottom of shot. Also George and I spent some time reviewing where he, and his assistant Oscar, are at on the undercarriage leg cover rebuilds they're engaged on for me, looking great so far. Alex meanwhile was busy doping on the fuselage of HR339 and Angus had his head down at his bench on more matters wiring therefore. |
|
|
|
Post by denysjones on Mar 2, 2024 20:21:26 GMT 12
Time to revert to a subject that I was tinkering with back in April and August of 2019 (pages 13 & 14 hereon) namely the undercarriage activation rams of Hudsons. After those posts other things drew me away from the topic, which was just as well as a couple of years later in amongst a selection of parts we received six more of the mounting blocks for the rams thus rendering my faux one obsolete and giving us enough to install both our rams and still have leftovers. Having got well through the long plumbing and related tasks I recently decided that the time has come to get these rams sorted. They install in this cutout of the main spar (see the two bolts holes and footprint of an original to the right inside it and the two pairs of bolts holes in the vertical channels alongside) and it was obvious, from the shape of the cutout and the items to be installed, that there will be only one simple way to do this so off to the manual we went. 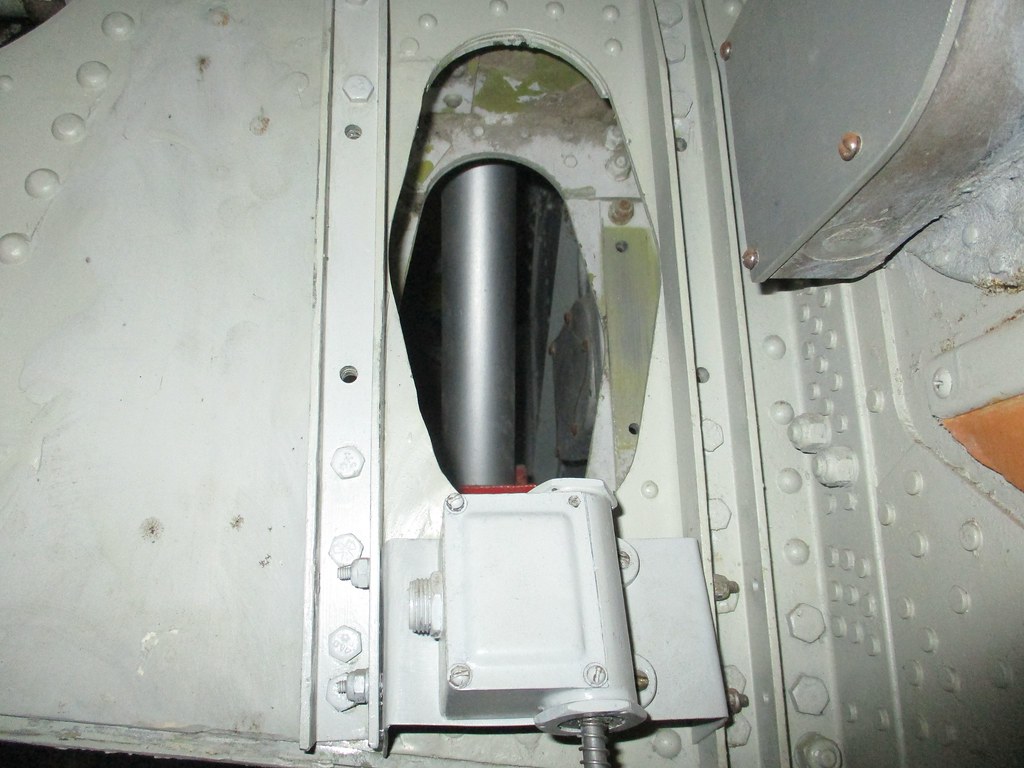 The outcome is that one of the lock nuts, and then the trunion assembly sandwiched between them (simply stated as being unscrewed off the ram!) and this all relies on the two items wanting to unscrew...of course after some 80 years they weren't ready to do so. For the last couple of months I've been repeatedly applying doses of CRC to one ram and letting it soak. This week it rewarded my patience and the lock nut came off albeit requiring, in lieu of special tool T-11399, a long series of persuasion taps with a wood drift (fashioned from a piece of scrap from 633Sqn's scrap bin). Then moving onto the trunion we hit a snag...it simply did not want to unscrew but eventually a difference, remember these rams are Ventura, with the manual procedure was the presence of a keyway deep inside the trunion. However in the end we succeeded, and once off the reason it took so long to unscrew is shown by way of the fine thread used. 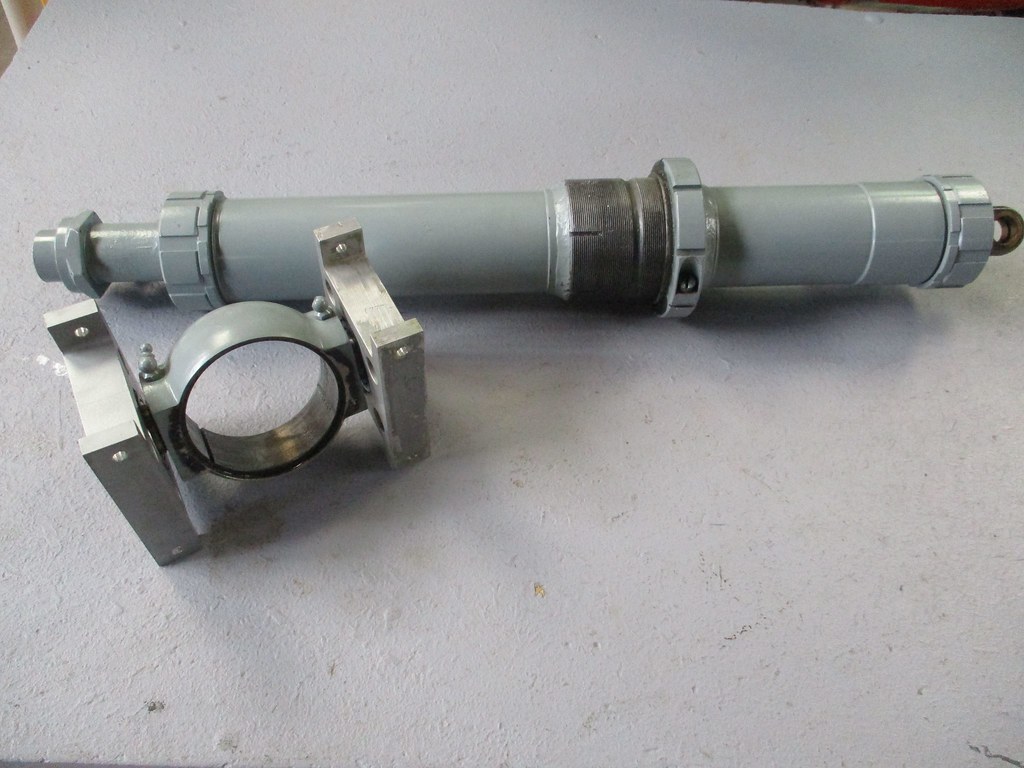 In the background of this the week's homework had been to prep another two mounting blocks and fittings. 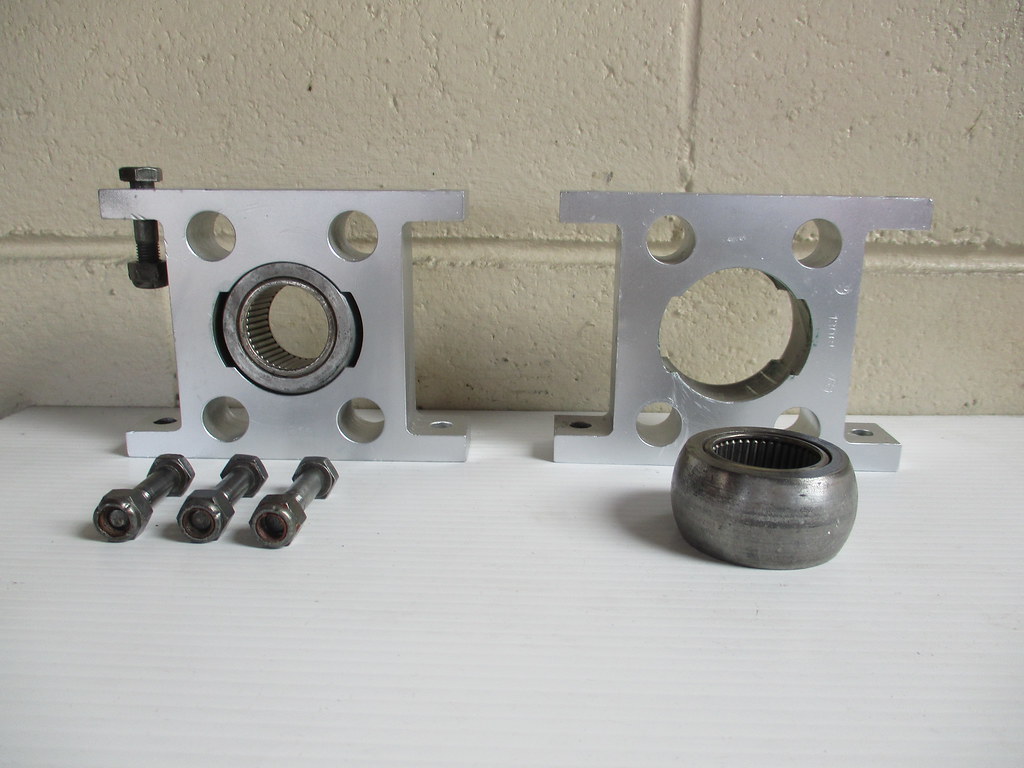 So we move onwards next week hopefully installation of the first and breakdown of the second ready to follow...keep your fingers crossed for us! |
|
|
|
Post by davidd on Mar 3, 2024 8:24:14 GMT 12
Fingers crossed Denys!
|
|
|
|
Post by denysjones on Mar 9, 2024 20:29:24 GMT 12
The manual I was referencing last week, which led us down the path of trying to unscrew the trunion from the ram body, was the 1943 one covering the Hudson III, IV & V, US Navy PBO-1, and Army A-28, 28A 29 and 29A. I also have a copy of the 1944 version of the same for the AT-18 navigation trainer version of the aircraft and looking at the corresponding section therein I read that after removing the lock nut you "slide the cylinder out of place', disarmingly simple! Neither manual mentions the existence of the keyway however both have a drawing of the ram and annotated thereon is "key". So moving on from that today's schedule got a tad upset with an interruption to the scheme in the morning leading to the task of installing our friend trunion being held over for the afternoon. This ended up as another iterative process as it involved placing one bearing block in the aperture, then the trunion, and then the second block, all having to go in on an angle and then rotate to the vertical. It soon became a process of removing nuts and bolts from inside the two channels either side of the opening and fore and aft of the spar to reduce the starting inclination of the set to increase the vertical travel versus roll space before trying the rotation. However... 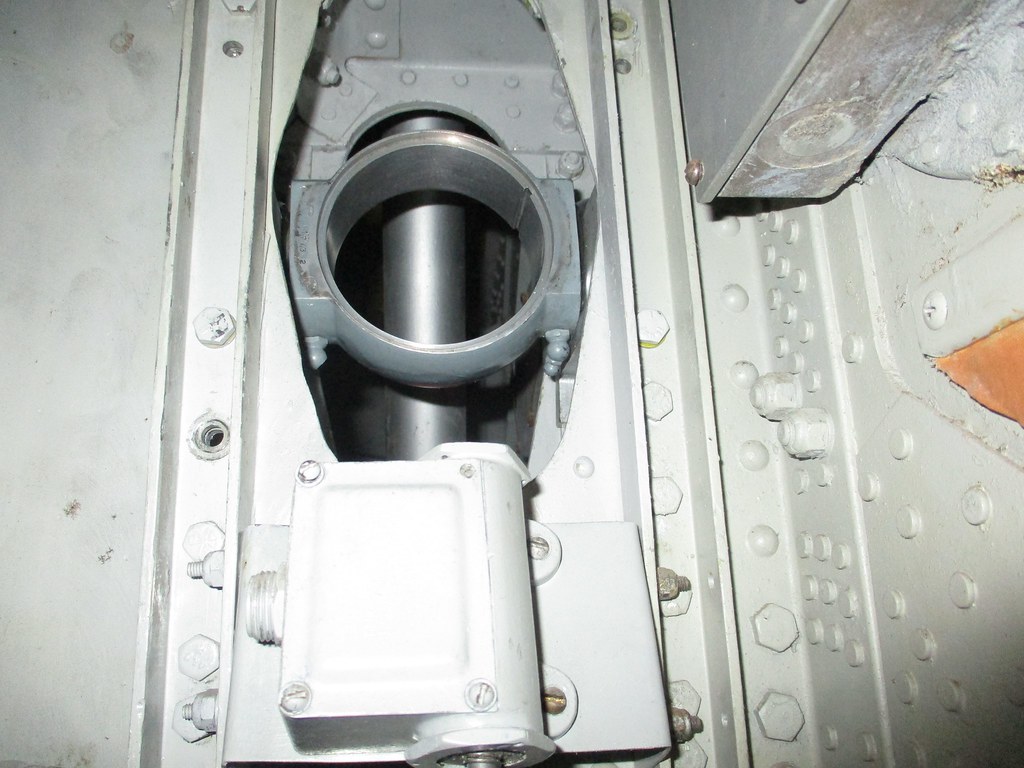 Now nuts and bolts etc to go back in and then we try the ram however I ran out of time and pool of assistants as time wore on so its over till next week. |
|
|
|
Post by denysjones on Mar 16, 2024 20:00:06 GMT 12
While another group are in the process of getting a couple of B737 engines from the US to NZ, this week we moved our JT8 from the workshop down to the hangars where it will now be combined with a set of reverser gear and the whole package titivated for display. When we got the unit from the AirNZ training institute it was on a full engineering stand which posed a couple of problems. The first was that it was both too high and too wide to go through the doors to the hangar and the other being that the side members of the stand hid a lot of the JT8 from view and so weren't desirable from a public display perspective, as you see in this shot of it as we acquired it. 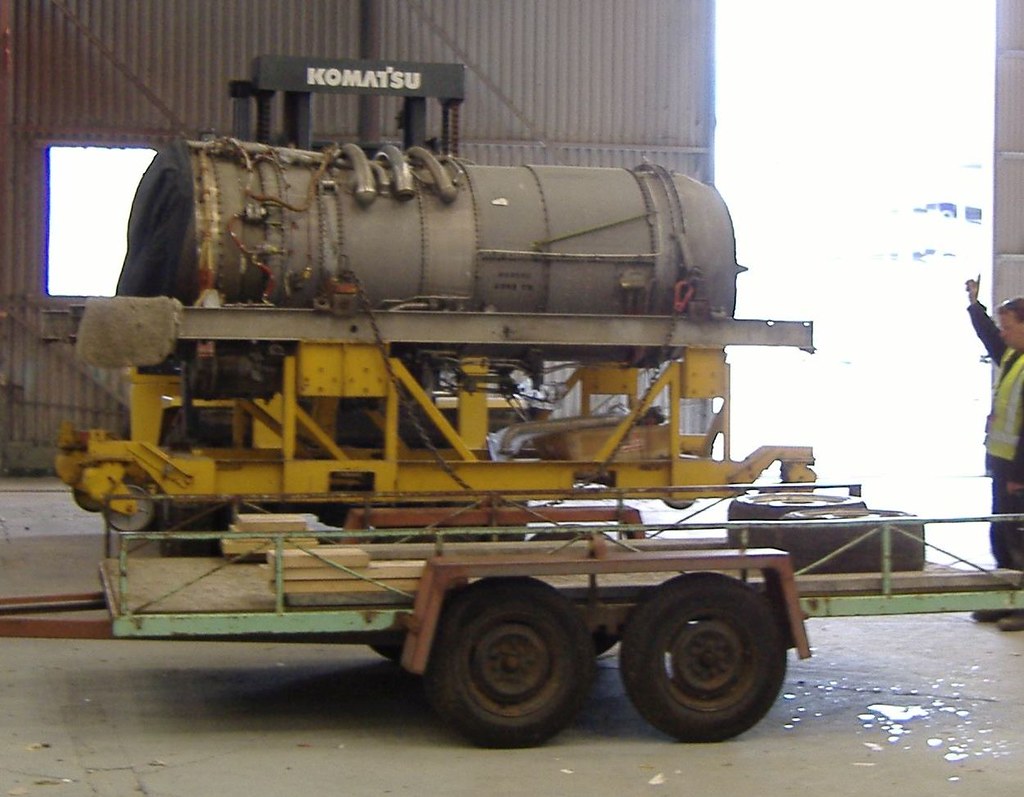 Surgery has duly been undertaken to solve these issues and to allow it to pass through the doorway with ever so little room to spare but it made it. 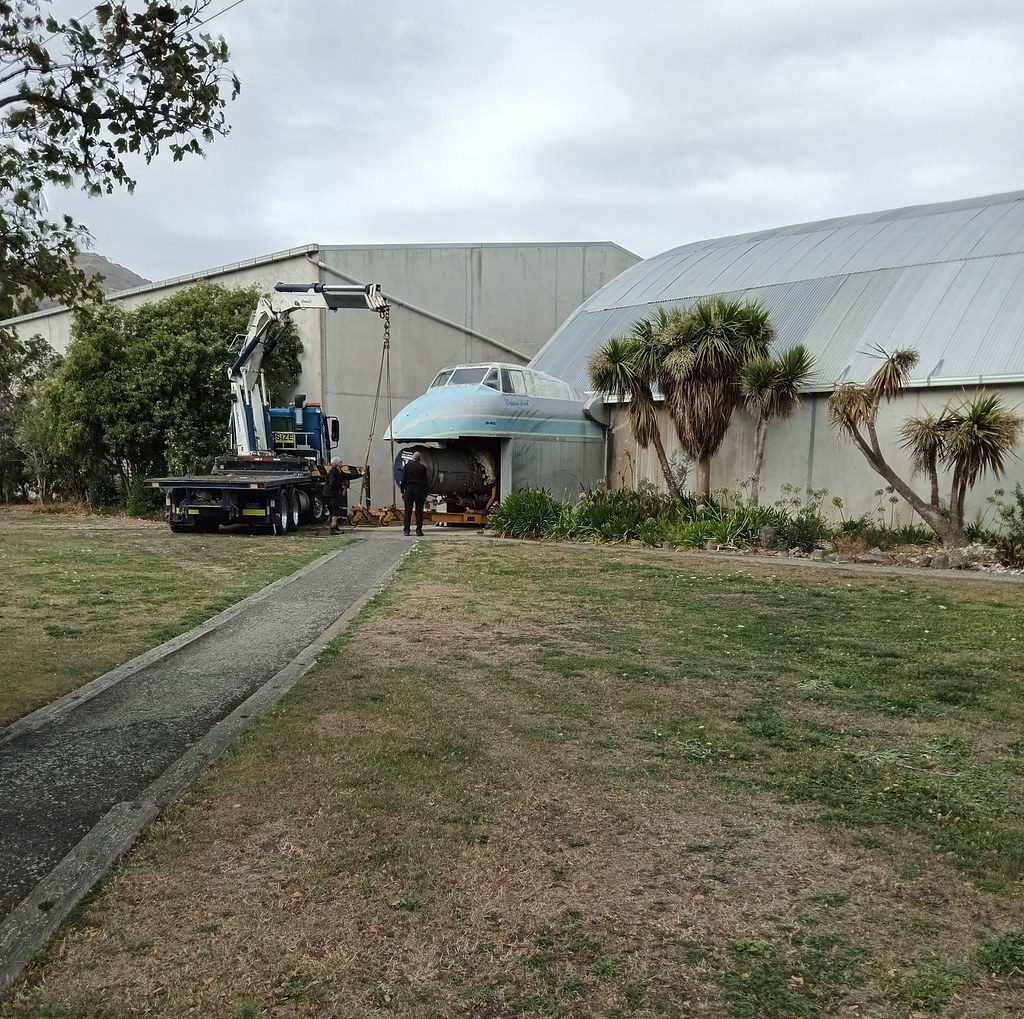 It's very useful for a group like us to have a member whose business requires him to own such useful toys which make light work of tasks like this, and even better that it's services are free! Today a bit of a cross-teams effort took place to provide the required manpower to mate the aft reverser-bucket assembly to the beast which certainly turns it into a pretty impressive display piece.  So that all slowed down 2035 work which saw only the completion of bolting in the portside trunion bearing blocks and initial prep works to extract the second ram's trunion and to prep the mounting starboard side for it. There's always next week but that's got something to do with fair weather sailing from the eastern isles :-) |
|
|
|
Post by 30sqnatc on Mar 17, 2024 10:01:01 GMT 12
Surgery has duly been undertaken to solve these issues and to allow it to pass through the doorway with ever so little room to spare but it made it.  Thats not a doorway, It's a carnivorous aircraft  |
|
|
|
Post by denysjones on Mar 23, 2024 20:13:05 GMT 12
Back in 2022 a visitor to the eastern isles sent me some photos of some aircraft bits he saw hanging in a shed roof and correctly thought might be of use to us. 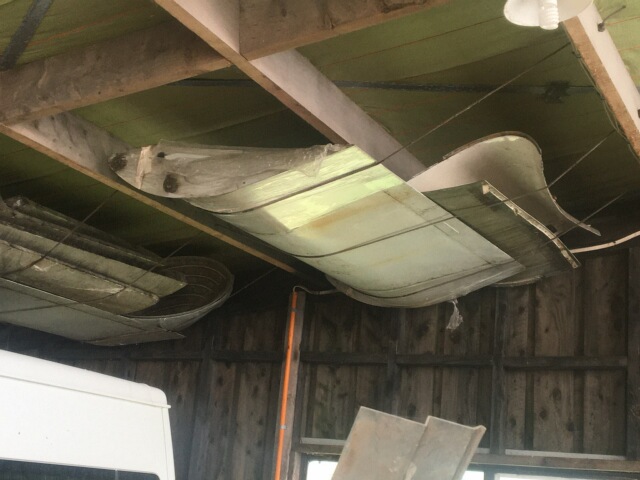 This led to a long saga but this week we got to the end as it was indeed good sailing for the good ship Southern Tiare on one of her regular jaunts from the eastern isles aka Chathams to Timaru and today saw a Dean roadie to collect these. 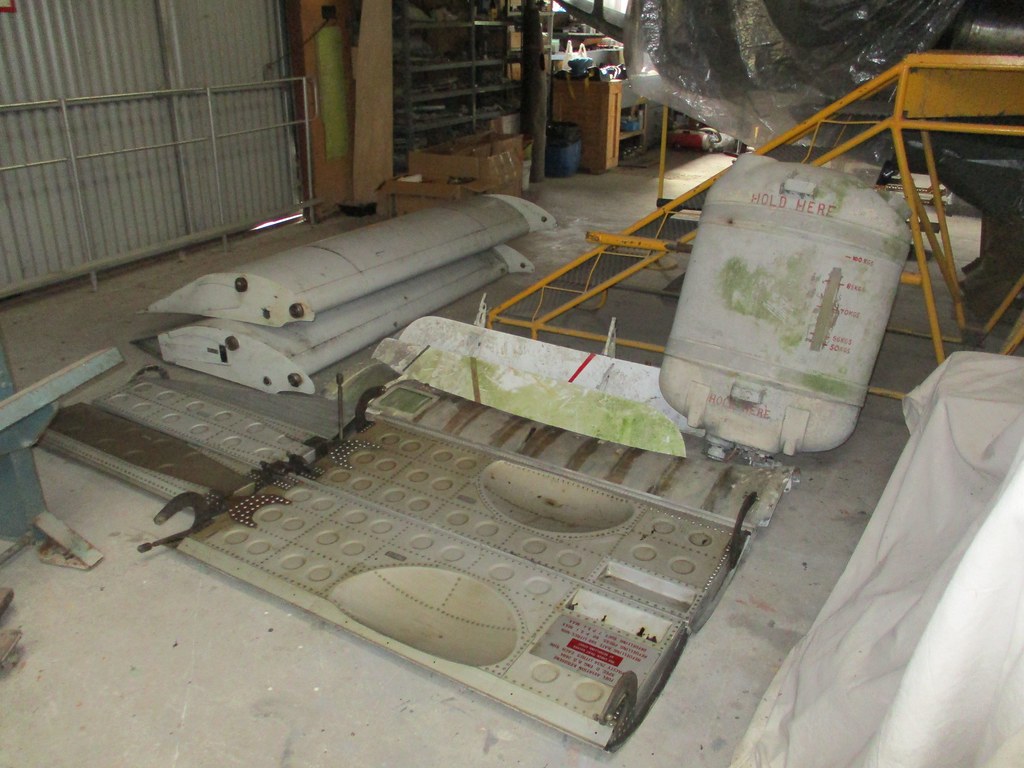 It's an assortment of Friendship parts from BXI. There's the inboard wing flap segments, assorted undercarriage doors, and the water-methanol tank from the port nacelle. All of these are of course missing from BXG. We're very grateful to the Muirson family for permission to reclaim the bits from their farm, Brian who took the photos, and especially to two island residents, Lucie and Wills, who, despite having no knowledge of aircraft parts and their identification etc, volunteered to be our gofers over there and get the bits from the farm and to the ship for us. While awaiting Dean's arrival I succeeded in removing the trunion from the second undercarriage ram for 2035 and then dived into the control cable system from the control wheel to the autopilot ram. It's a composite of chains and sprocket wheels combined with cables and pulleys but it looks pretty straight forward. Many years ago I got a large dump of Hudson materials including heaps of cables. I sorted these and did rough measures of their lengths and so marked. It may be optimistic but one of the ones I needed to find today was 132 5/8Inches and we had in stock 132 1/2Inches in my rough measure...we might be on a winner on this run! |
|
|
|
Post by planecrazy on Mar 23, 2024 21:15:48 GMT 12
Great stuff, love stories like this.
|
|
|
|
Post by agile on Mar 24, 2024 12:43:57 GMT 12
Massive props are due to Denys for securing the Chathams bits. 'Saga' doesn't do justice to the trials and tribulations he has gone through in order to get these bits back to the Mainland.
|
|
|
|
Post by Deleted on Mar 24, 2024 18:36:57 GMT 12
Bravo Denys and the Chatham folks, what an excellent outcome!
|
|
|
|
Post by denysjones on Mar 30, 2024 20:25:39 GMT 12
The first piece from last week's acquisitions is aimed at making good a long-standing deficiency on BXG as we've long had two port side doors for the nose gear bay and no starboard. So in the photos we got showing what was on the Chats we were delighted to see standing in the fuselage out in the open 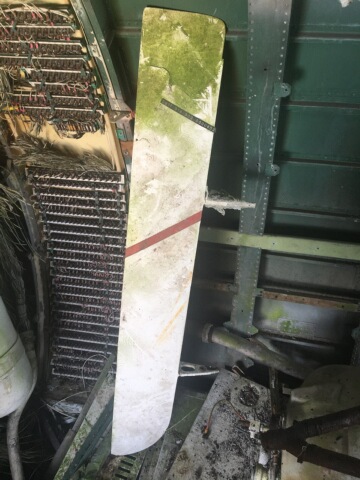 Last week that door arrived, somewhat more moss covered than in the photo, and accompanied by two more port ones. One of those two was a match in colour scheme of white with a diagonal red stripe...question... what aircraft are they from as it isn't an NAC/AirNZ scheme. I wonder about the Indian F27 that was scrapped at Woodbourne as we got the cowls from it, via Peter Mac, which were white. Also from AirNZ we got a fwd fuselage door which was white with a blue stripe and while sanding the nose door I encountered blue beneath the white. Age and, I suspect, the environment it has been in on the island have not been kind to the door which presented several issues. Firstly the rear hinge arm had certainly seen better days. 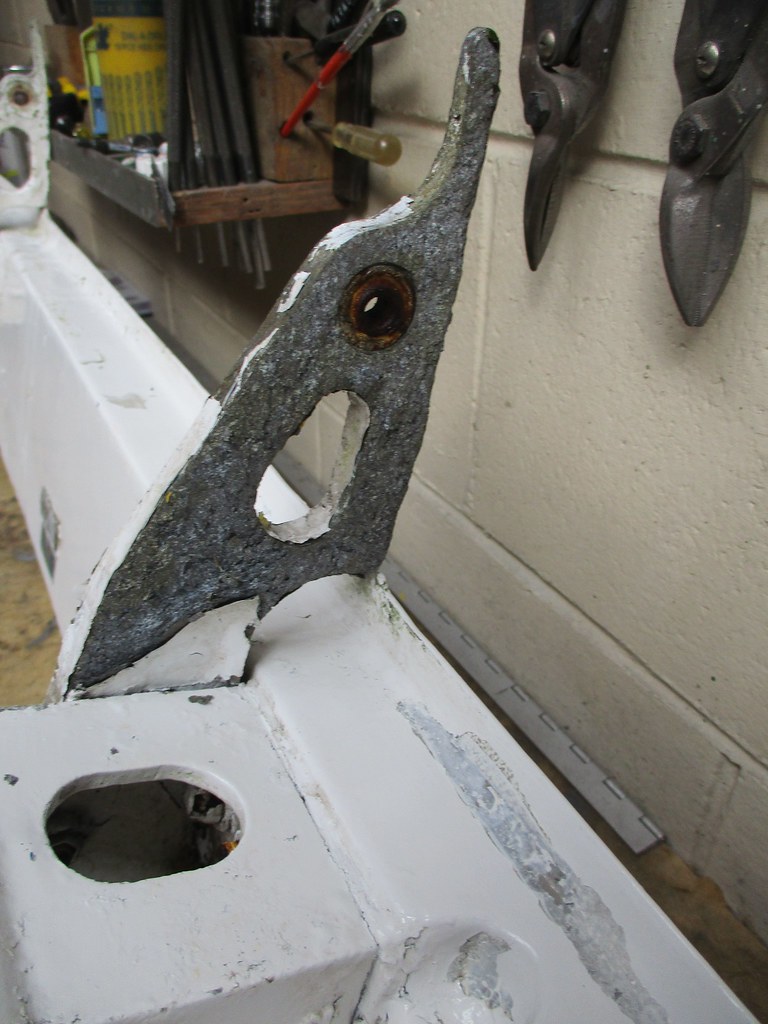 The problem being easily solved as the arm is the same on both side doors so a spare port side unit yielded a replacement. Next there was a wee issue of cracking and loss of the outside skin. 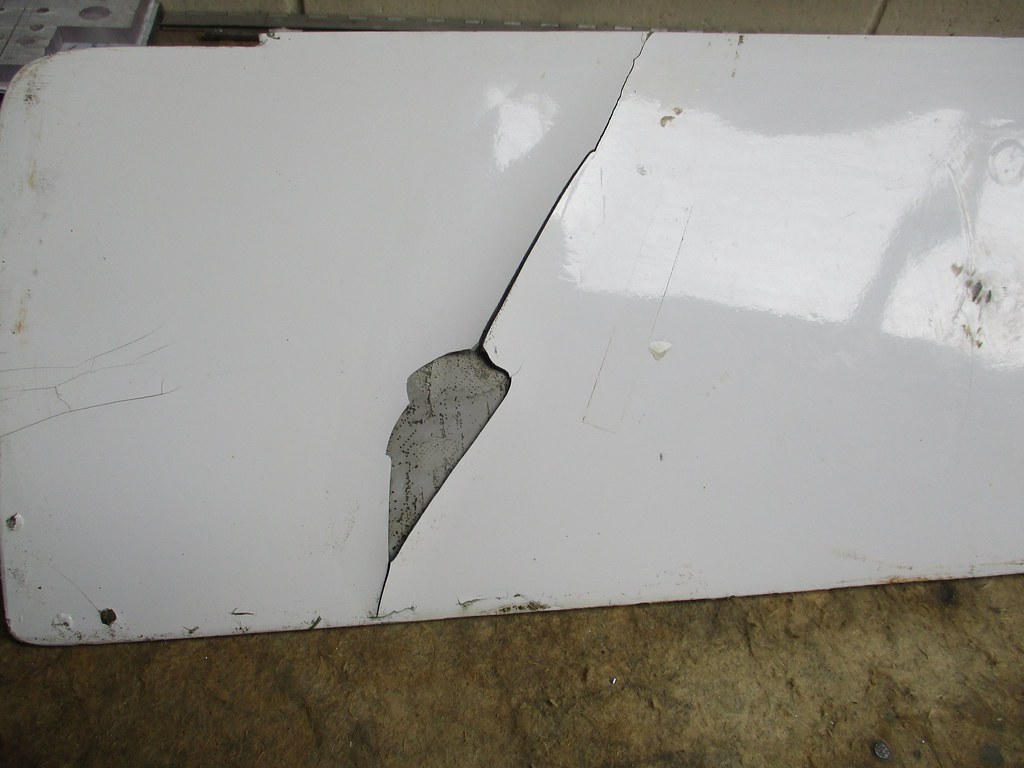 I fixed this by extending the loss area the length of the crack and then applying some epoxy adhesive under both edges and body filled the loss area. The last repair was an area of penetration and cracking of the fibreglass structure which was fixed with paint removal and a fibre resin doubler patch. All things going according to plan then this morning this front view of BXG 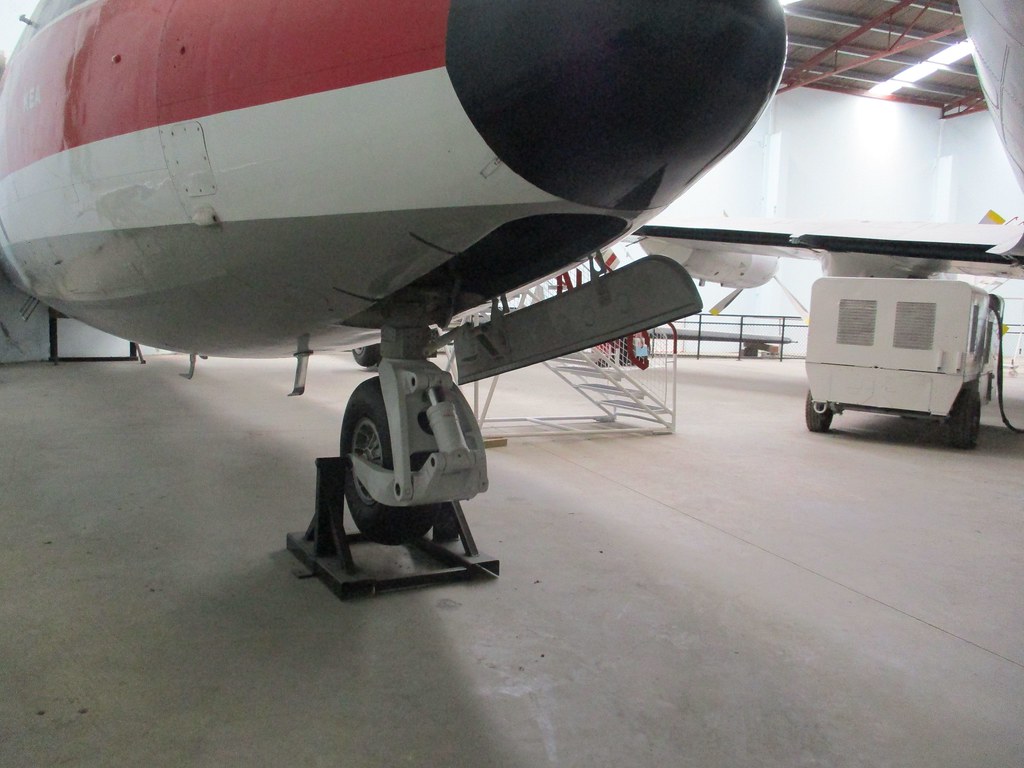 got transformed to this 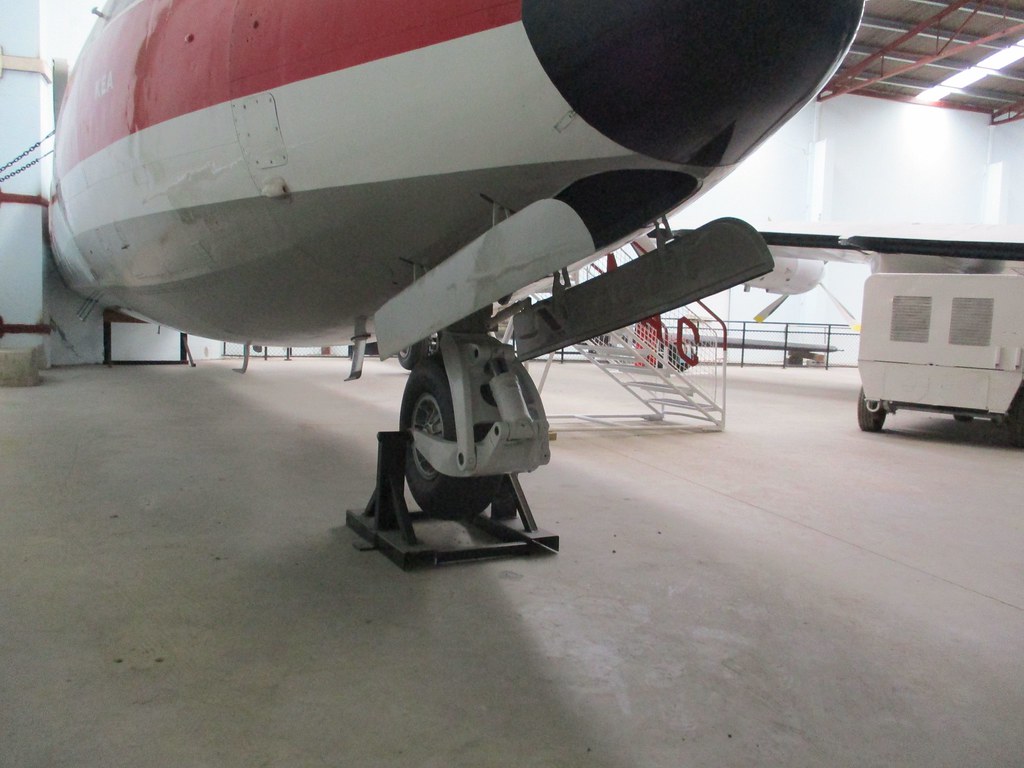 Task 1 ticked off. Now to task 2 the water-methanol tank. I first learnt of this and its lot on the Chathams via this photo of the two tanks languishing in the open to the weather cockpit. 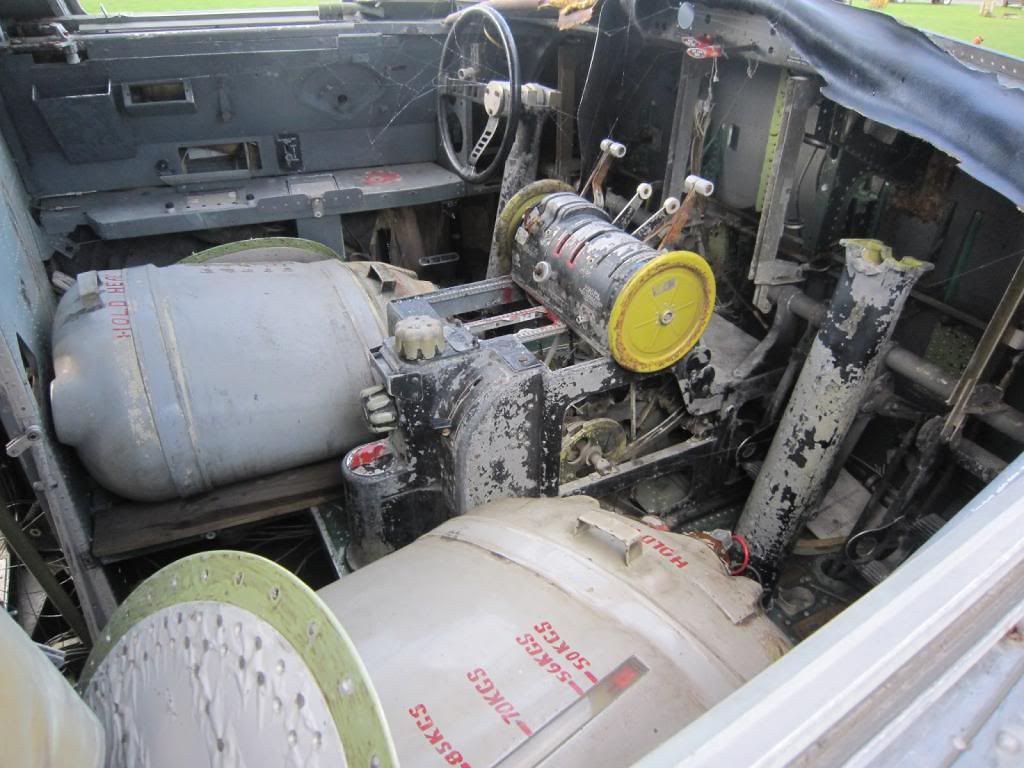 So no wonder that the fixtures on the tank are not remotely flash and today considerable time was spent removing the top 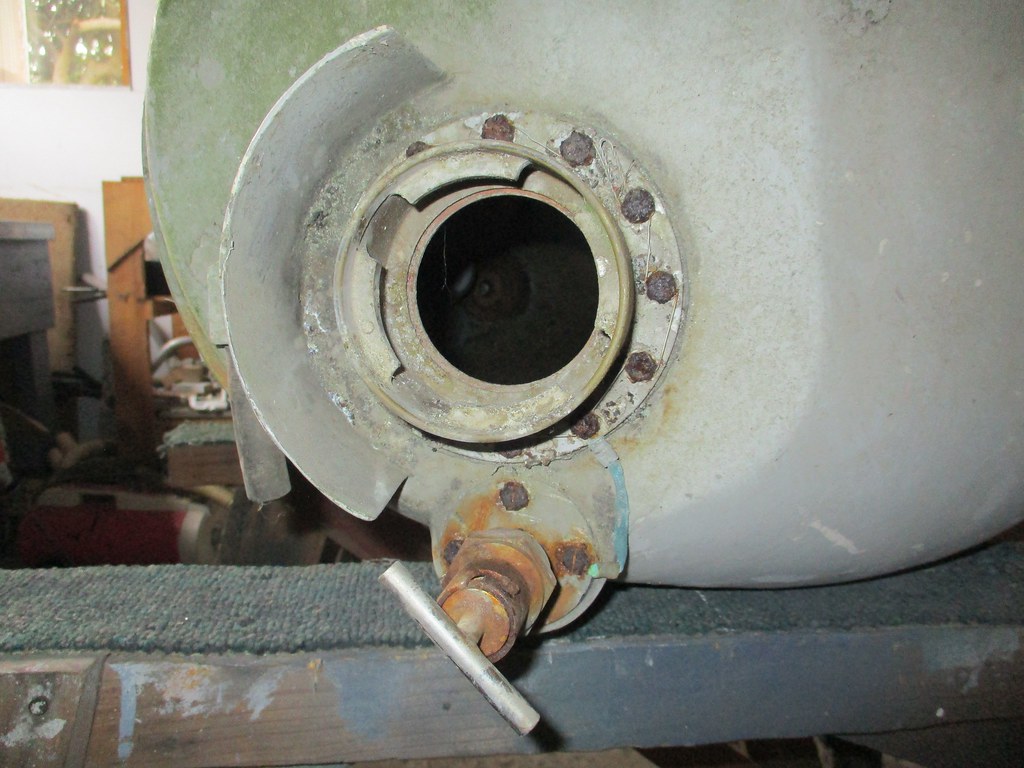 and bottom appendages 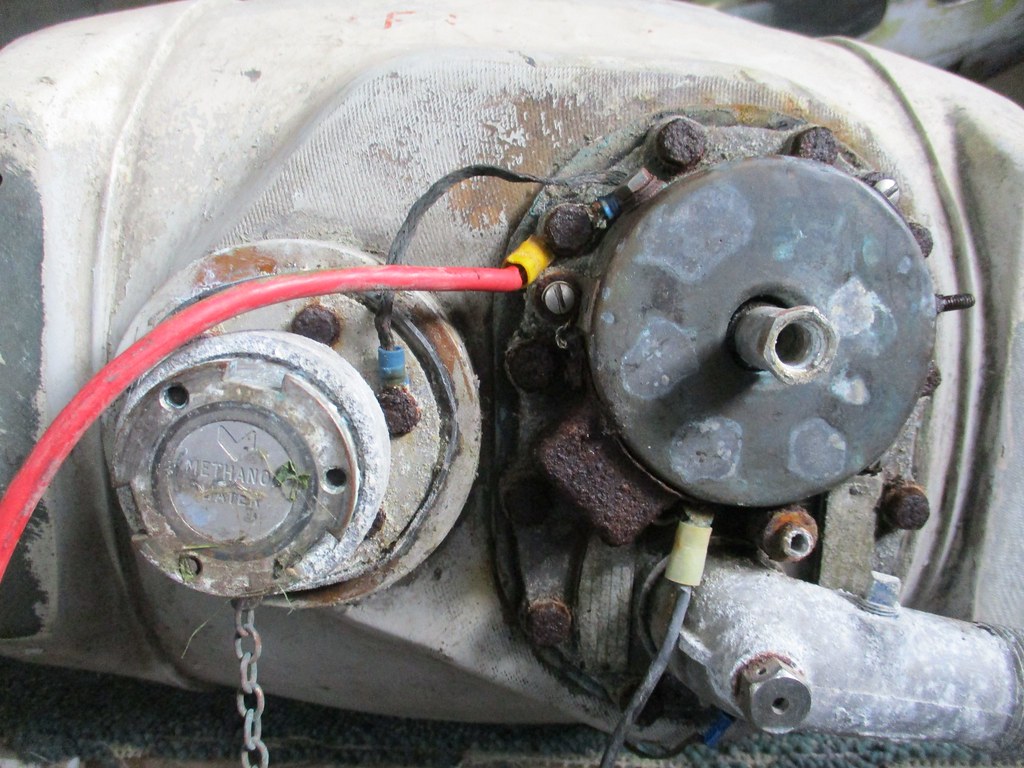 These latter two being the power fuel feed attachment (as opposed to the top "pour-it-in-variant") and the pump. The bolt heads on these were so rust eroded that they didn't fit any specific spanner size but alternative methods won out, thankfully they still make CRC! |
|
|
|
Post by Deleted on Apr 3, 2024 10:03:26 GMT 12
Bravo Denys and co, what excellent progress to see!
|
|
kiwiwreckdiver
Squadron Leader
   Still military and aviation history mad
Posts: 124
|
Post by kiwiwreckdiver on Apr 5, 2024 19:40:11 GMT 12
That Mossie is coming along very nicely !!!!
|
|
|
|
Post by denysjones on Apr 7, 2024 15:05:20 GMT 12
Yesterday was a varied day off tools on aircraft for several of the team. Dag and Alex were busy applying their wood working skils to something other than the mossie. When we built the second section of our original workshop back in 1983 we installed what were already second-hand, and of unknown age, windows in the public walkway area. The sills of these have now got well past their best and so as a pre-winter task the guys have literally ripped into the task. Dean, Rob and I moved our newly acquired sheet guillotine into place in the appropriate area of the shop. We're indebted to Lincoln University for the donation of it and a mill. Dean was also busy inflating the tyres of our Fordson refueller so that the generous amount of manpower on site could get to and push it a new location relative to the Viscount. Hopefully the experience hasn't scared off a couple of new prospect members who were on site for look about. Team1058 busied themselves with more detailing of the R1340 which is actually a build-up from the remains of 1080's and so lacks quite a number of small pieces and Dave was engaged in his usual Sunderland tasks. I managed some time to pre-paint clean the location of the second undercarriage ram trunion in 2035 and then the tedious rub down of the water methanol tank for BXG which late in the afternoon received its new coat on the back side, hopefully time will come to hand to get on site and do the reverse during the week. Our friendly graphics whiz has the stencils for it underway and the various removed accessories are also wip.  |
|
|
|
Post by denysjones on Apr 13, 2024 20:59:49 GMT 12
The weather and other things played out pretty well and so the water-meth tank got painted and the top and bottom accessories cleaned up nicely which makes a change from the views posted a couple of weeks back. 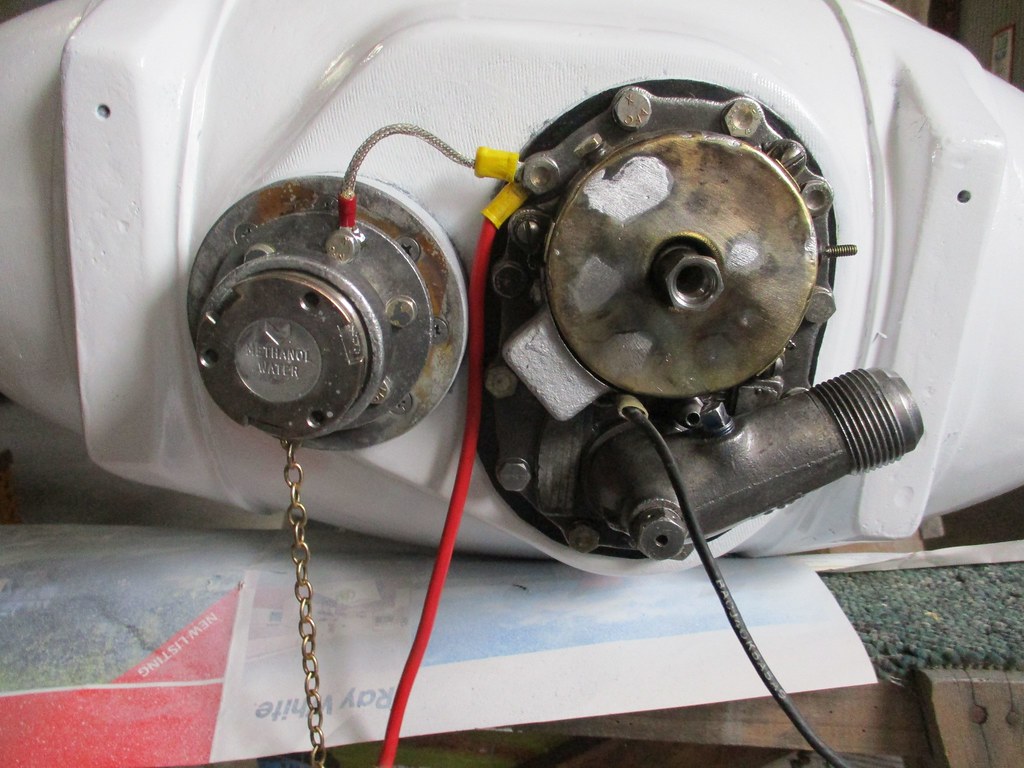 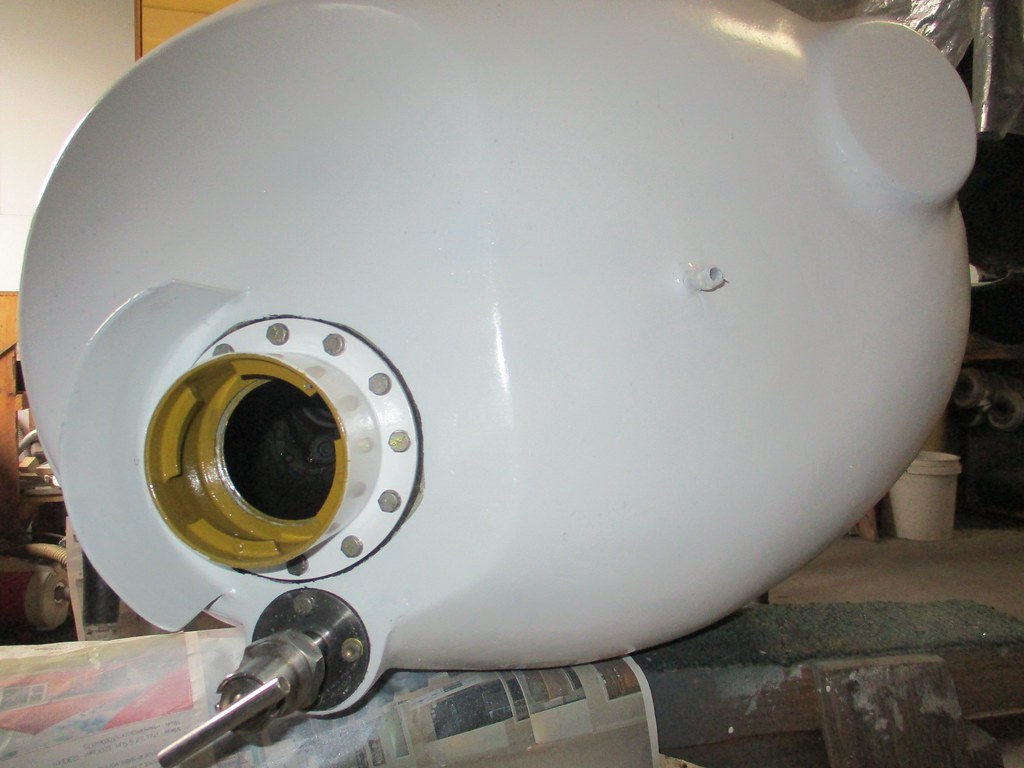 Today Dag arrived with some goodies dropped in his letter box during the week by Owen our friendly graphics man. Owen donates his and his equipment time to us and makes a modest charge for materials and no delivery fee as Dag's place is on his cycle route. As an aside...while I was sanding the tank down in lower levels of paint I found remains of an earlier set of the graduation bars alongside the sight glass but these ones were yellow. I wonder what shade the corresponding wording might have been as no trace of that came forth. The week's home work was one of the rear halves of the wheel bay doors, the forward one having been done a week back, and so that was offered up today but lack of time means its forward buddy waits another week. 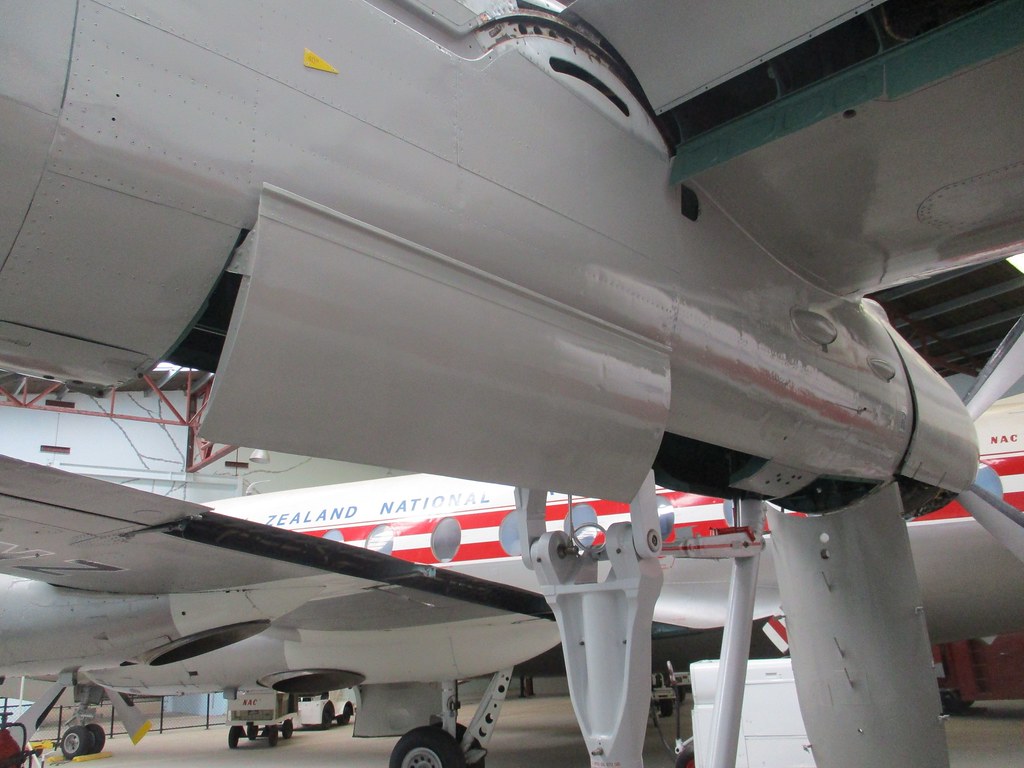 As a bit of background this is the rear of the undercarriage bay when BXG came into our care 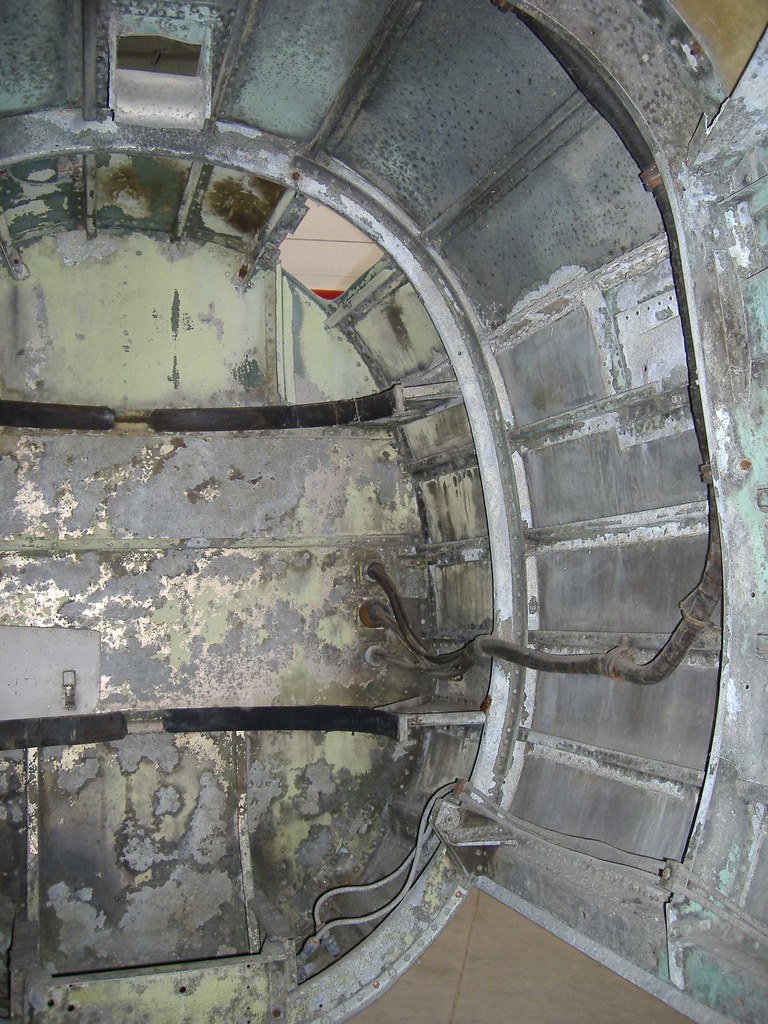 and we were able to get it to this condition 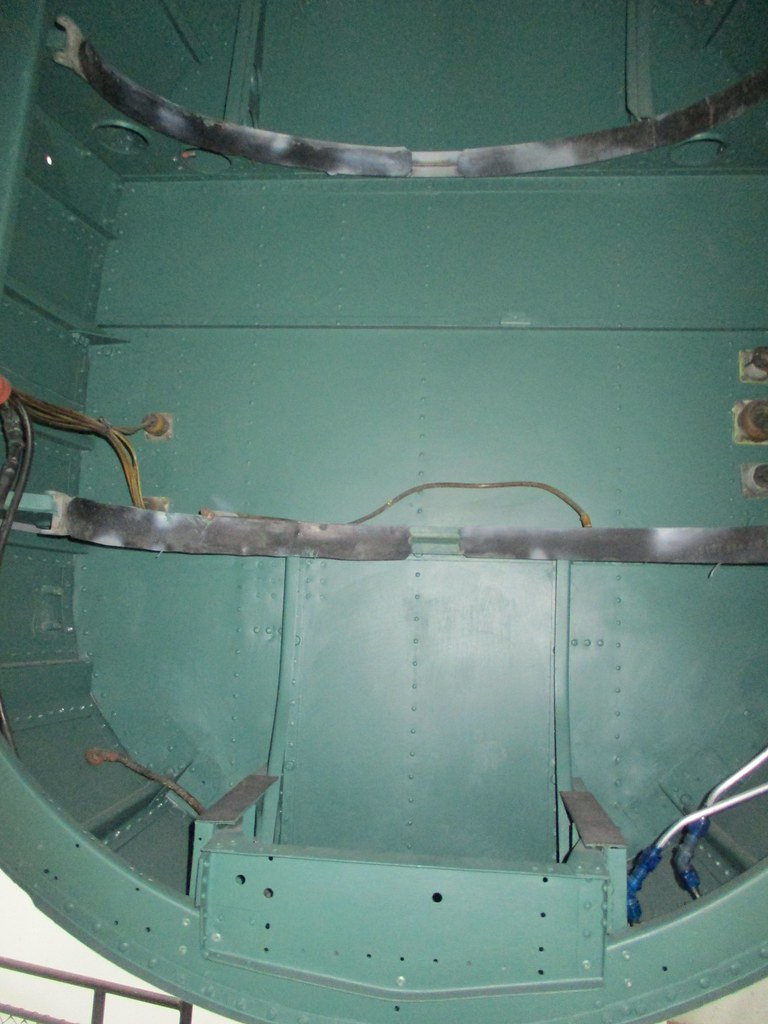 Now here is the completed tank, featuring Owen's graphics, as it has been lashed up in place to allow for measurements for the retaining straps to be determined.  You can see what a dominant feature in the rear of the bay the tank is which is why I was so hell bent on getting one if it was at all possible! Work target for the week is the second rear door with a view to it and the first front one going on...fingers crossed. |
|
|
|
Post by Antonio on Apr 14, 2024 8:49:09 GMT 12
Magic Man !!
|
|


