|
|
Post by kiwi on May 14, 2007 23:25:17 GMT 12
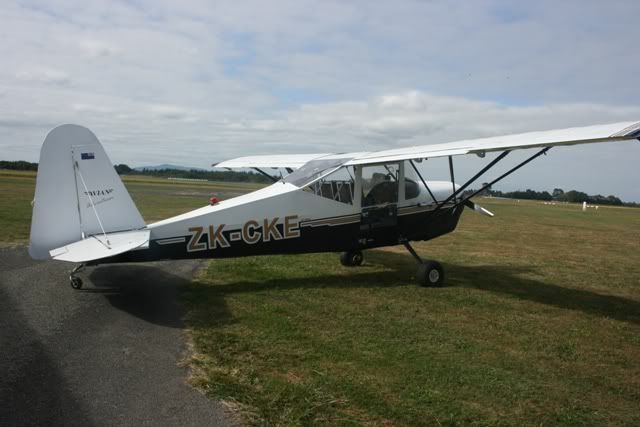
I believe the "nose art" is the 5 Sqn emblem and that the serials are not thought to have been carried or at least not visible in photos , but would have been in Black .
|
|
|
|
Post by Bruce on May 14, 2007 23:33:41 GMT 12
They certainly took a big crew to launch these beasts! The tail beaching gear in visible in the second shot (well, part of it - the 3 erks at the back are steering the drawbar), but in the workshop shot, if you look closely, the tail is supported on a rather precarious stack of timber! this was possibly because of work on the hull in that area, or the beaching gear being required for another aircraft. On that final workshop shot, the Fin flashes appear to be the later narrow type, but with the lighting its hard to be certain. the other shots show full size, equal flashes. thanks for posting those pictures Kiwi, they hold a wealth of information.
|
|
|
|
Post by Bruce on May 14, 2007 23:35:14 GMT 12
oh. I also love the Ocean liner type opening portholes in the hull - dont they look great!
|
|
|
|
Post by Dave Homewood on May 14, 2007 23:55:48 GMT 12
Crikey, you're right, there is a stack of firewood holding all that weight. That is how you should display the Singapore model, on a base with the stack of wood supporting it. It'd make a great talking point when people see the model, and easy to do.
I love the portholes too. The whole design smacks of elegance and luxury, and that's what I was told is they were very luxurious for military aircraft.
|
|
|
|
Post by Dave Homewood on May 15, 2007 16:26:41 GMT 12
Here is the wider view taken from Contact in March 1945 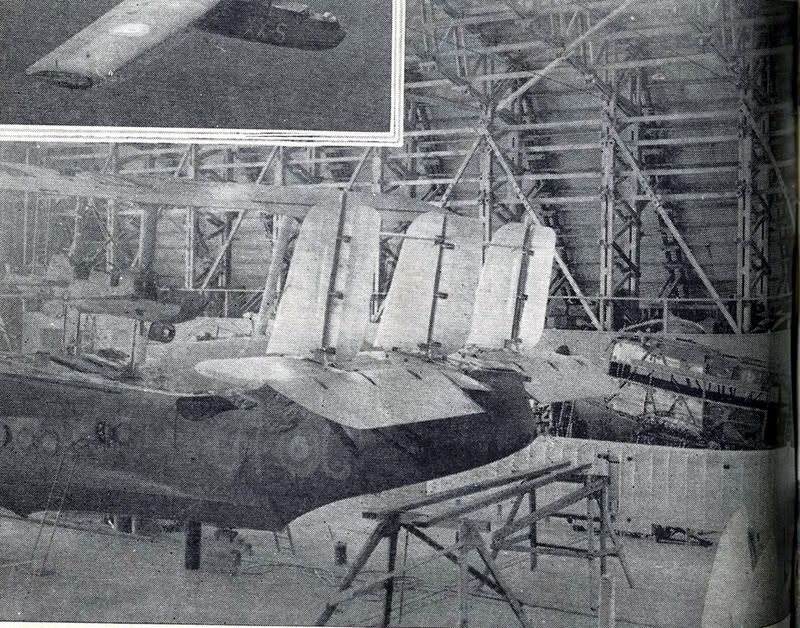 |
|
|
|
Post by Bruce on May 15, 2007 16:39:53 GMT 12
That looks like a Dominie fuselage behind the the vincent wing - the angled bracing across the window openings is distinctive. (And Dominies were definitely in Fiji at the time - deteriorating rapidly!) I wonder what OSH would think about the trestles behind the Singapore tailplane - and that stack of timber....
|
|
|
|
Post by Dave Homewood on May 15, 2007 19:04:44 GMT 12
You're right. I was thinking Vincent because No. 5 Squadron operated them, but I wasn't sure it looked right. Too true I am certain now it is a DH89a Dragon Rapide (the Dominies wouldn't have been in Fiji at that time, only the Dragon Rapides). The Rapides were used by Unit 20, which became No. 4 GR Squadron, and then they formed the Fiji Communications Flight, RNZAF. I'd think this would probably be 1942 or early 1943. The Dominies never entered RNZAF service till September 1943, and the first of them arrived in Fiji in November 1943, by which time the Singapores were all sadly deceased.
This is possibly NZ557.
|
|
|
|
Post by Dave Homewood on May 16, 2007 14:19:20 GMT 12
I have just spoken with Mr Arthur Strother, who was a Flight Mechanic (aircrew) aboard the Singapores.
He confirms that '17 was made into a houseboat. He also says '12 was vandalised and broken up by the Americans.
He said he's sure the squadron codes were painted on in Singapore before they left for the ferry flight (which he took part in). He also confirmed that when beaching them, a dolly was attached under the keel and the rare of the planing hull.
The Singapores were never beached when operating at Suva as there was no slipway and they had no beaching gear. So it was only when they got to Lauthala that they could be taken out of the water. The beaching gear had arrived from Singapore by then.
He gave me heaps more info for my GR book too. He's the second Flight Mech on Singapores I have interviewed. Thanks Bruce for spirring me on to get round to doing this interview.
|
|
|
|
Post by Dave Homewood on Jun 3, 2007 18:21:42 GMT 12
How is the Singapore coming along Bruce? Any progress photos please? What's the fit and accuracy like?
I searched the net and can't find any reference to the kitset at all. Perhaps you're the first person to put it together.
|
|
|
|
Post by Bruce on Jun 3, 2007 20:49:58 GMT 12
I've been tied up a bit of late doing something as unimportant as putting fabric on the tail fin of my homebuilt! I am in tonight so should get back onto the Singapore. The kit is way better than the Andover, it has slightly heavier plastic and the fuselage halves fit quite well. The fuselage is built so far, and it hasnt required much in the way of filling at all - most is around the damaged chine areas which i have repaired sucessfully. I did have to add a little internal structure, as always in order to provide a positive wing alignment. The cockpit floor provided was also set too low so I have added a dummy floor on top of the kit one, with layout roughly based on the few drawings or photos I have of the inside of one of these boats. Its not detailed but it is enough to suggest that there is something inside. Generally its not a bad kit, but with so many multiples of everything (and a homebuilt I'm trying to make so progress on) its not going to be a quick build. I will try to post some pics shortly.
|
|
|
|
Post by Dave Homewood on Jun 3, 2007 21:22:28 GMT 12
Thanks Bruce. Good luck with it.
|
|
|
|
Post by Bruce on Jun 10, 2007 19:21:12 GMT 12
I'm making steadyish progress through all the multiple bits, here is a photo of the components completed so far: 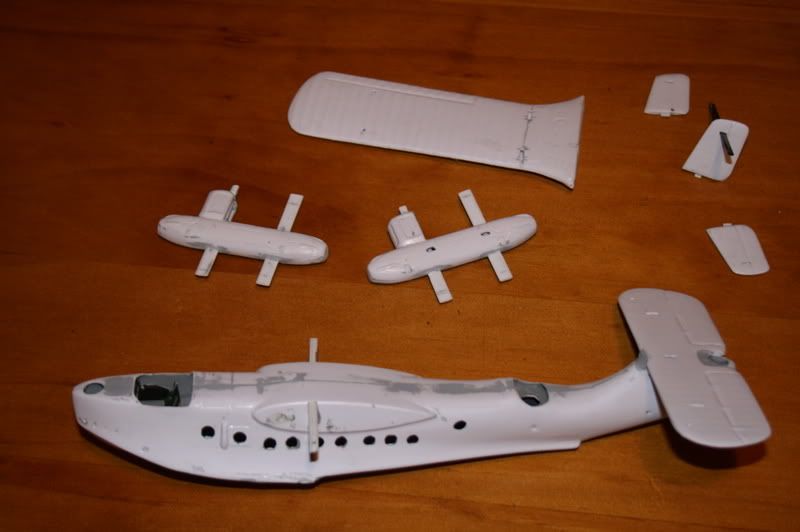 As far as vac forms go, this one is pretty good - note the minimal amount of filler on the fuselage. All the bits go together pretty well, so i should be able to get a reasonable finished product. |
|
|
|
Post by Dave Homewood on Jun 10, 2007 19:56:44 GMT 12
That looks good all right, almost looks like injected in that photo.
|
|
|
|
Post by Dave Homewood on Jun 18, 2007 15:58:07 GMT 12
Bruce, here are a couple more photos I've found that may be useful From Contact magazine 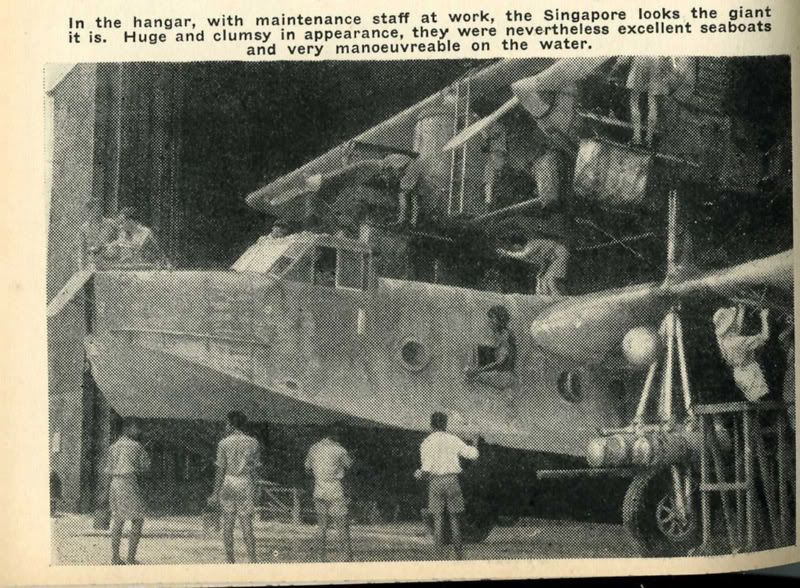 |
|
|
|
Post by Dave Homewood on Jun 18, 2007 15:59:18 GMT 12
And from RNZAFA News in Winter 1991 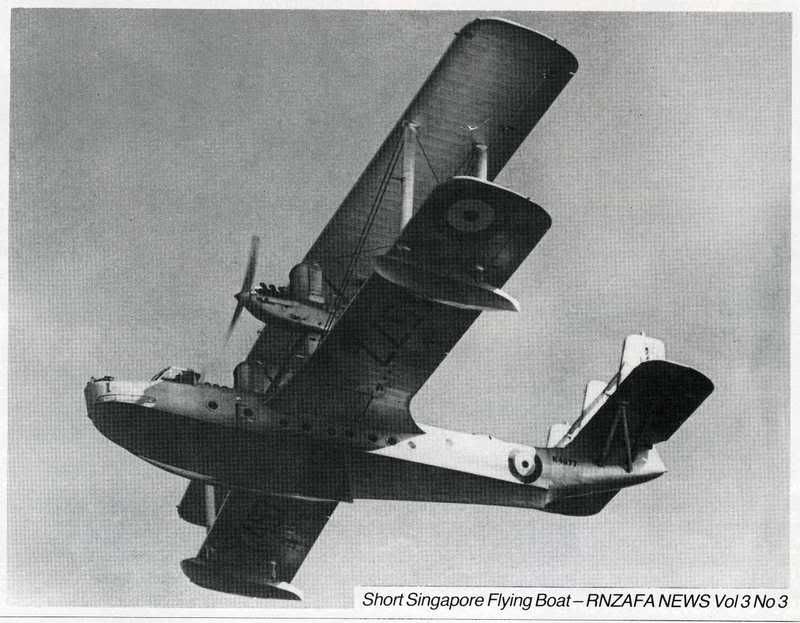 |
|
|
|
Post by Bruce on Jun 18, 2007 21:48:26 GMT 12
Thanks for those pics Dave, The last one is particularly useful as it shows the shape of the exhaust pipes on the Nacelles. I have just received a set of Aer Club kestrel "Elephant ear" exhausts, and that photo proves they are correct. The only problem is I only ordered 1 pack of 4 exhausts when I should have ordered 2 - there is a minimum order for buying the sets - and at 85p (UK) for the exhaust set I'm well short (5 pound minimum) does anyone want to order any other Aeroclub bits and combine shipping? (see www.aeroclub-models.com/ or alternatively, does anyone have the AV009 exhaust set that I can buy? PM me if interested. |
|
|
|
Post by Dave Homewood on Jun 18, 2007 22:33:28 GMT 12
Maybe one of our UK members can pick a set up for you Bruce and post it over?
I'm glad the photos have been useful. I really like the one of the Singapore on the hard, with all the activity around it. Note how the engine cowl hinges downwards. And the flap in the nose. It's also a useful shot for your scratchbuilt wheels I'd think.
|
|
|
|
Post by Dave Homewood on Jun 18, 2007 22:58:31 GMT 12
Here's a great photo of '18 taking off from Charles Darby's 'RNZAF - The First Decade"  |
|
|
|
Post by Bruce on Aug 6, 2007 22:11:04 GMT 12
IT'S FINISHED!!!!!  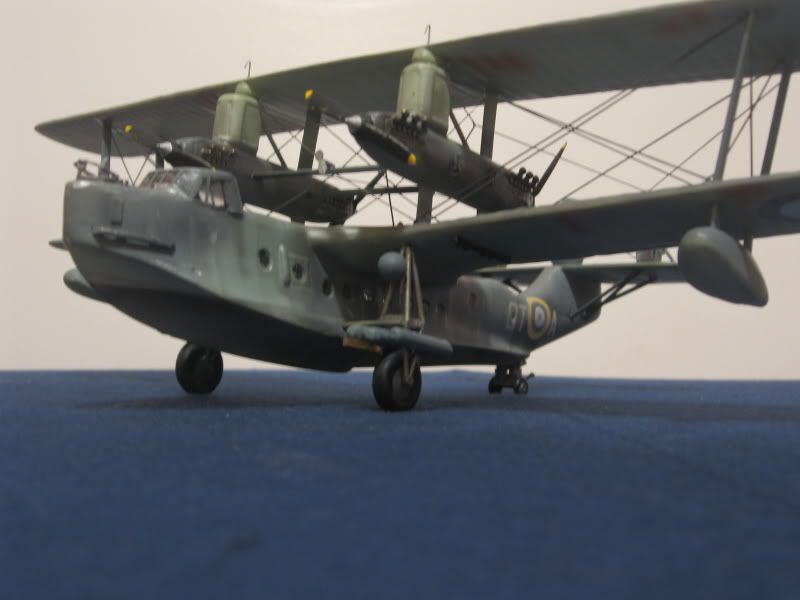 Due to the huge interest and support I have had from the forum, I have put an extra special effort into the Singapore and I am quite frankly chuffed with the result. At daves suggestion I actually airbrushed this one - thanks forthe loan of your airbrush Dave, I found it so neat i went out and brought my own. I found the techniques to be pretty easy, I did a bit of research on the net and practiced on an old dead Canberra PR9 (Loosely disquised as a BI-12). Being really pleased with the airbrush finish, I decided I would put some rigging on, and using a technique suggeste on one of the other threads, I used some black elastic, and cut it apart to get single strands of the rubber filament, which hangs together really well with a few little drops of Cyano. For decals I used standard RAF roundels a set I had lying around and was going to use get talon to print some codes. He advised that his printer doesnt do light grey very well, so I Purchased some Microscale code letter sets on eBay, and they do the job very well. Thanks kiwi for the exhaust sets, I'll be in touch about exchanging the surplus Demon parts. I had to modify the 2 rear props to pusher config. these are out of the Aeroclub demon sets(white metal) but of course the blades are around the wrong way for pusher use. I cut the blades off with my Bandsaw and resoldered them in the new position, then cleaned up the profiles with sandpaper. The beaching gear is all scratchbuilt using plastistruct strip and rod, and a set of Vickers Wellington Mainwheels. The spherical floatation devices on the top of the gear is made out of "Knead it" Epoxy putty. anyway, some more photos: 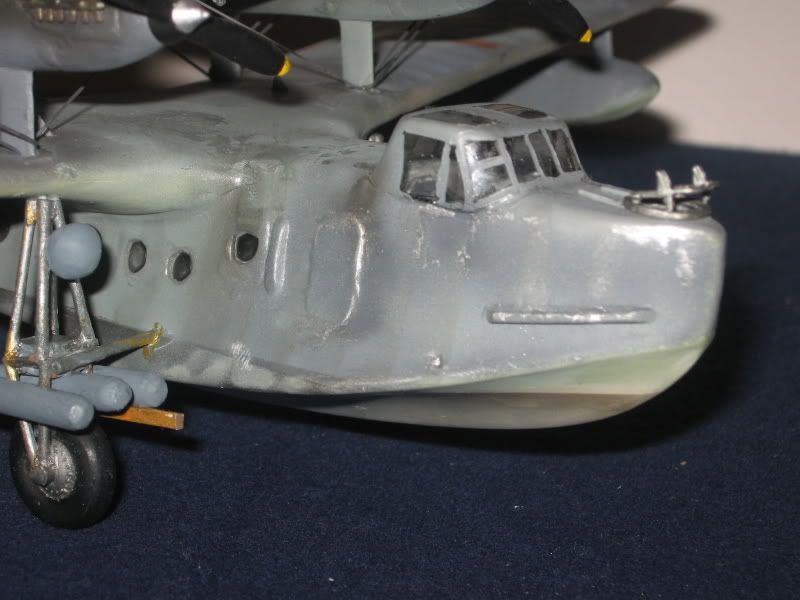 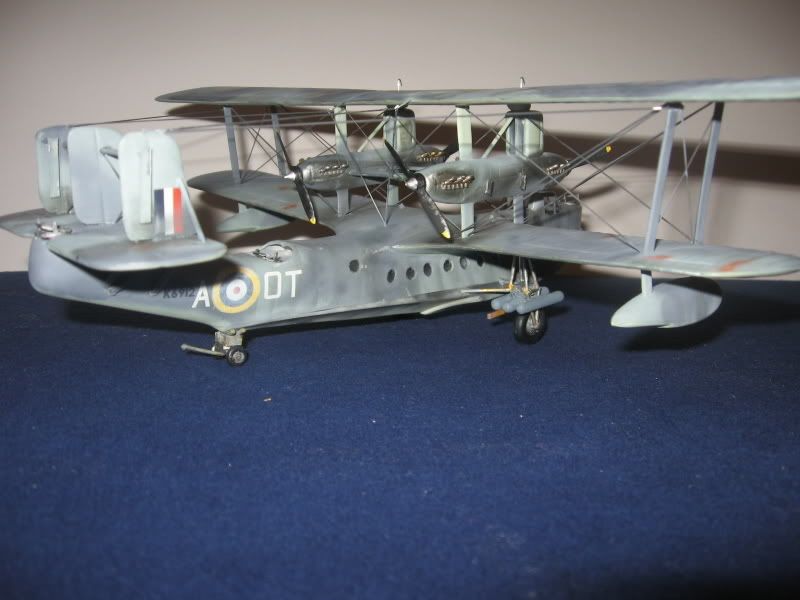 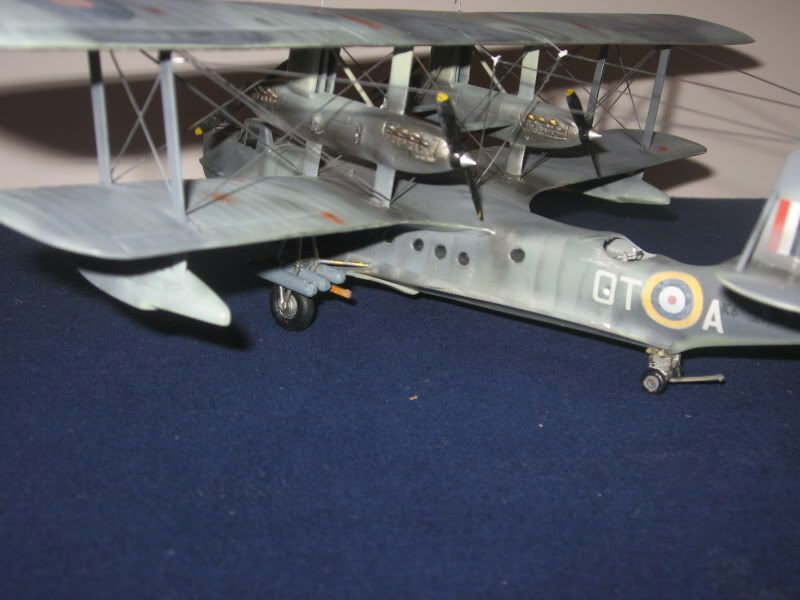 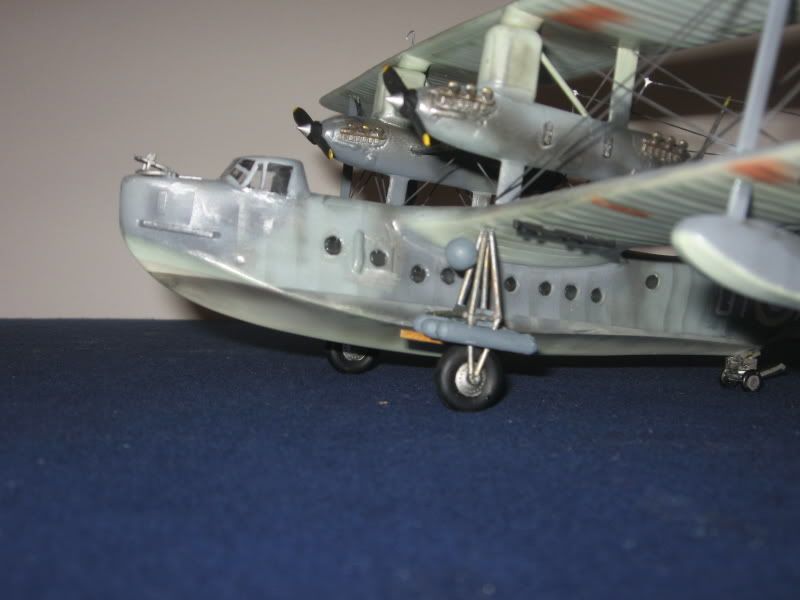 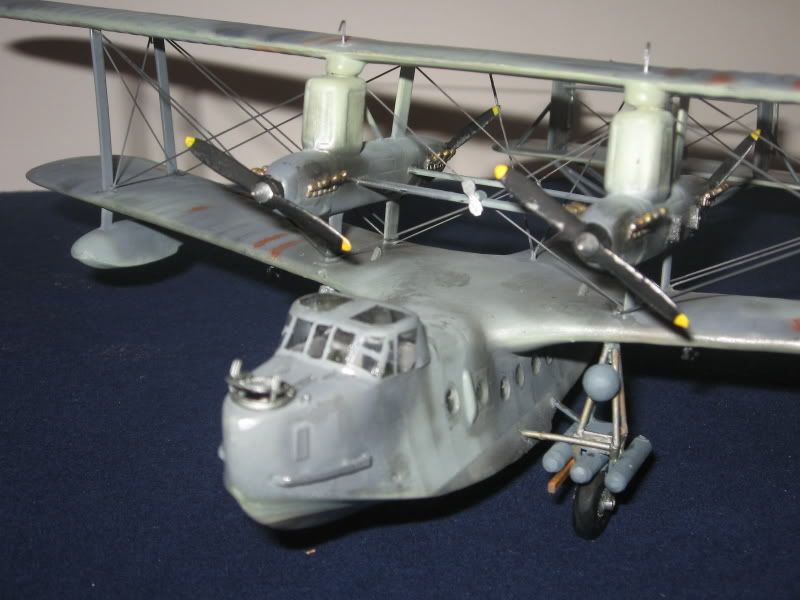 Just as an experiment to see how accurate the weathering looks, lets try the period photo trick: 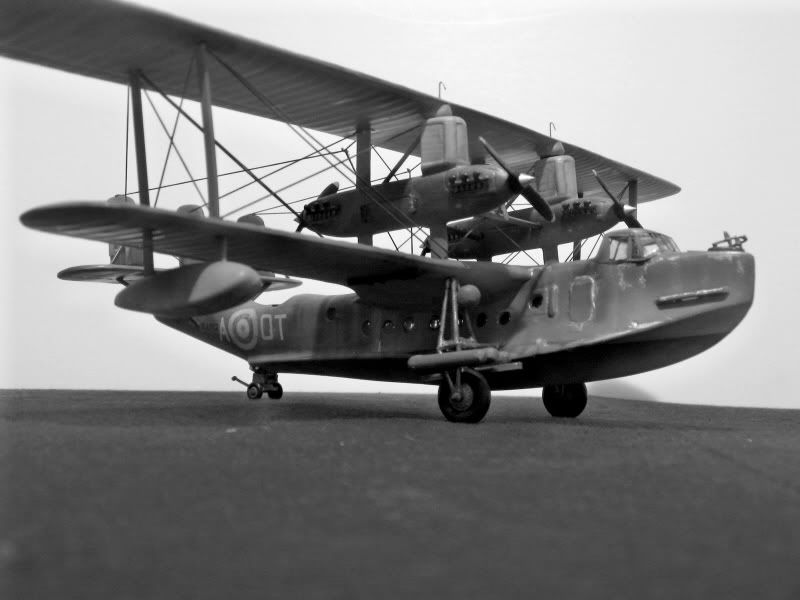 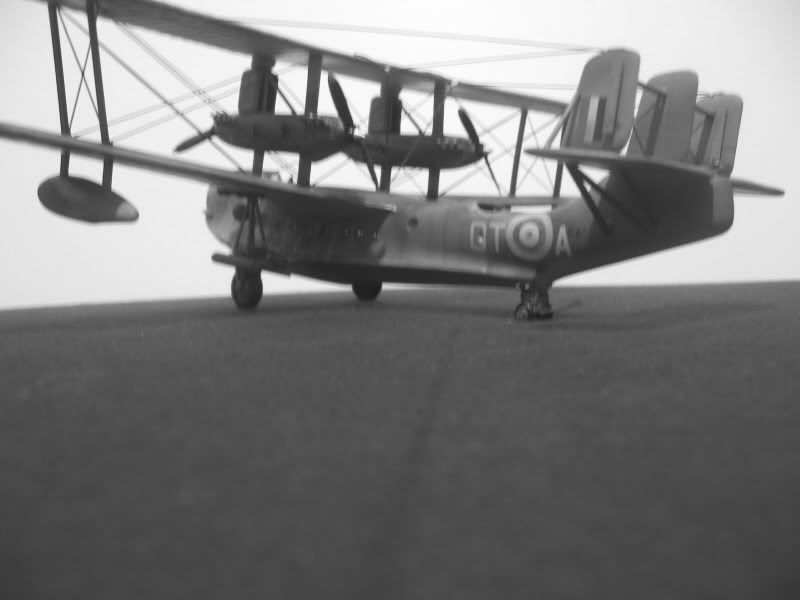 Once again, many thanks for your support, photos and comments, they have made a huge difference to how this model has turned out.  |
|
|
|
Post by Dave Homewood on Aug 6, 2007 22:58:53 GMT 12
Fan-bloody-tastic!!
That really looks the dog nuts! It's hard to believe it's a vacuum formed kit. Well done Bruce.
The paint work looks superb, I doubt you'd have gotten such a great finish with hand brushing.
You're going to need a case for it now, dusting that will be a nightmare.
|
|