|
|
Post by Bruce on Jun 12, 2007 22:50:09 GMT 12
Its Term break time at the university (Where I work) so I have taken a week off work to do some work on the homebuilt (My own - design Avian Adventurer). Today I managed to get all the fabric on the fuselage, which is a massive leap of visual progress. I was assisted by fellow SAA member Graeme Colquhoun who will be using the same covering system on his aircraft, so he gave me a hand in order to gain some experience. As many here would be unfamiliar with the process, here are a few pics. The system being used is "Stits Polyfibre" which uses Polyester (Dacron) Fabric and special Acrylic Laquer based filler and UV protection coats. 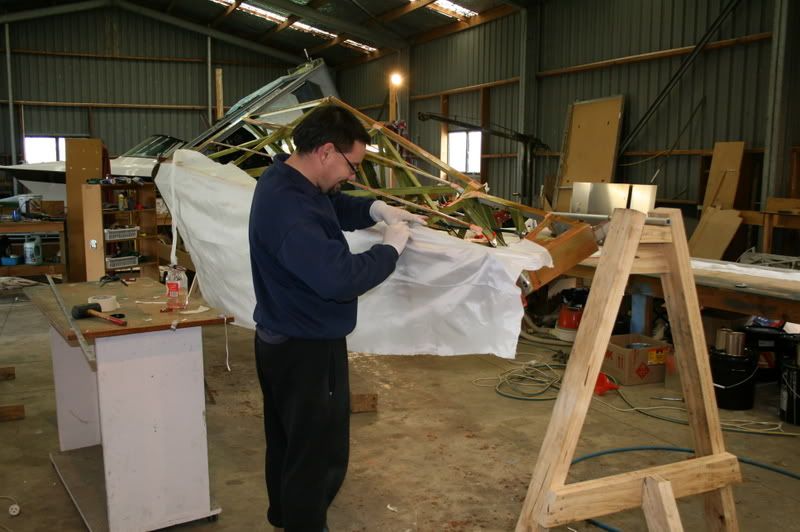 The fuselage is mounted on a "Rotisserie" jig, which can be locked at a number of useful angles. It is covered with 4 pieces of fabric starting at the bottom. Using the "Polytac" adhesive, the fabric is glued in place and trimmed to fit tidily. It is then heat shrunk using a carefully calibrated iron, which causes it to become drum tight.  The process is then repeated for each side, once again heat shrinking after gluing.  The top panel is finally fitted, and the fuselage is closed in (at long last - nearly 6 years after starting the process) that was today's work - tomorrow the first filler coat goes on, then the reinforcing tapes... I will try and get some pics, you can also follow the project in the photo gallery on the SAA web page: www.saa.org.nz/modules.php?set_albumName=proj_cooke&op=modload&name=gallery&file=index&include=view_album.php&page=1 |
|
|
|
Post by Dave Homewood on Jun 12, 2007 23:10:46 GMT 12
Hey Bruce, that looks really good now. It's beginning to really look like a plane!
Have you done the wings yet?
|
|
|
|
Post by corsair67 on Jun 13, 2007 17:50:22 GMT 12
Thanks for posting those images, Bruce. Good to see the process as it happens.
What's the life expectancy of that type of fabric and glue combination?
|
|
|
|
Post by Bruce on Jun 13, 2007 17:56:54 GMT 12
I'll have to check the manual. I beleive it is guaranteed for 20 years, but if done by the book and the aircraft is kept hangared, it theoretically will last indefinitely, there isnt anything that degrades on it. the important thing is to get a decent layer (3 coats) of the aluminium pigmented UV potection coats. Although the fabric doesnt rot, UV light does weaken it, if the "Silver" coats are good, then that is no longer an issue.
|
|
|
|
Post by Bruce on Jun 14, 2007 19:33:17 GMT 12
Excellent visual progress continues.... On wednesday I gave the fuse the first coat (brushed on) of "Poly Brush" filler/ sealer. the next step was to add the various reinforcing tapes, gussets, inspection rings, cable fairings etc.  Although was interrupted by the Wanganui Aero work Cresco team orbiting the workshop at low altitude whilst holding for thier performance at the Fieldays opening! 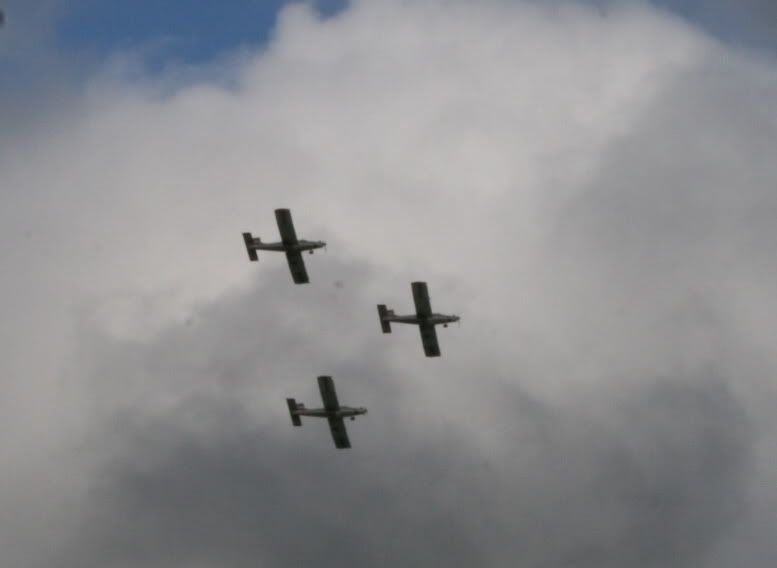 By the time I got my gloves off and the camera ready, they were moving out of range, but they obviously chose a good point to orbit! 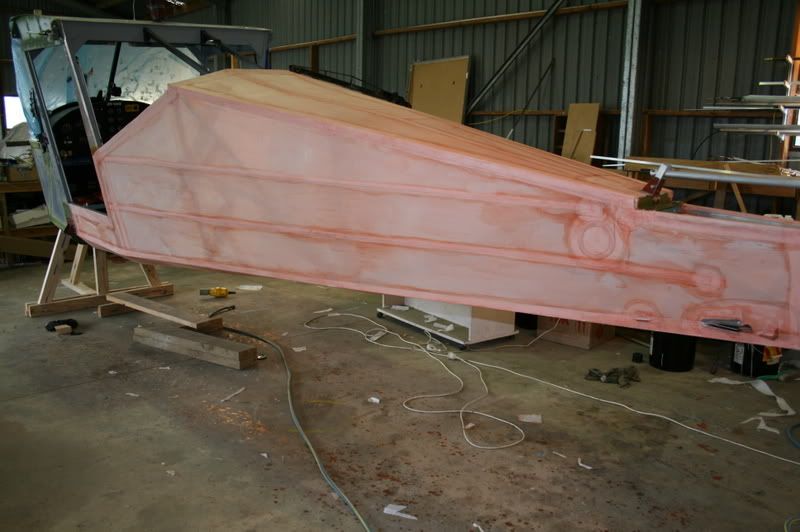 Finally all the tapes were on, the next step (Carried out Thursday) was to Carefully work over everything with a cooler iron to smoooth out the lumps and wrinkles, then give the whole lot several sprayed coats of Poly Brush to seal the weave. Once the Polybrush had dried (Fairly quick) it was time for 3 coats of Silver "Poly Spray" to provide UV protection 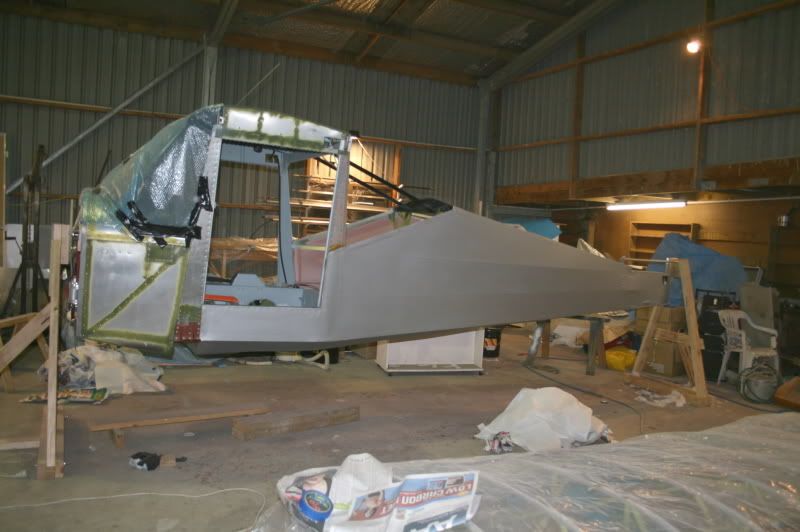 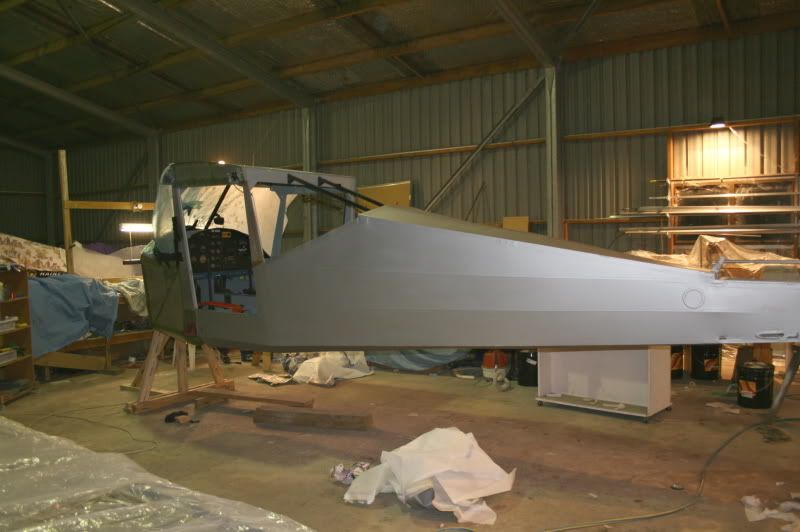 The next step is to fit the rear windows and prime the bare metal areas. then the white top coat will go on, but this will be a week or so away yet. Just as well my shoulder is aching from weiding the paint gun all day! |
|
|
|
Post by Dave Homewood on Jun 14, 2007 19:46:25 GMT 12
That looks really neat Bruce, you must be chuffed at the results. It actually looks great in silver, but it will be good to see the white top coat.
|
|
|
|
Post by Bruce on Jun 14, 2007 19:55:11 GMT 12
the planned colour scheme is crisp white with dark midnight blue undersurfaces and fine gold cheatlines, which will look pretty smart - but yeah, the silver isnt too bad....
|
|
|
|
Post by Dave Homewood on Jun 14, 2007 20:01:03 GMT 12
Ah, so different from your model then. Sounds like it'll be rather striking.
|
|
|
|
Post by corsair67 on Jun 15, 2007 11:23:10 GMT 12
Bruce, that's looking great.
Haven't you built yourself a spraypainting robot yet? ;D
|
|
|
|
Post by Bruce on Jun 28, 2007 22:24:35 GMT 12
After the fabric went on I installed the rear windows and masked everything for painting the top coat. As I was back at work that meant working in VERY cold conditions during the evening! (which explains why progress on the Singapore model is pretty slow!  ) Last weekend I primed the remaining bare metal areas then got the white top coat (part of the PolyFibre system - insignia white) applied. Fortunately I had managed to overhaul my pressure pot spray rig (Never lend these to friends....) so it wasnt as much of a strain on the arms. The last couple of nights I have started masking out the colour trim in preparation for the colour coats which should hopefully go on this weekend.  |
|
|
|
Post by Dave Homewood on Jun 28, 2007 22:44:24 GMT 12
Hey, that's looking really cool.
I was wondering after seeing the uncovered wing under plastic in the foreground, I have seen over the years r/c modellers covering their aircraft's wings with clear solarfilm (or whatever it's called) occassionally. Especially the little freeflights. Would it be legal to cover a real aircraft's wings with clear skin or panels if you could find the right material - so the wings are see-through and give even better all around view? (especially low wing-ers).
Or would an invisible plane (like Wonder Woman's) be a hazard to other traffic. Just a thought. I doubt there is covering material availble in clear.
|
|
|
|
Post by Radialicious on Jun 28, 2007 23:40:52 GMT 12
Dave, there is an airworthy Curtiss Jenny in the USA covered in an invisible film made by 3M. It is pretty cool to look at. Many of those old aircraft have detail that is too pretty to hide behind fabric. At Omaka we have an AVRO 504K in fairly advanced state of rebuild and it seems a shame to hide the work that has been done. In saying that, if you are putting such effort into perfection and originality, Glad Wrap is probably out of the question.........
|
|
|
|
Post by Dave Homewood on Jun 29, 2007 0:21:42 GMT 12
I hadn't heard of that Jenny. I agree it's a shame to cover up the work sometimes, but often the colour scheme makes the aircraft too. Still, it'd be cool to have a fully clear glide or ultralight - with all the ribs etc made from perspex too.
|
|
|
|
Post by Bruce on Jun 29, 2007 8:20:20 GMT 12
During World War I, the germans experimented with covering several aircraft with a material called Cellon, which was derived from celluloid (unfortunately that made it also highly flammable!) in an attempt to make an "invisible" aircraft. Unfortunately it had the opposite effect as the various reflections / refractions of the sunlight made them extremely visible and nearly dazzled the pilots!. At least one Fokker Eindekker was covered this way, also a large twin engined bomber (which also had other unconventional features and was dramatically unsucessful).
More recently The Paul McCready human powered "gossamer" aircraft were covered in clear plastic film, and some modern solar powered ultra - ultra lights have the clear Mylar covering similar to that used on the Curtiss Jenny mentioned above.
The drawback to the clear coverings is as they are not fibrous, if the covering starts to split, the whole lot goes, therefore some fairly high tech material needs to be used for anything but the lightest machines.
|
|
|
|
Post by Peter Lewis on Jun 29, 2007 11:09:14 GMT 12
Yes Bruce, I was thinking of the Gossamer Albatross.
Mind, as a pilot, I'm not so sure that I'd want everyone able to see right through the aircarft and notice exactly what I was doing. Bit like flying a goldfish bowl.
|
|
|
|
Post by Bruce on Jun 29, 2007 14:09:14 GMT 12
The Adventurer is a bit of a Goldfish bowl even without clear coverings - there is an awful lot of window area! (The doors - seen masked - are clear view - plus roof light windows and the big rear windows as well....). Aparently the Gossamer "pilot / riders" suffered dehydration as it was like doing a workout in a glasshouse.
|
|
|
|
Post by Dave Homewood on Jun 29, 2007 15:50:14 GMT 12
Your aircraft sounds like it'll make a good cameraship Bruce. What top speed do you expect it to achieve roughly?
|
|
|
|
Post by corsair67 on Jun 29, 2007 16:18:16 GMT 12
Looking great; she's coming together nicely, Bruce.
You must be happy to have your 'airplane' at this stage now.
|
|
|
|
Post by Bruce on Jun 29, 2007 16:56:26 GMT 12
its an AEROplane craig - none of this American spelling here!  She should do at least 100kts by my reckoning, maybe 120. considering its a similar size to a Cessna 152, but a lot lighter, with 160hp and a variable pitch prop, that should be easily acheivable. Wouldnt be a bad camera platform, although dual wing struts with Jury struts may get in the way a bit. The doors are capable of being opened (intentionally...) in flight, so would be a good camera ship for air to air work. I was originally intending to build a forward looking camera mount into the wing leading edge but space around the structure was a bit tight, so I left that out for now. I'll probably do an air to air session with the Adventurer a subject aircraft as well once test flying is out of the way. John King is quite keen to get some pics for "Sport Flying" Magazine. |
|
|
|
Post by corsair67 on Jun 29, 2007 18:11:31 GMT 12
Airplane - I just had to test out Dave's spell correctioner! ;D
|
|

