|
|
Post by dewobz on Aug 28, 2013 17:13:23 GMT 12
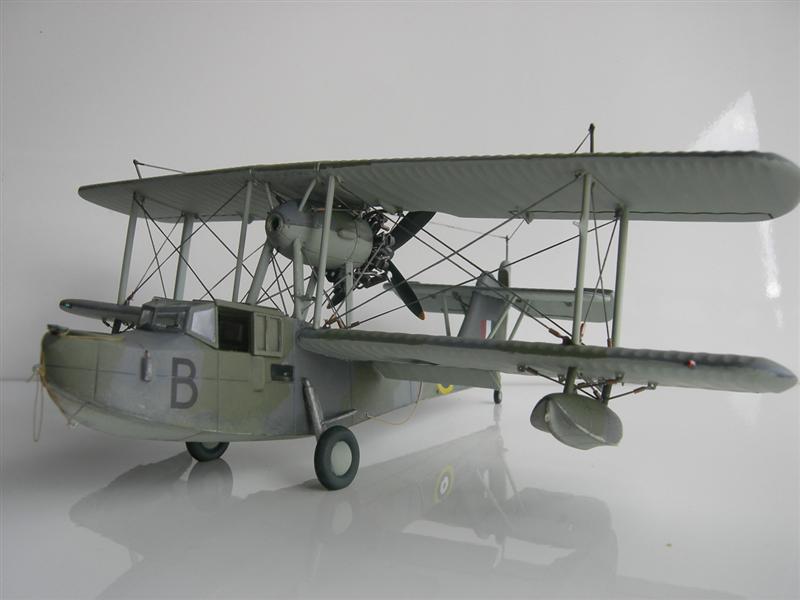
I am also currently building the old Smer (& Merit I think) 1/48 Supermarine Walrus as an RNZAF example already wearing NZ serials but still in its original camouflage as seen in Weekly Review No. 106 (1943) posted on here recently. The footage features mostly NZ152 'B' but also shows a Walrus entering the water at Hobsonville wearing the black code letter 'F'. See Weekly Review No. 106 @ 2.56mins. I wonder if anyone can confirm this aircraft's serial number? I suspect it is NZ156 but adf.serials states NZ156 was not received until September 1944, which means it shouldn't really be in the film. Perhaps 'F' is NZ154 ...? Anyhow, I will make NZ152 'B' if I can't confirm another one. The Smer kitset is fairly basic and dated, the fuselage covered in engraved panel lines, rivets and yes, insignia impressions. I have used alot of Mr Surfacer attempting to fill that and scribe some new (what I see as) 'essential' panel lines -  WALRUS 4 040 (Medium) WALRUS 4 040 (Medium) by Wally Hicks, on Flickr 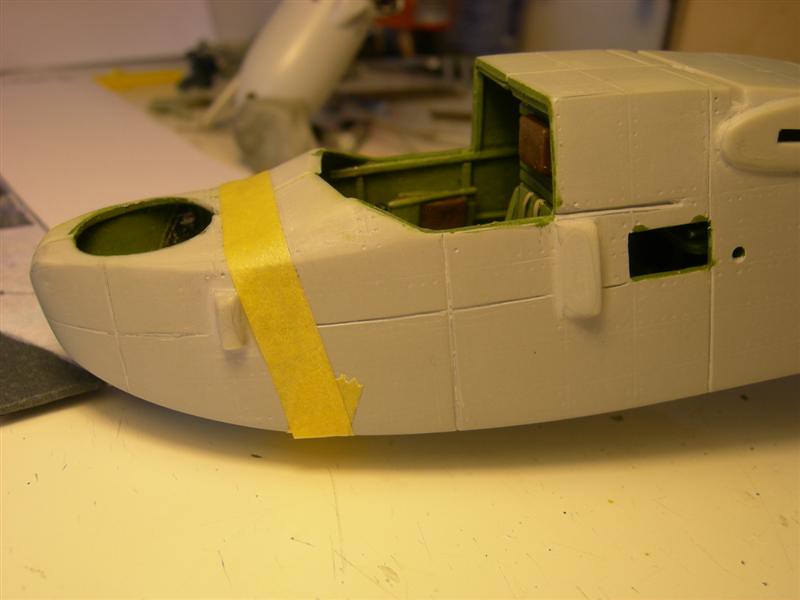 WALRUS 4 032 (Medium) WALRUS 4 032 (Medium) by Wally Hicks, on Flickr The 7 part cockpit (not including pilot figure) is simple but fairly anatomically correct and has the makings of a worthwhile interior, so I have detailed it up in my 'moderately correct and somewhat representative' fashion using both actual & model references from online. 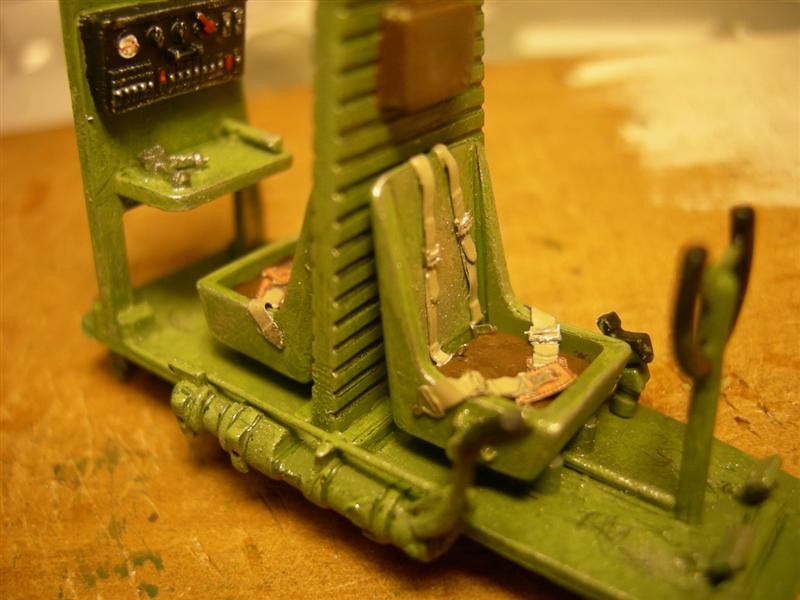 WALRUS 3 001 (Medium) WALRUS 3 001 (Medium) by Wally Hicks, on Flickr 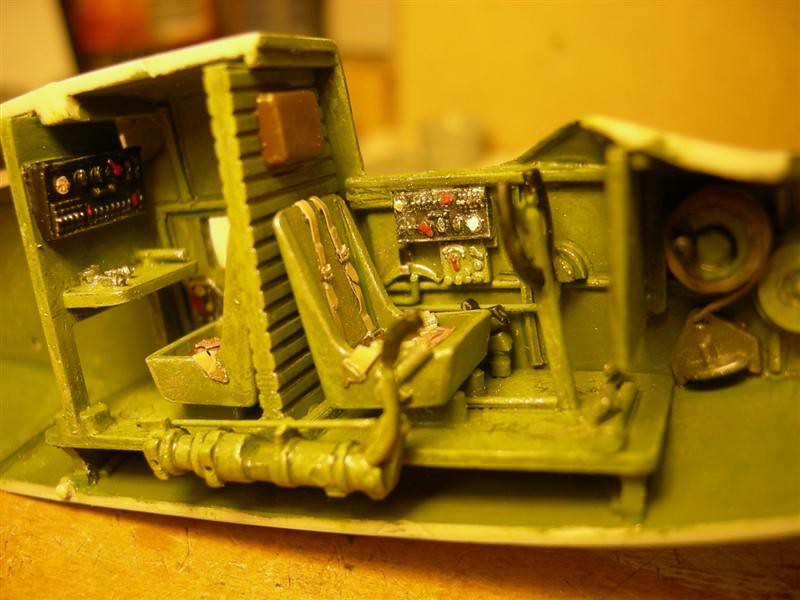 WALRUS 3 003 (Medium) WALRUS 3 003 (Medium) by Wally Hicks, on Flickr 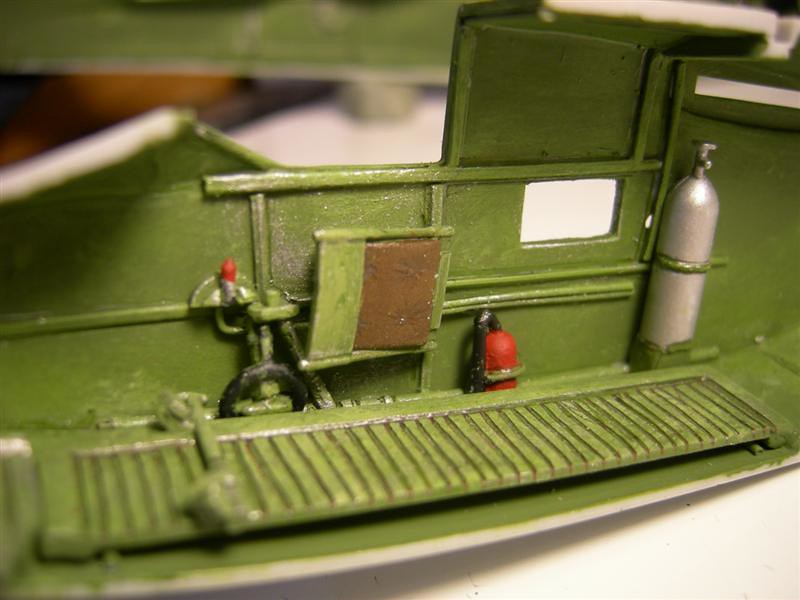 Catalina XX-O & WALRUS 2 042 (Medium) Catalina XX-O & WALRUS 2 042 (Medium) by Wally Hicks, on Flickr 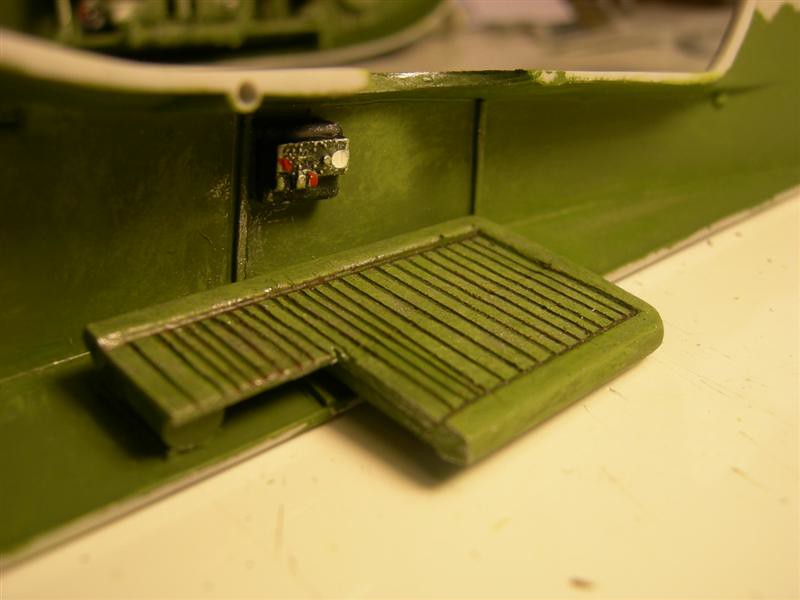 Catalina XX-O & WALRUS 2 043 (Medium) Catalina XX-O & WALRUS 2 043 (Medium) by Wally Hicks, on Flickr The fuselage halves fit together like so - 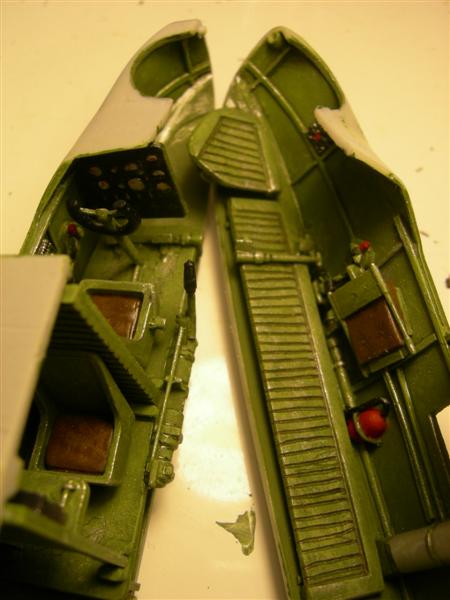 Catalina XX-O & WALRUS 2 046 (Medium) Catalina XX-O & WALRUS 2 046 (Medium) by Wally Hicks, on Flickr - to create the walkway, co-pilots folded seat and column, pedals and the undercarriage hand pump (exaggerated here) etc etc, with tread plates in the front & rear 'turrets' - 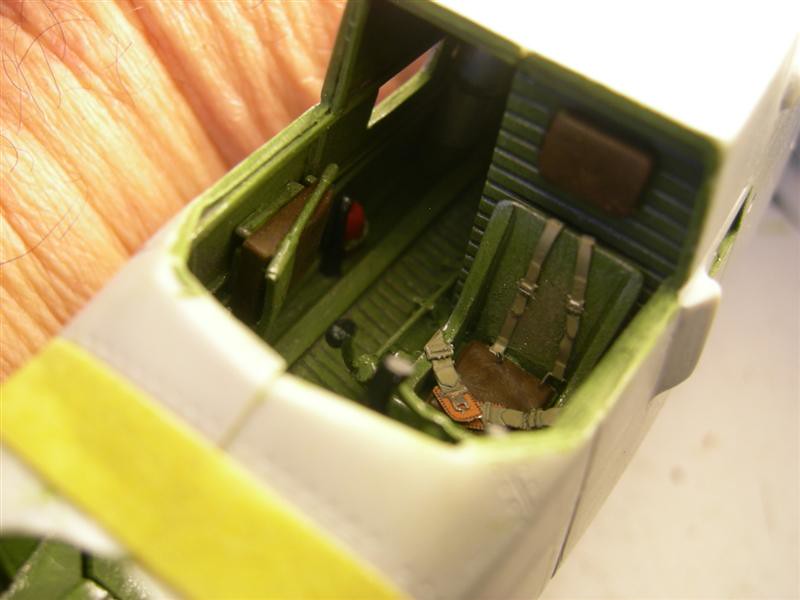 WALRUS 4 039 (Medium) WALRUS 4 039 (Medium) by Wally Hicks, on Flickr 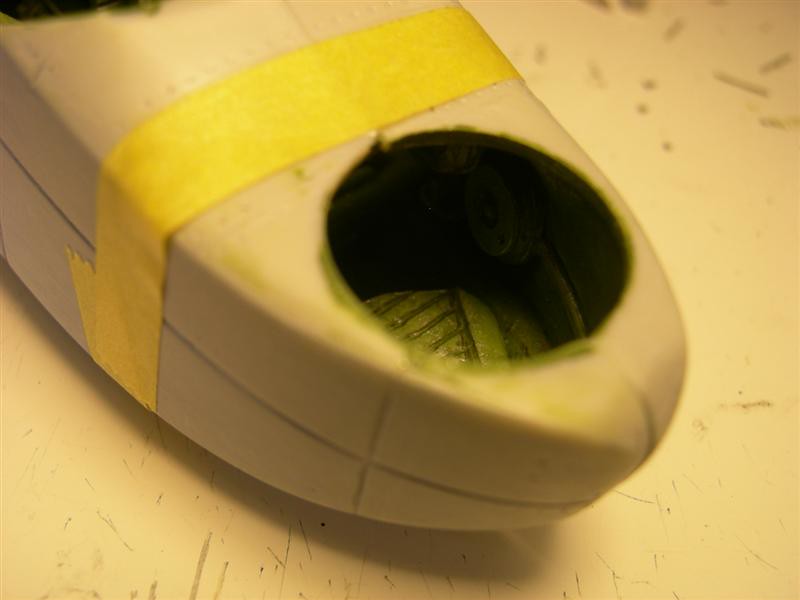 WALRUS 4 037 (Medium) WALRUS 4 037 (Medium) by Wally Hicks, on Flickr 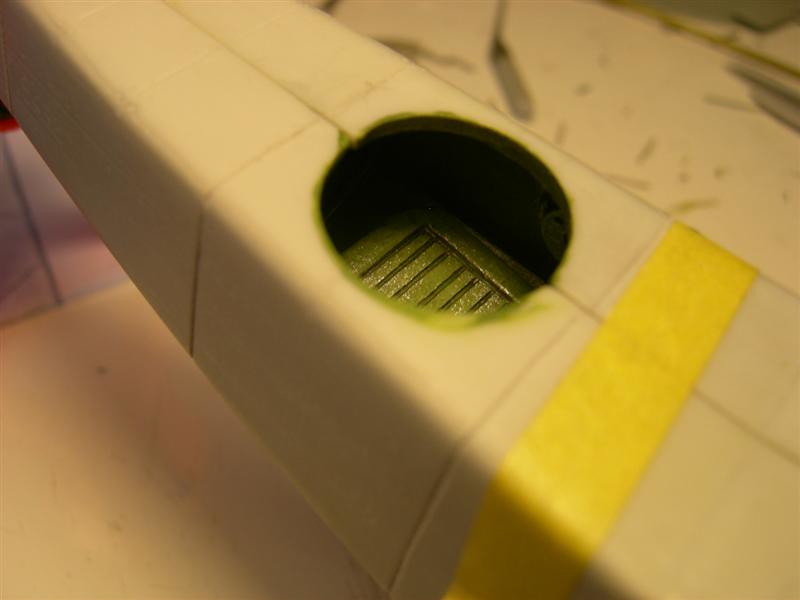 WALRUS 4 036 (Medium) WALRUS 4 036 (Medium) by Wally Hicks, on Flickr I've also had a go at detailing up Smer's very basic one-piece engine - a crankcase, cylinders & con rods - once again using actual & model refs for the Pegasus X motor. I've added exhausts, ignition wires, rockers and (what I take to be) injector pipes and external oil coolers or filters - 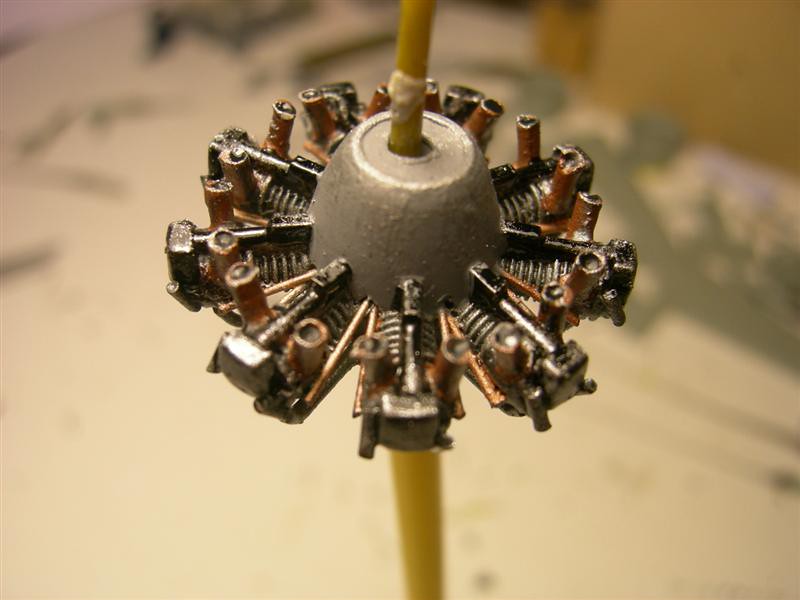 WALRUS 4 017 (Medium) WALRUS 4 017 (Medium) by Wally Hicks, on Flickr 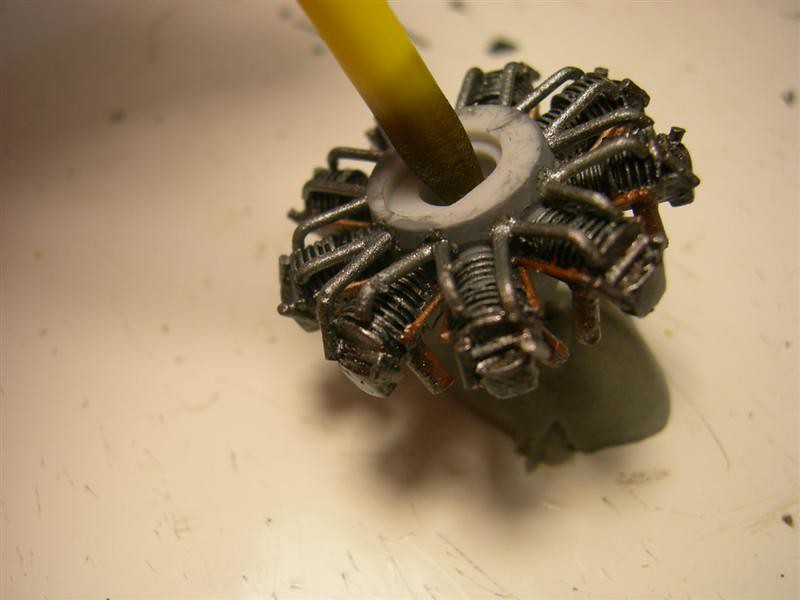 WALRUS 4 018 (Medium) WALRUS 4 018 (Medium) by Wally Hicks, on Flickr 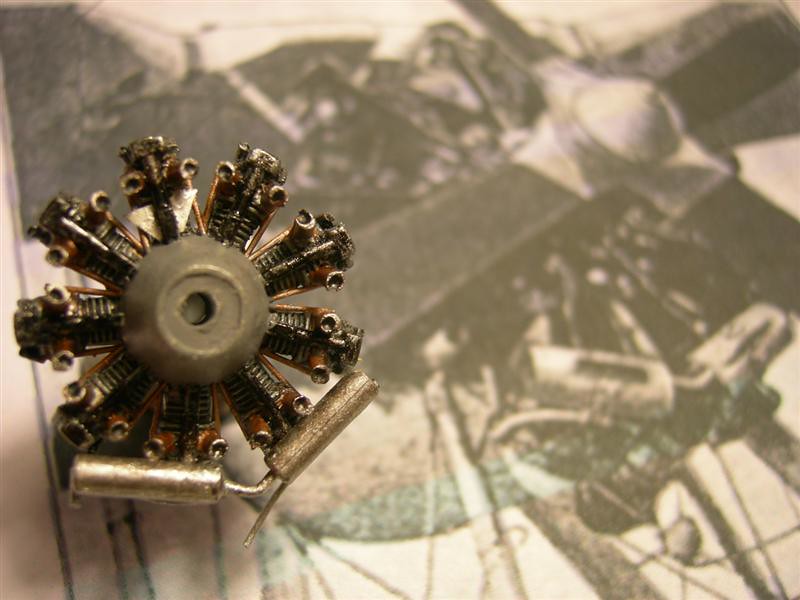 WALRUS 4 019 (Medium) WALRUS 4 019 (Medium) by Wally Hicks, on Flickr 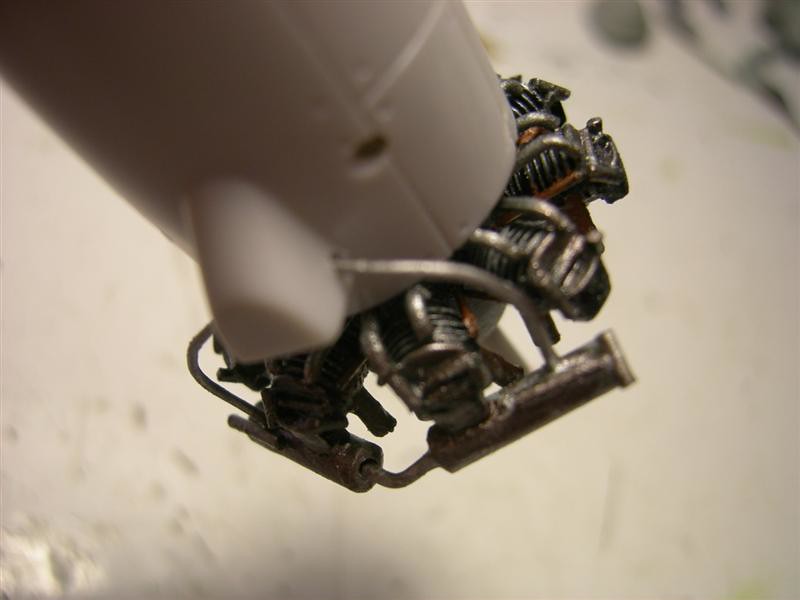 WALRUS 4 028 (Medium) WALRUS 4 028 (Medium) by Wally Hicks, on Flickr 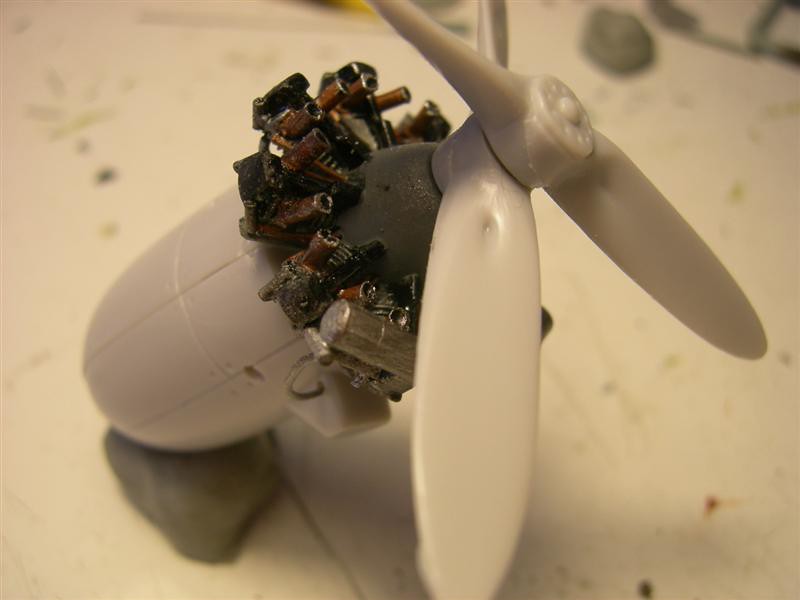 WALRUS 4 029 (Medium) WALRUS 4 029 (Medium) by Wally Hicks, on Flickr Now I've gotta get my head around biplane rigging, which I don't recall ever having done ...? Advice welcomed. Cheers (and anyone know which Walrus was coded 'F'?) Wally. |
|
|
|
Post by davidd on Aug 29, 2013 13:22:01 GMT 12
Wally,
Just a suggestion, but that ugly "lump" on the port side of the nose (on your second view) is actually the outside air temperature guage (or in reality the fairing that covers it) and is the same as found on the side of the nose of the Anson. Many British aircraft of that era had similar installations. The fairing was very much like a short section of a Venetian blind and provided (I think) a low pressure zone behind so that the actual probe was not super-cooled. Modern light aircraft often have a simple probe poking out throught the windscreen - I guess this style has some sort of correction factor built in.
David D
|
|
|
|
Post by dewobz on Aug 29, 2013 17:07:32 GMT 12
davidd, that is very useful information, thank you. I'll see if I can detail that area. Kiwi Walruses appear to have had a similar fairing on the starboard side which does not appear on the kitset - 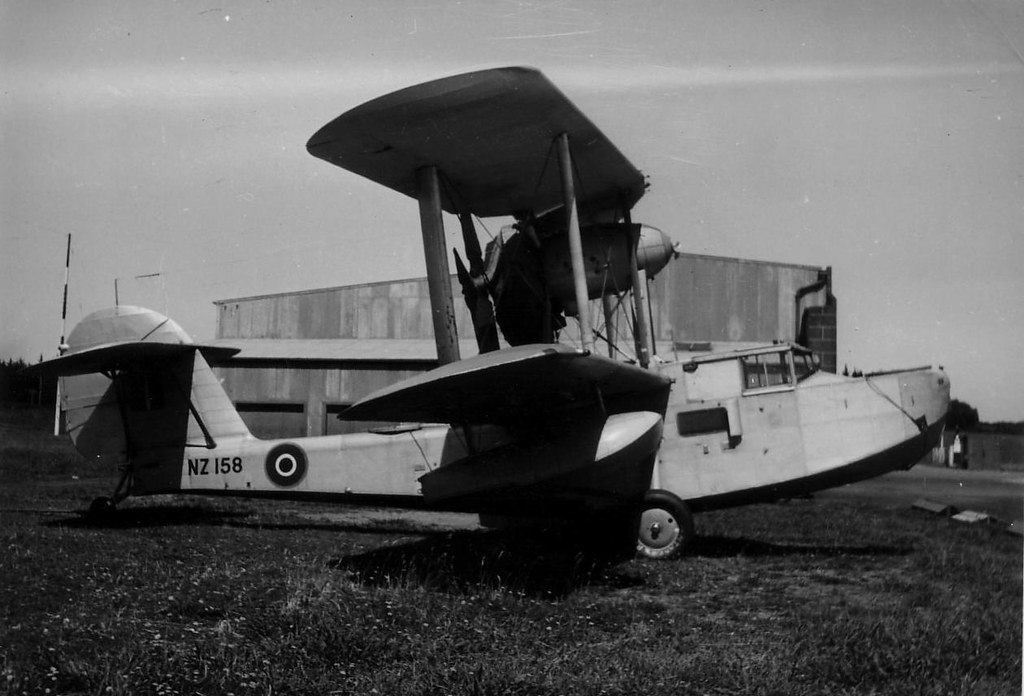 RNZAF_walrus3 NZ158 RNZAF_walrus3 NZ158 by Wally Hicks, on Flickr Or could this temp gauge fairing have sometimes been installed starboard or been interchangeable from side to side, because it does not appear in this shot of NZ151 - 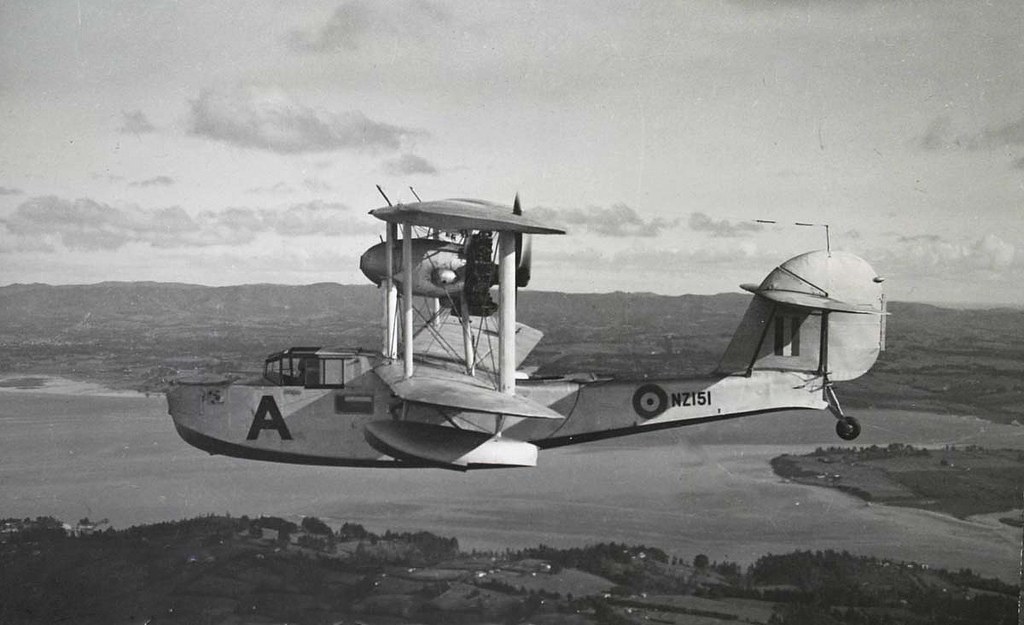 Walrus NZ151 over Hobsonville Walrus NZ151 over Hobsonville by Wally Hicks, on Flickr In these drawings it is port-side as per the kitset - 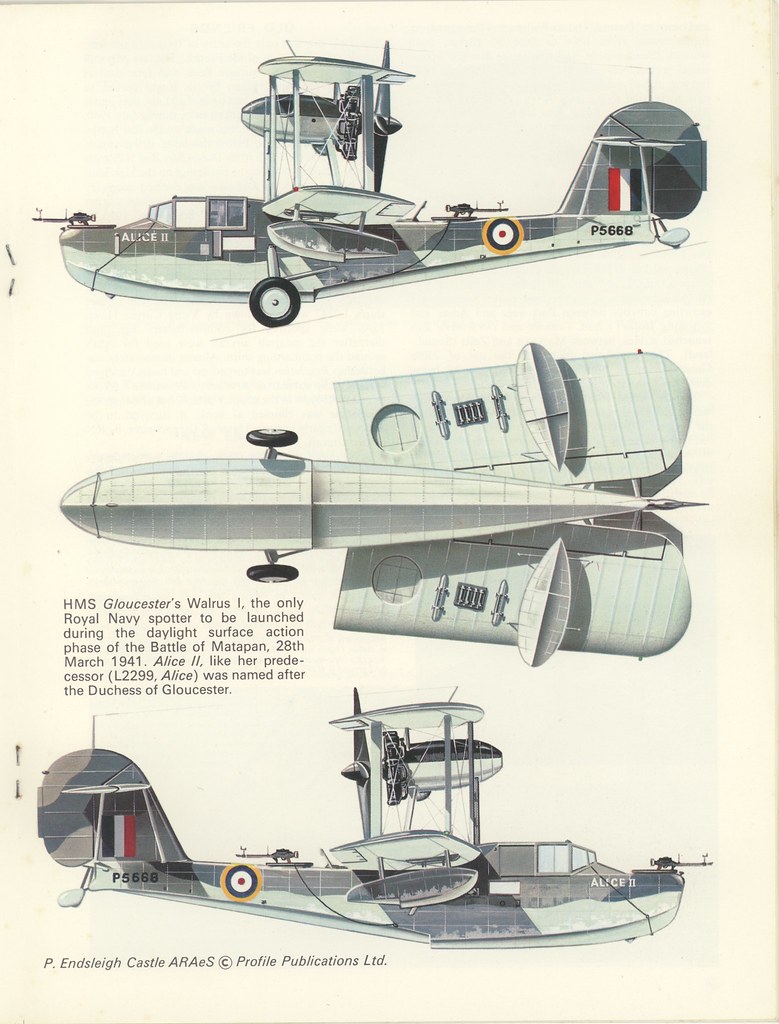 Walrus Colour 2 Walrus Colour 2 by Wally Hicks, on Flickr I guess I am wondering whether I need to add another one to the starboard side, which I won't do if I can possibly help it ... Thanks again Wally. |
|
|
|
Post by davidd on Sept 4, 2013 11:01:41 GMT 12
Wally,
I think the fairings fitted directly in front of those windows located just under the lower wing leading edge are quite different animals and may possibly be some kind of slipstream deflector. You will notice that on the side elevation of "ALICE II", both the nose mounted gizmo as well as one on ahead of the side window are shown. I seems probable that with the passage of time, different schemes were introduced for mounting such items as outside air temperature gauges. The older biplanes of the 1920s and 1930s certainly had plenty of externally mounted items cluttering up their streamlining, such as it was, and much of this equipment had to be moved inside in later designs which were expected to attain much higher cruising speeds. Some of this newer technology was no doubt retrofitted to some of the earlier types in the interests of a slight increase in cruising speed, or just to be more modern!
David D
|
|
|
|
Post by dewobz on Sept 10, 2013 16:24:05 GMT 12
Here's a quick update on my Smer 1/48 Shagbat. I have been detailing it as best I can with available references although my rigging connector points are way oversize. This will be my first ever biplane rigging, the turnbuckles and wire are likely to be oversize as well. 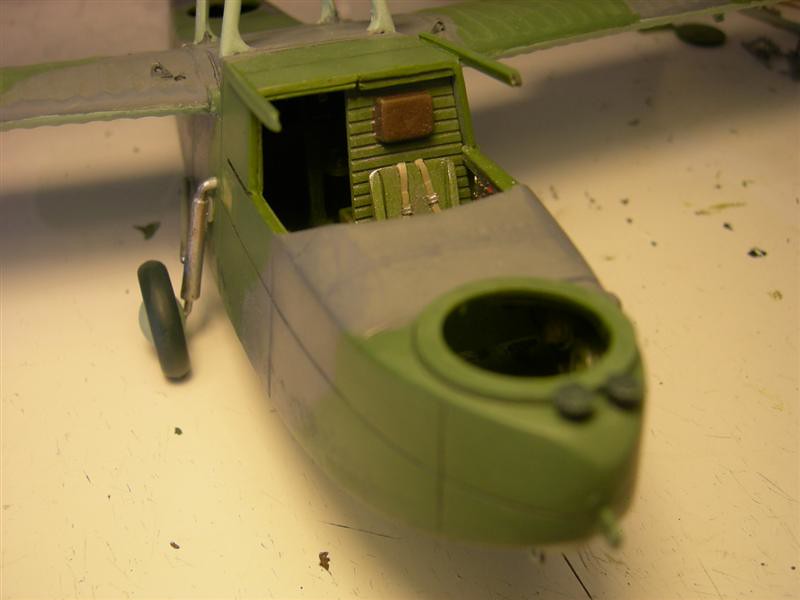 NZ152 WALRUS 8 Nefa 011 (Medium) NZ152 WALRUS 8 Nefa 011 (Medium) by Wally Hicks, on Flickr 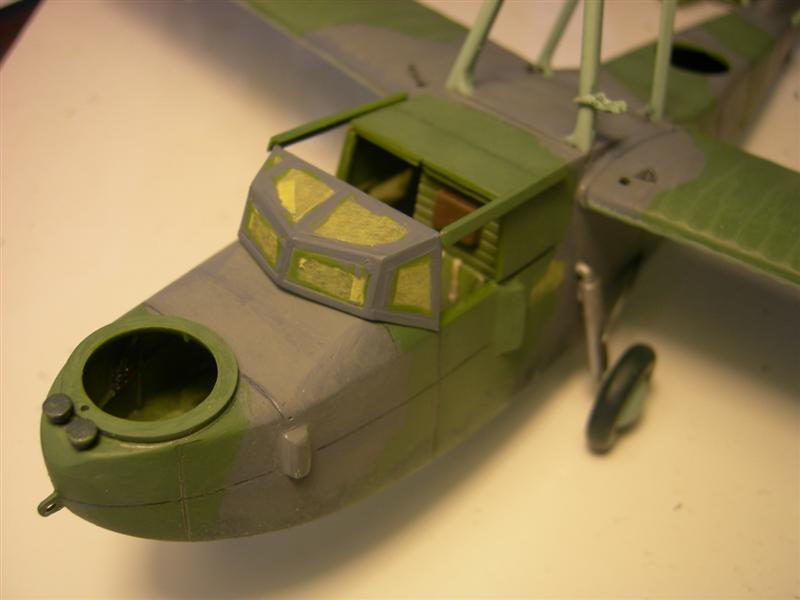 NZ152 WALRUS 8 Nefa 005 (Medium) NZ152 WALRUS 8 Nefa 005 (Medium) by Wally Hicks, on Flickr I've added most details like bollards, anchor points, actuators etc as the Smer kitset is fairly basic. I've used the Smer kitset decals for roundels and Ventura serials but have been unable to match the shape of the code letter B, after checking it on Weekly Review # 106, so must now wait for those to arrive from the USA. 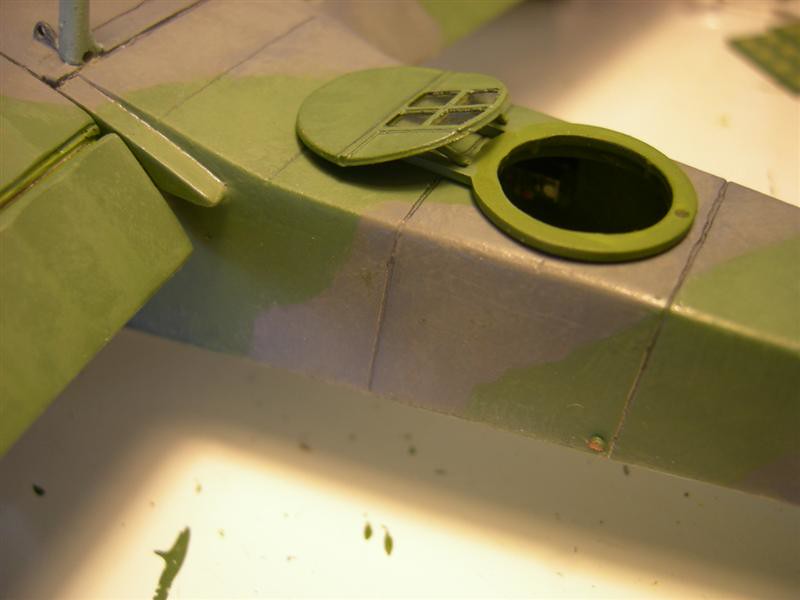 NZ152 WALRUS 8 Nefa 006 (Medium) NZ152 WALRUS 8 Nefa 006 (Medium) by Wally Hicks, on Flickr 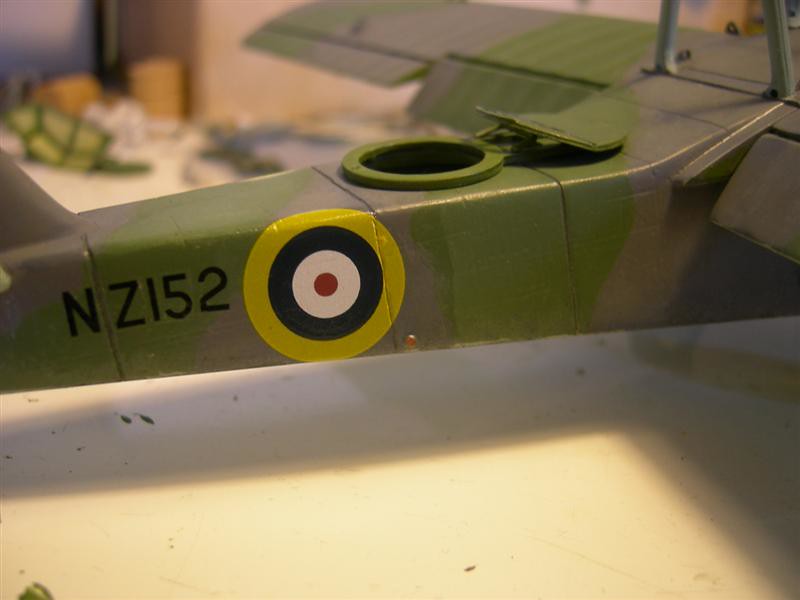 NZ152 WALRUS 8 Nefa 015 (Medium) NZ152 WALRUS 8 Nefa 015 (Medium) by Wally Hicks, on Flickr 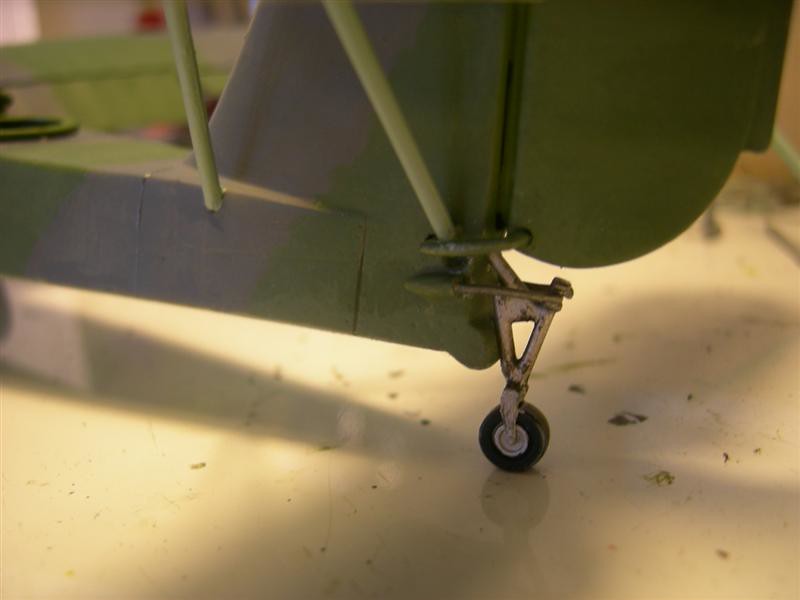 NZ152 WALRUS 8 Nefa 007 (Medium) NZ152 WALRUS 8 Nefa 007 (Medium) by Wally Hicks, on Flickr 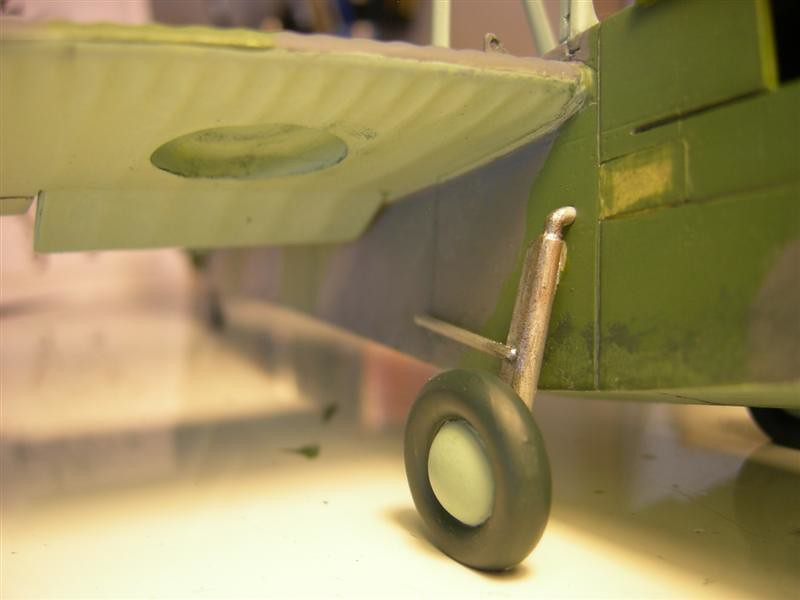 NZ152 WALRUS 8 Nefa 012 (Medium) NZ152 WALRUS 8 Nefa 012 (Medium) by Wally Hicks, on Flickr 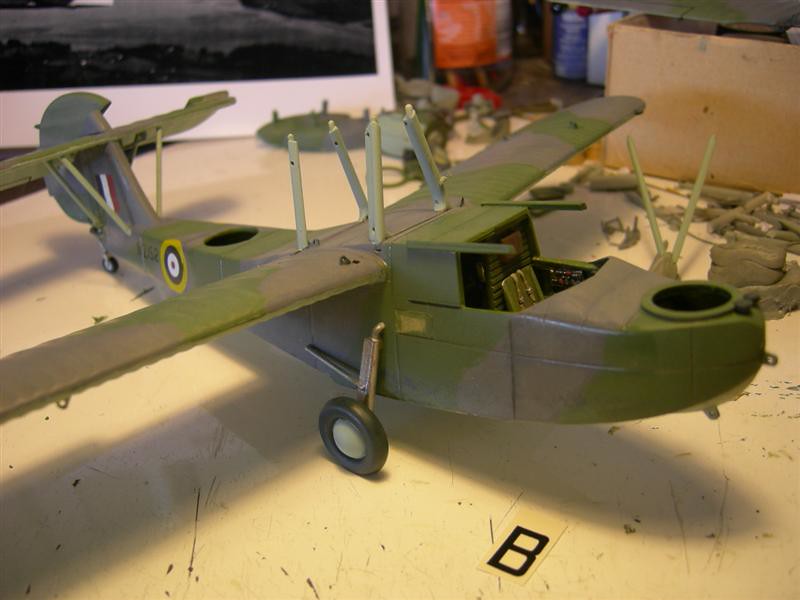 NZ152 WALRUS 8 Nefa 013 (Medium) NZ152 WALRUS 8 Nefa 013 (Medium) by Wally Hicks, on Flickr 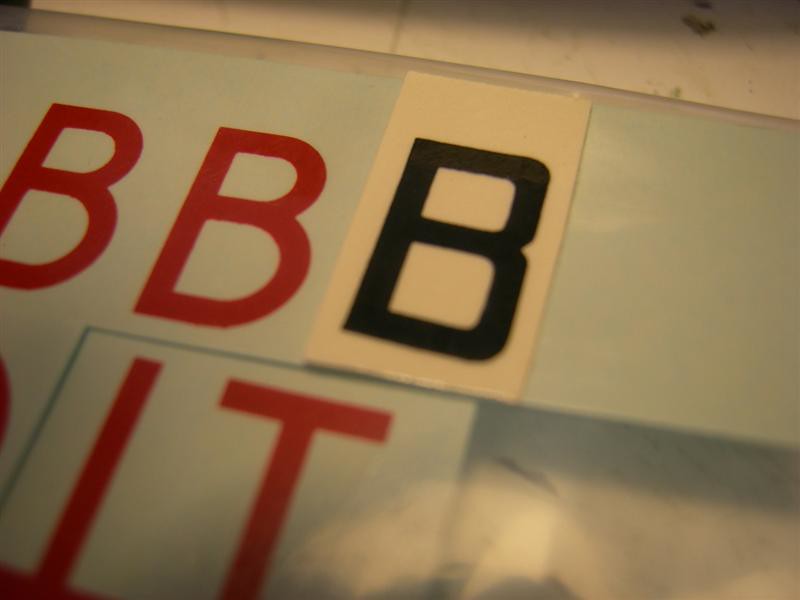 NZ152 WALRUS 8 Nefa 016 (Medium) NZ152 WALRUS 8 Nefa 016 (Medium) by Wally Hicks, on Flickr A quite challenging and enjoyable build so far. Cheers Wally. |
|
|
|
Post by nuuumannn on Sept 23, 2013 14:33:59 GMT 12
Nice work, Wally; what Dave is referring to is this device as seen on the nose of Bill Reid's Anson I. It is also visible on the image of NZ151 over Hobsonville. 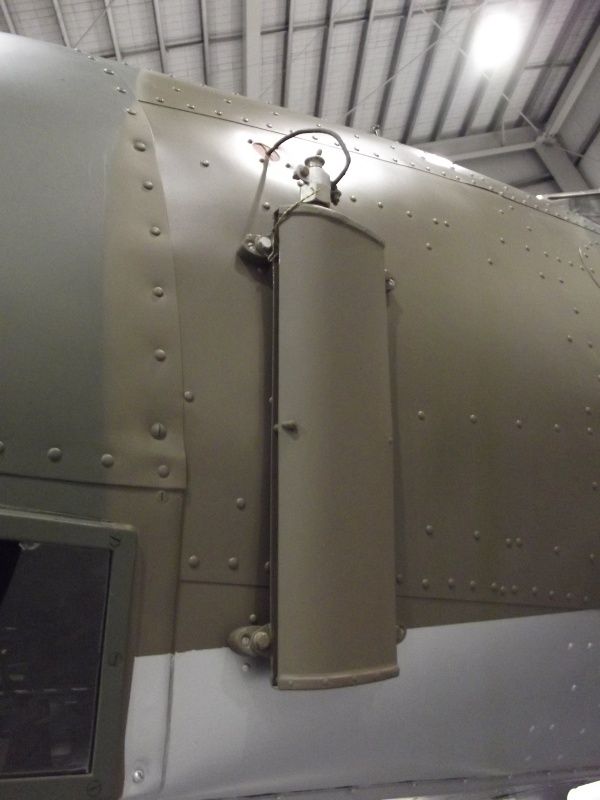 |
|
|
|
Post by dewobz on Sept 23, 2013 14:53:12 GMT 12
Thank you nuuumannn. It is interesting how items such as this are represented in different model scales. It becomes a 'generalized' fairing, protrusion or lump. I may still be able to add some detail to it, although things have progressed a ways meantime. I'll post some more pictures soon.
Wally.
|
|
|
|
Post by nuuumannn on Sept 23, 2013 15:32:53 GMT 12
You're right, looking at the Smer Walrus, the fairing is way too big. Nice work on the engine, by the way.
|
|
|
|
Post by dewobz on Sept 23, 2013 16:25:09 GMT 12
Thanks. I really enjoyed scratch-building that engine detail. I have started rigging the aircraft now and would post some pictures except flickr is being very disagreeable at present, taking forever to load my photos. Hopefully tomorrow, when more of Shagbat might be rigged and assembled.
I don't know whether we Kiwi's used the nickname "Shagbat"?
In Weekly Review 106 there is reference to the nickname "Lady of All Work" which seems a rather formal and old-fashioned one.
Cheers
Wally.
|
|
|
|
Post by Dave Homewood on Sept 23, 2013 20:45:47 GMT 12
They also called the Walrus the Pusser's Duck. One of the RNZAF examples at Hobsonville had a duck nose art.
|
|
|
|
Post by dewobz on Sept 24, 2013 11:02:45 GMT 12
Thanks Dave. Hence the Weekly Review # 106 title "Flying Ducks" I guess?
That makes two examples of WW2 Kiwi nose art you've used as your avatar which I want the artwork for to make decals ... This "Flying Kiwi" and NZ4516 "Patu te Ra". (Though I have a feeling the serial no. of Flying Kiwi is unknown)
Keep it up. There'll soon be enough for a whole decal sheet.
|
|
|
|
Post by dewobz on Sept 24, 2013 12:04:47 GMT 12
As I have said before on here, "Ultra-realists look away now" My rigging on Shagbat is shamelessly over-scale, governed by my budget constraints, impatience and the newness of the biplane genre. It continues what I have called a slightly "cartoon-like" theme to this build. I'm using elastic thread for the wire and copper wire insulation for the turnbuckles, painted afterwards in enamel gunmetal and acrylic self-mixed brass. I started with the engine tower where my holes are at their most unrealistic - 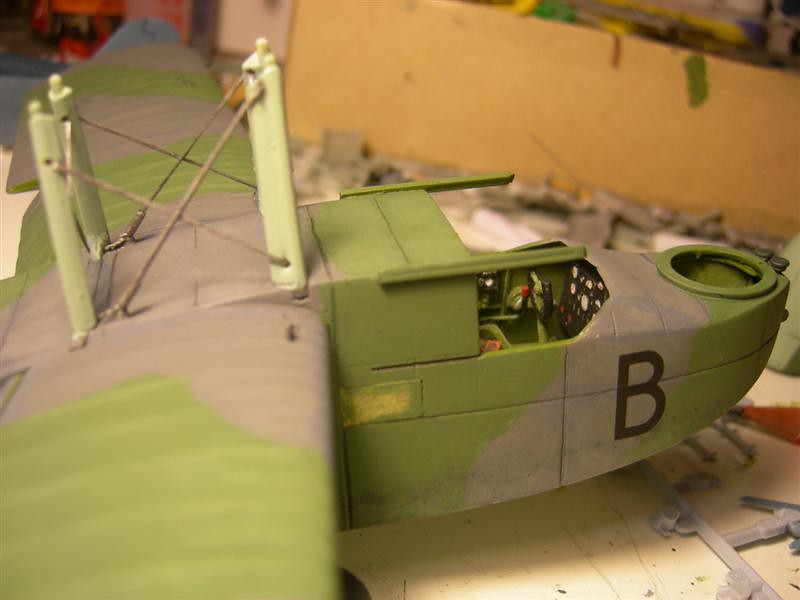 XX-O 5 + Walrus RIGGING 015 (Medium) XX-O 5 + Walrus RIGGING 015 (Medium) by Wally Hicks, on Flickr 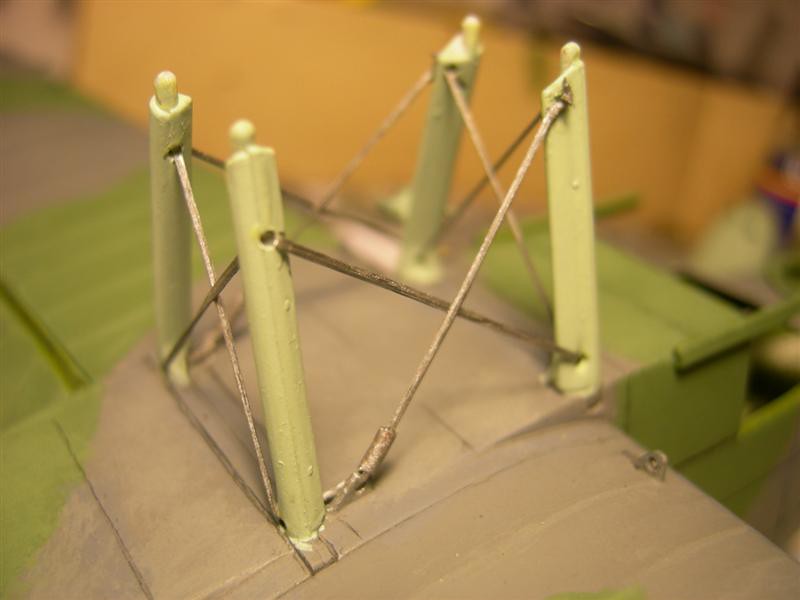 XX-O 5 + Walrus RIGGING 016 (Medium) XX-O 5 + Walrus RIGGING 016 (Medium) by Wally Hicks, on Flickr 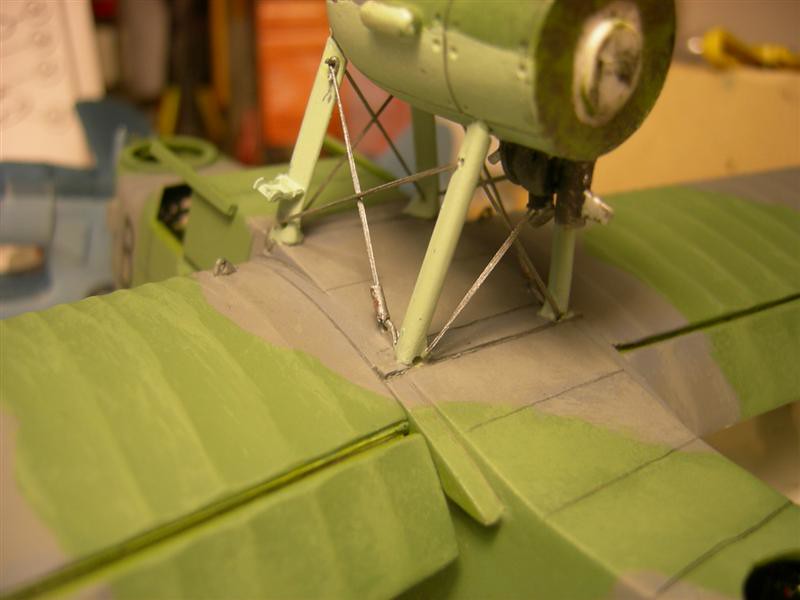 XX-O 5 + Walrus RIGGING 013 (Medium) XX-O 5 + Walrus RIGGING 013 (Medium) by Wally Hicks, on Flickr 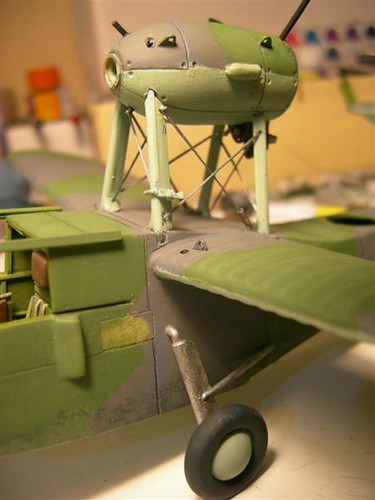 XX-O 5 + Walrus RIGGING 011 (Medium) XX-O 5 + Walrus RIGGING 011 (Medium) by Wally Hicks, on Flickr And now I have progressed onto the floats and the struts attaching the engine nacelle to the upper wing - 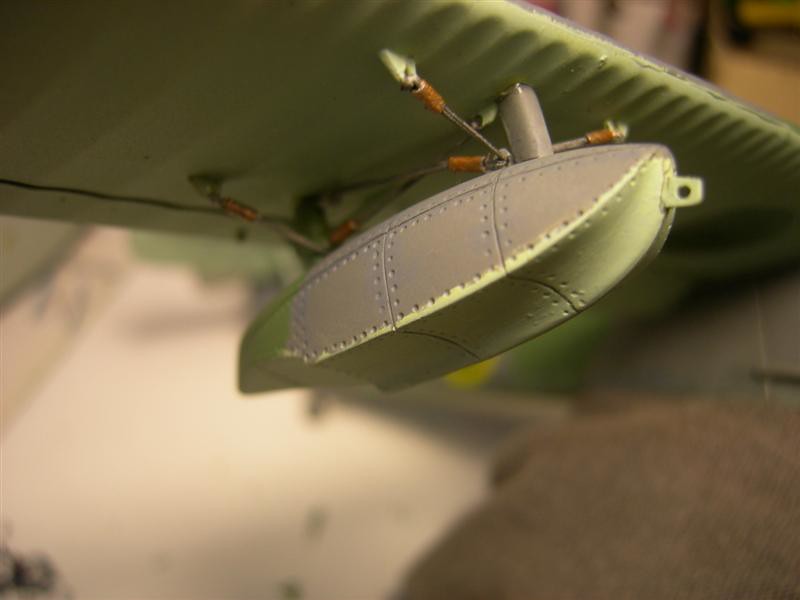 Walrus RIGGING 2 001 (Medium) Walrus RIGGING 2 001 (Medium) by Wally Hicks, on Flickr 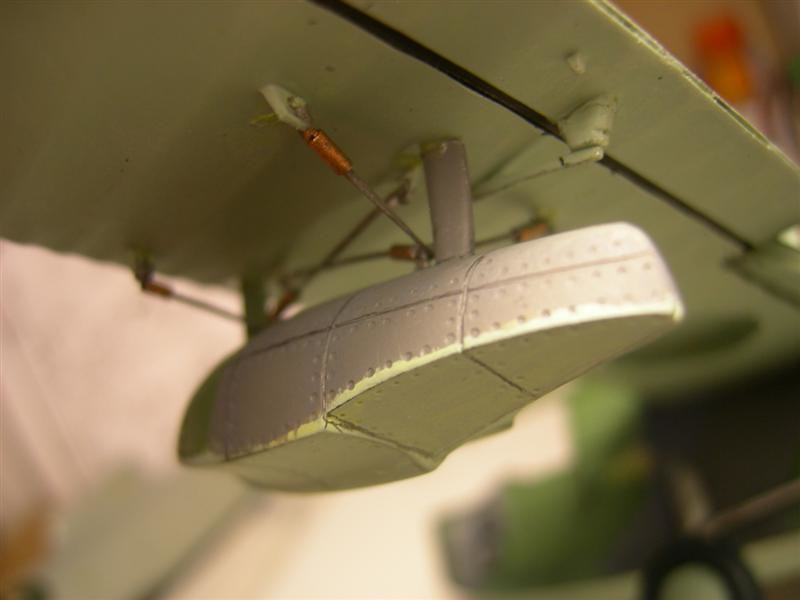 Walrus RIGGING 2 008 (Medium) Walrus RIGGING 2 008 (Medium) by Wally Hicks, on Flickr 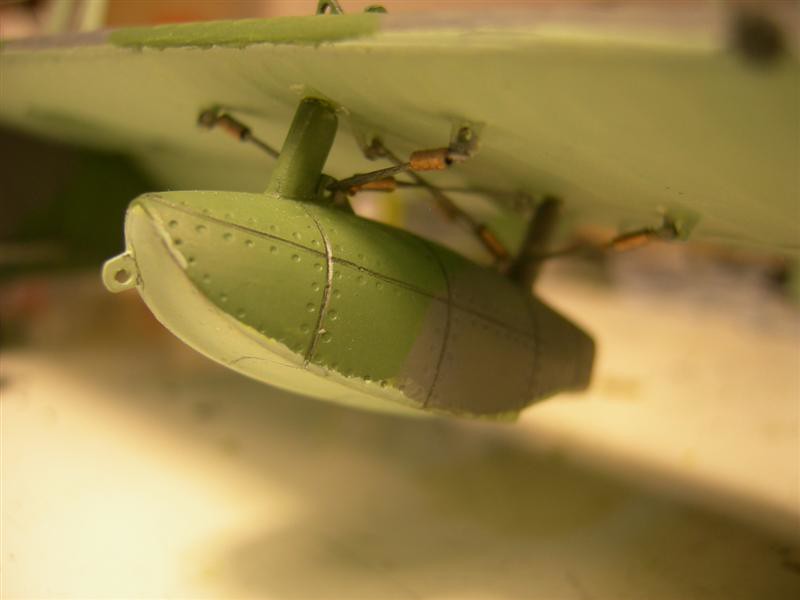 Walrus RIGGING 2 004 (Medium) Walrus RIGGING 2 004 (Medium) by Wally Hicks, on Flickr 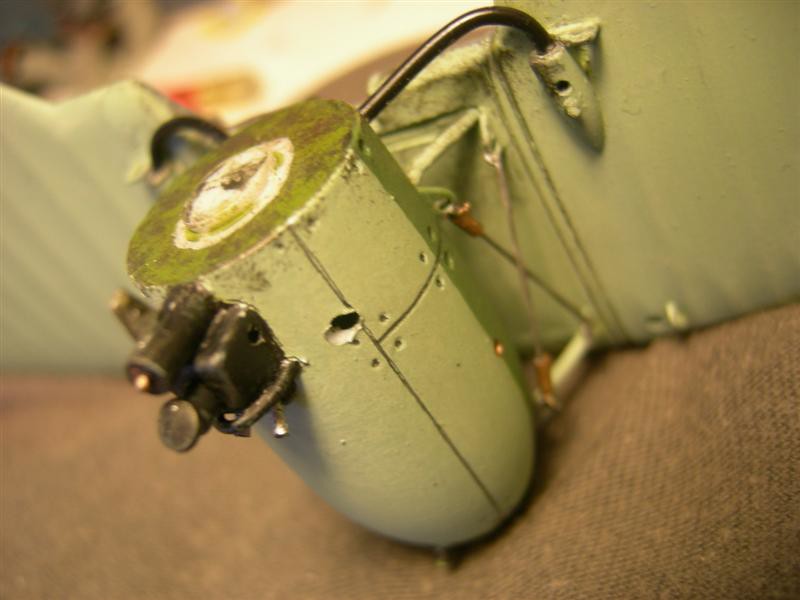 Walrus RIGGING 2 010 (Medium) Walrus RIGGING 2 010 (Medium) by Wally Hicks, on Flickr 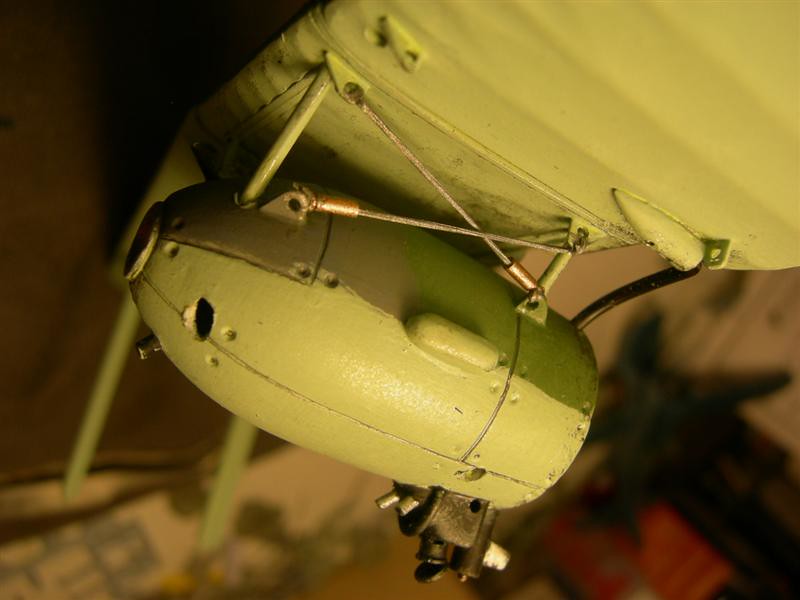 Walrus RIGGING 2 012 (Medium) Walrus RIGGING 2 012 (Medium) by Wally Hicks, on Flickr 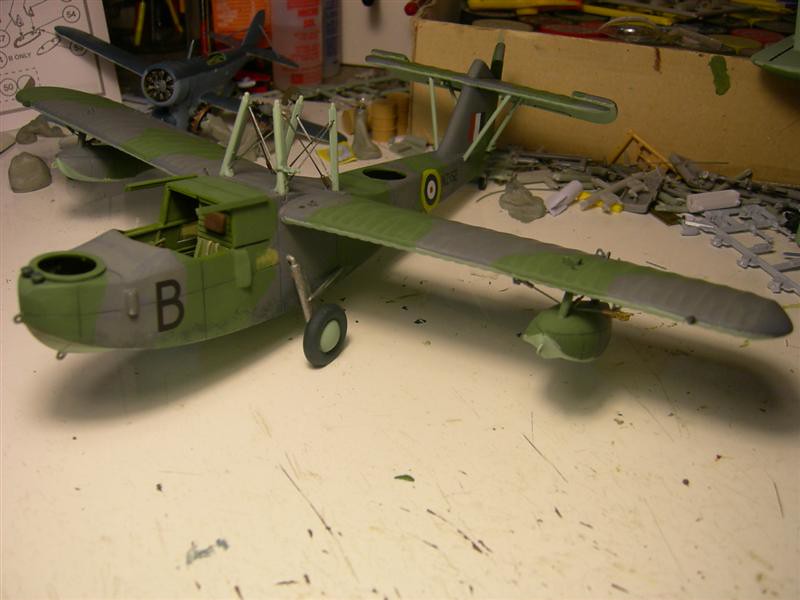 Walrus RIGGING 2 006 (Medium) Walrus RIGGING 2 006 (Medium) by Wally Hicks, on Flickr From my point-of-view it is getting better as I go along, easier to do, but it isn't getting any more scale-realistic. Cheers Wally. Cheers |
|
|
|
Post by dewobz on Sept 26, 2013 18:03:56 GMT 12
Here are some photos of Smer's 1/48 Supermarine Walrus finished as NZ152 in 1943 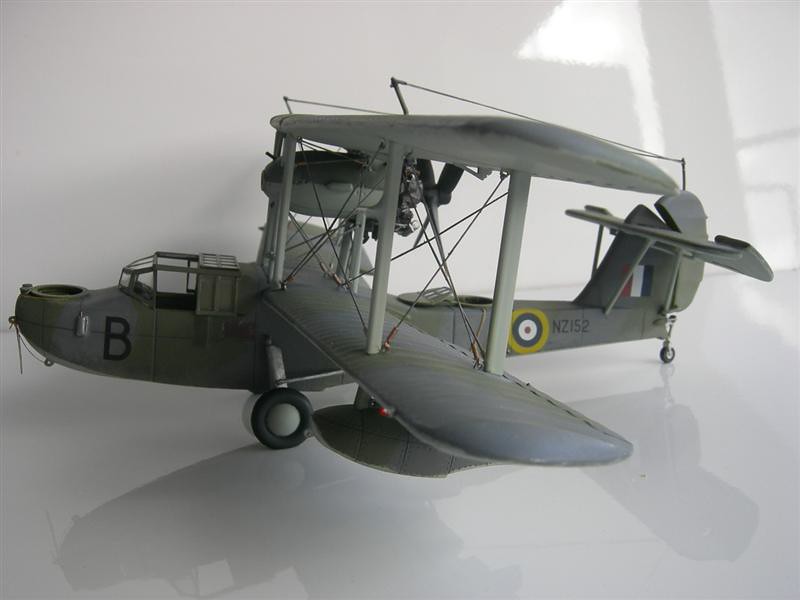 NZ152 WALRUS Rig 3 & FINISH V1 014 (Medium) NZ152 WALRUS Rig 3 & FINISH V1 014 (Medium) by Wally Hicks, on Flickr 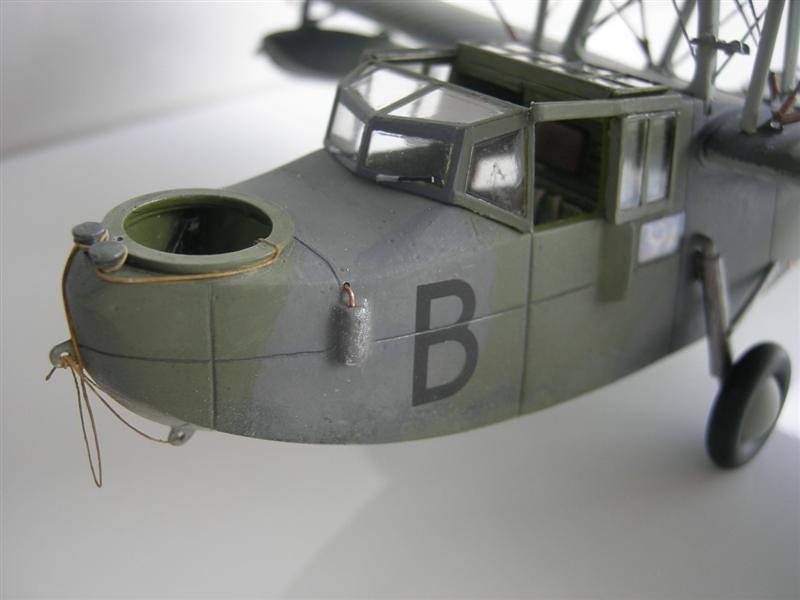 NZ152 WALRUS Rig 3 & FINISH V1 016 (Medium) NZ152 WALRUS Rig 3 & FINISH V1 016 (Medium) by Wally Hicks, on Flickr 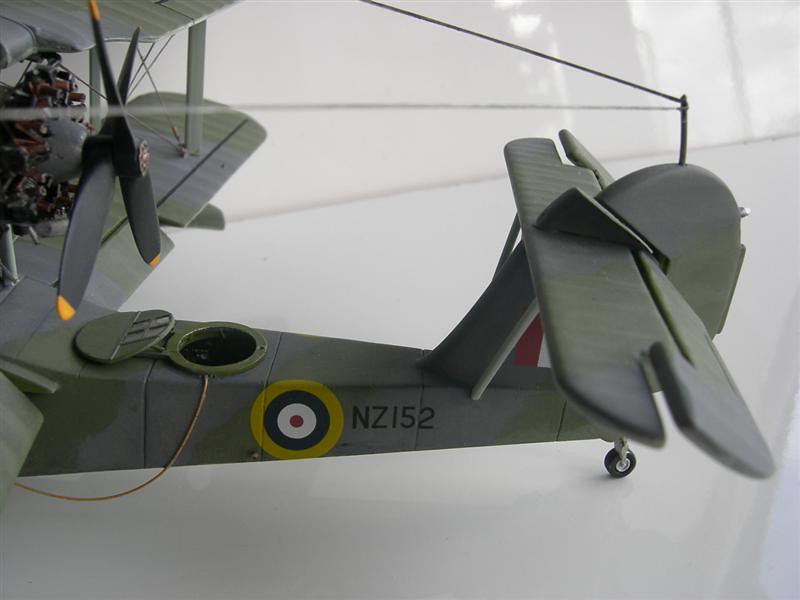 NZ152 WALRUS Rig 3 & FINISH V1 035 (Medium) NZ152 WALRUS Rig 3 & FINISH V1 035 (Medium) by Wally Hicks, on Flickr 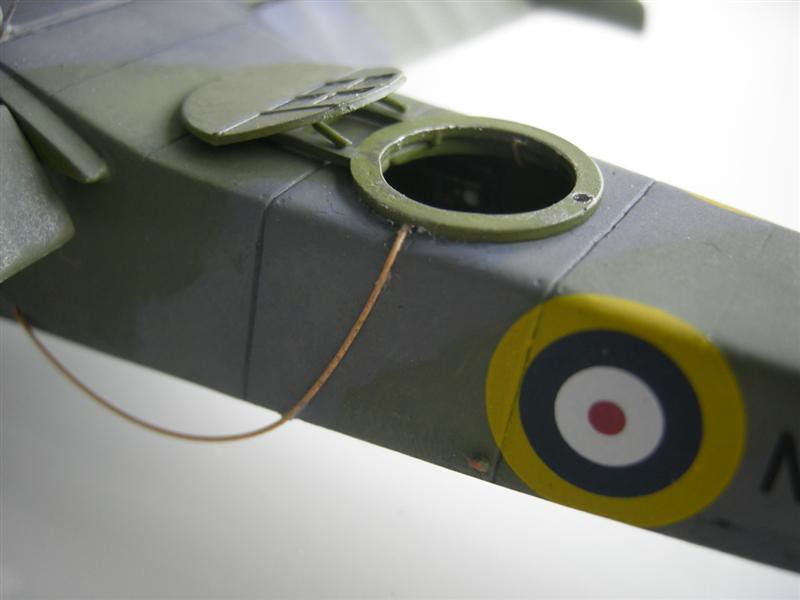 NZ152 WALRUS Rig 3 & FINISH V1 034 (Medium) NZ152 WALRUS Rig 3 & FINISH V1 034 (Medium) by Wally Hicks, on Flickr 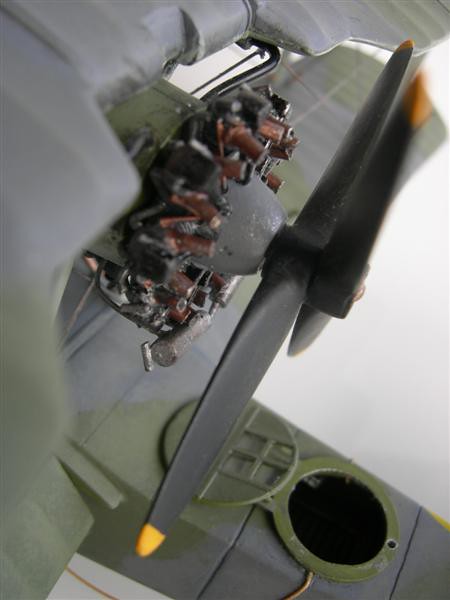 NZ152 WALRUS Rig 3 & FINISH V1 037 (Medium) NZ152 WALRUS Rig 3 & FINISH V1 037 (Medium) by Wally Hicks, on Flickr 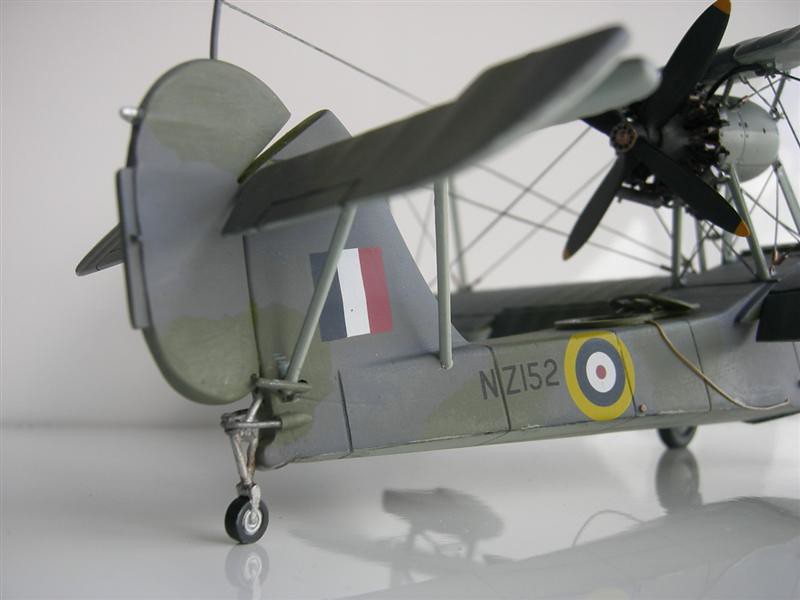 NZ152 WALRUS Rig 3 & FINISH V1 030 (Medium) NZ152 WALRUS Rig 3 & FINISH V1 030 (Medium) by Wally Hicks, on Flickr  NZ152 WALRUS Rig 3 & FINISH V1 041 (Medium) NZ152 WALRUS Rig 3 & FINISH V1 041 (Medium) by Wally Hicks, on Flickr 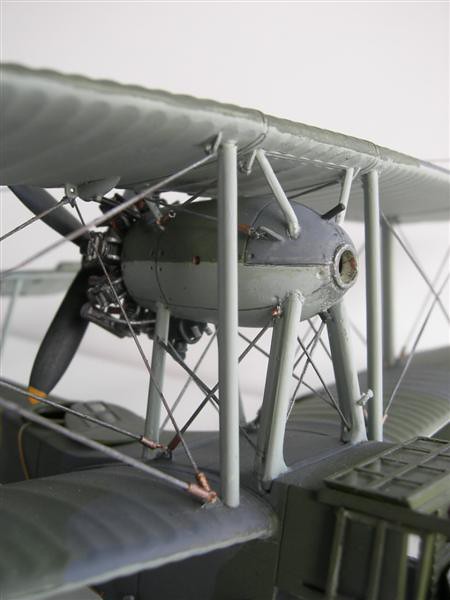 NZ152 WALRUS Rig 3 & FINISH V1 053 (Medium) NZ152 WALRUS Rig 3 & FINISH V1 053 (Medium) by Wally Hicks, on Flickr 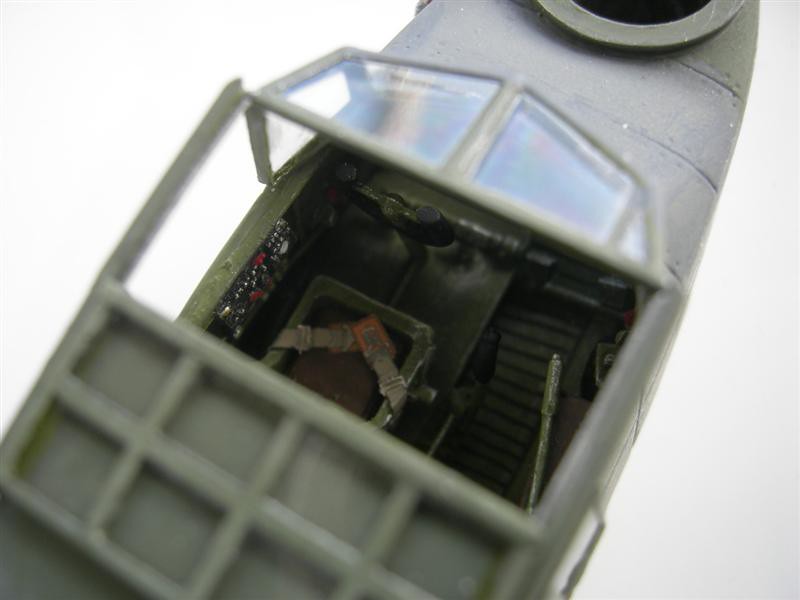 NZ152 WALRUS Rig 3 & FINISH V1 055 (Medium) NZ152 WALRUS Rig 3 & FINISH V1 055 (Medium) by Wally Hicks, on Flickr 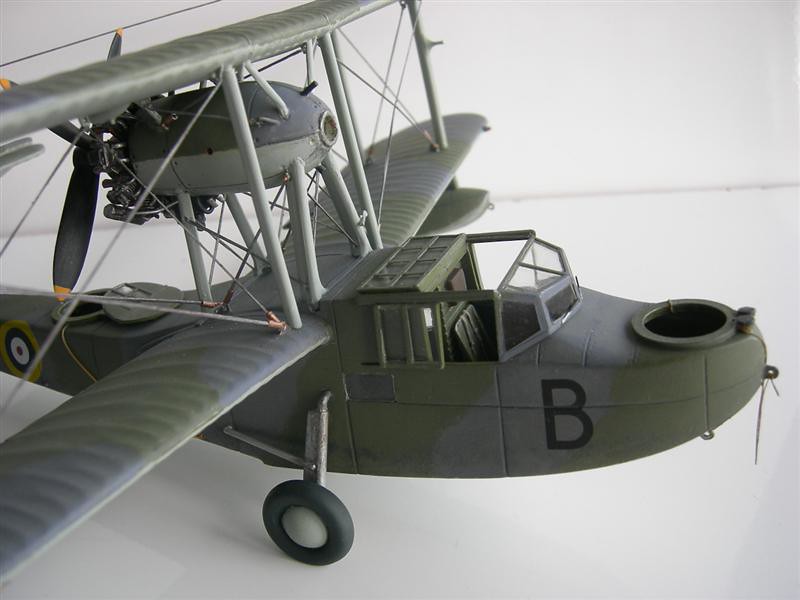 NZ152 WALRUS Rig 3 & FINISH V1 026 (Medium) NZ152 WALRUS Rig 3 & FINISH V1 026 (Medium) by Wally Hicks, on Flickr  NZ152 WALRUS Rig 3 & FINISH V1 027 (Medium) NZ152 WALRUS Rig 3 & FINISH V1 027 (Medium) by Wally Hicks, on Flickr Many thanks to those who have contributed information and pictures. Cheers Wally. |
|
|
|
Post by dewobz on Sept 26, 2013 18:08:01 GMT 12
|
|
|
|
Post by Dave Homewood on Sept 26, 2013 18:48:54 GMT 12
That looks excellent Wally. Well done.
|
|
|
|
Post by alanw on Sept 26, 2013 19:46:53 GMT 12
Hi Wally That's one fine looking Walrus!!!  I think your rigging looks really great too (rigging a Biplane model is no mean feat) Thanks for sharing your build with us. Regards Alan |
|
|
|
Post by nuuumannn on Sept 26, 2013 20:56:27 GMT 12
Yes, with those here Wally, very nice. Your efforts make it, regardless of the scale. The Smer kit reminds me of the old Matchbox kit with its trench like recessed panel lines. You can't really see it, but I take it the engine nacelle is cocked to one side as on the real thing?
|
|
|
|
Post by harrysone on Sept 26, 2013 21:57:55 GMT 12
that looks great, I love the detail particularly the rigging wire with the turn buckles etc!
|
|
|
|
Post by dewobz on Sept 27, 2013 10:26:58 GMT 12
Thanks for your comments folks.
Nuuumann, the trench-like recessed panel lines on my finished model are of my own making, having filled the myriad deeply recessed panel lines and rivets on the Smer kitset OOB. I copied mine to some extent from online builds of the Classic Airframes kit which seems to have much more subdued panel lines and some deeper especially essential ones. Depth-wise mine got a bit out-of-hand though, being scribed into a surface partly made up of 7 or 8 coats of Mr Surfacer 500. All the photos of real Mk 1 Walruses I looked at showed almost no discernible panel lines at all, so where Smer and Matchbox got the idea we shall probably never know.
I had absolutely no idea the engine nacelle was offset to one side and unless this is incorporated in the kitset mine is not. I don't think the kitset includes this.
However the difficulty (I had) in fitting the upper wing with its struts and loose rigging thread attached did result in the struts above the engine nacelle becoming unequal in length - more deeply embedded in the nacelle on one side - so perhaps the offset is there purely by accident ...?
|
|
|
|
Post by flyjoe180 on Sept 27, 2013 14:16:22 GMT 12
Lovely work Wally, your Walrus looks fantastic.
|
|


