|
|
Post by flyjoe180 on Aug 3, 2009 23:14:57 GMT 12
If you need any further photos or info just sing out Anthony. The helicopter crews are doing some training at present so for once they're all in the one place.
|
|
|
|
Post by agalbraith on Aug 15, 2009 16:06:18 GMT 12
Thanks Joe, really appreciate that mate! Well, Chris sent me a prototype instrument panel for test fitting etc on my BK. This ment I had to address this area now. The instrument panel is made to the actual scale size..........so if my calculations were correct! it should fit............. Here is the kit part  It looks nothing like the real one. The shape is all wrong and is too narrow.....I was actually dreading doing this part, but the time had come. Firstly the combing needed to be widened by 2.5mm and the photos show where it need to be. After it has been widened the whole profile needs filing/sanding/scraping/cutting to match the actual panel. There are ridges and bumps that need a lot of refining. Once the width etc was sorted out, an edge was then glued along the top and a strip placed just in front of that. This was then all blended together to obtain the correct profiles etc. Next up was the scalloped strips running through the front portion. The places were marked out and a tiny hole drilled at each end. Then I used a photoetch saw and new scalpel blade to make the slots with rounded ends. Thin strip was then trimmed to fit and pushed through the slots so they sat just below the surface.  Then the top surface of each slot was repeadedly flodded with Mr Surfacer 1000 untill it all blended together with rounded edges. This gave the impression they were pressed/molded on.  Here is a comparison of the 2  I then glued the test panel on the original plastic part and shaped to fit. You will notice on this photo that it is just roughly sitting where the final one will go.  Progress has been a little slower than usual (if that is possible) as I am making another fuselage shell up for a friend. I think I will be sick of BK's for a while once this is done. Thanks for looking Cheers Anthony |
|
|
|
Post by mstokes on Aug 16, 2009 23:23:36 GMT 12
Hi Anthony, Mate lovely work again!
Progress is slow all around, I have only completed an oil cooler and am working on completing BOF's canopy. I have decided to make it open and close... thereby ensuring another round of minute over engineering!
That panel with all the bezels looks fantastic!
cheers Mike
|
|
|
|
Post by Fletcher400 on Aug 17, 2009 9:09:32 GMT 12
Wow only just saw you updated the photo etch looks brilliant! Excellent work as always!
cheers
|
|
|
|
Post by agalbraith on Aug 17, 2009 9:33:07 GMT 12
Thanks Guys, much appreciated!
My archer rivet resin/decals arrived last week....they look like just the ticket.
Cheers
Anthony
|
|
|
|
Post by baz62 on Aug 17, 2009 16:31:48 GMT 12
Nice mate. Whats the test panel made from? It looks a bit like brass?
|
|
|
|
Post by agalbraith on Aug 18, 2009 8:37:44 GMT 12
Thanks Baz, yes mate it is thin brass that has been chem etched.
Cheers
Anthony
|
|
|
|
Post by agalbraith on Aug 25, 2009 23:01:17 GMT 12
Wish I could show more work for the time spent this past week or so. Anyway, I came across a problem of the instrument panel covers front contours not matching the windscreen line. No matter how I moved it around I just could not get it to fit properly! Time for a trip to see the machine herself and see where I went wrong or what I was missing. As soon as I saw it I realised 2 things: 1. There was a recess through the centreline of the cover that the centre windscreen frame passed through 2. There was a panel between the windscreen and the cover(just below the frame line......phew! This entailed me fitting a 10 thou piece of card around the top edge as I have cut the lower windscreen line down to the frame line to compensate for the new windscreen fittment and replacement frame. 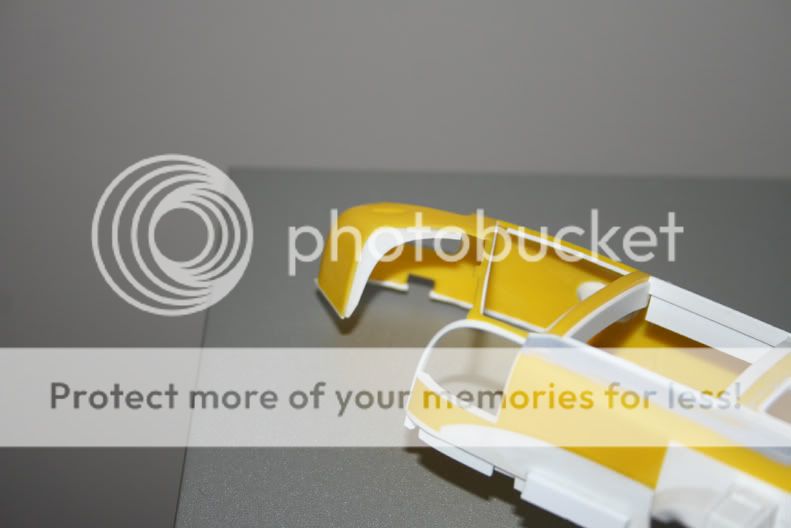 Now the front edge of the panel cover is too big and needed cutting right back and a constant trimming was needed for a nice fit. This took a fair bit of time as I had to make sure it was at the right height. I wasnt going to glue this in but after many nights of fitting & trimming I decided that I really needed to if I was going to have a nice fit. It is going to slightly complicate things for me down the track, but I dont think I had any choice for the best result. I jigged everything up and glued it in finally! Then Mr Surfacer was brushed around the edge, I am really happy with how it turned out.  you can see in this photo the centre ridge has also been added. I had to remove the temporary windscreen centre frame as this was only added earlier to line things up. Here are a few quick pics before I go to bed What do you think.....did I get it right?  ?? I hope so, I have spent so long on it I cant tell anymore! There may be a little tweaking here and there, but on the whole I think it is pretty close. 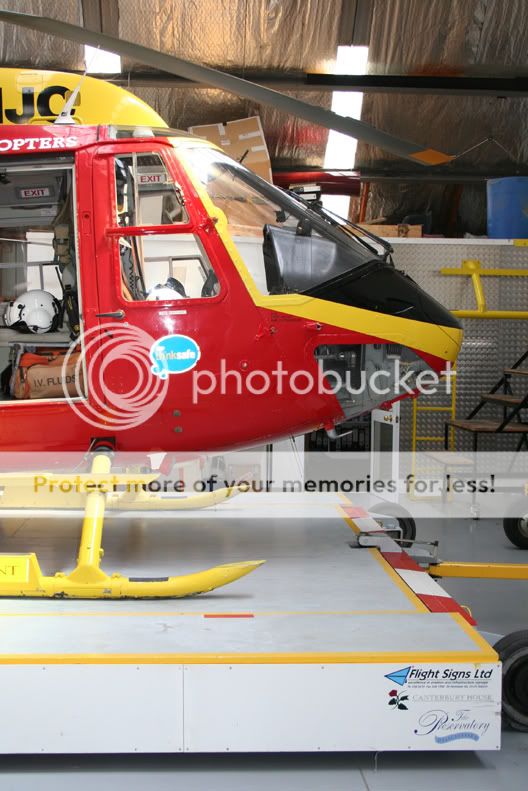    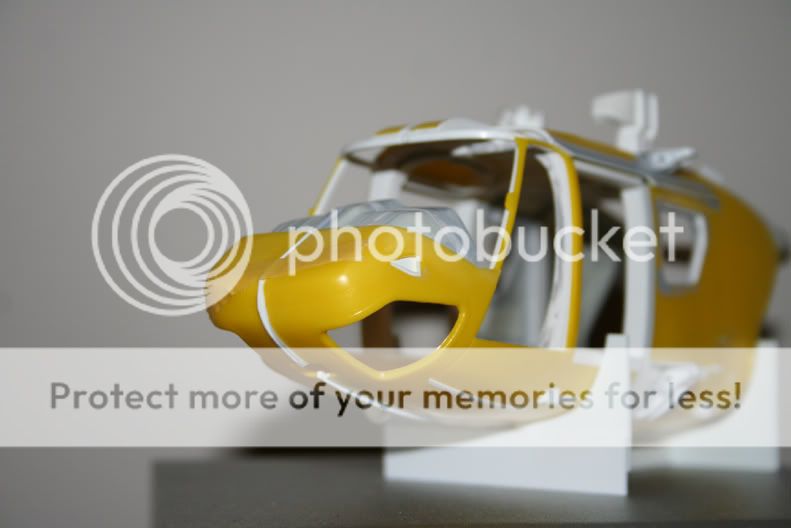 Excuse the photos...its getting late......again Cheers and thanks for taking the time to look in. Anthony |
|
|
|
Post by Fletcher400 on Aug 28, 2009 2:09:12 GMT 12
From the comparison of the full size photo and the side on pic, I can safely say that you've gotten it pretty bang on accurate Anthony!
You must have clocked up quite a few hours so far on this model!
cheers.
|
|
|
|
Post by Dave Homewood on Aug 28, 2009 10:43:06 GMT 12
Good stuff Anthony, that looks great with the panel in place.
The second photo in your last post makes the nose of the helicopter look like a shark!
|
|
|
|
Post by agalbraith on Aug 31, 2009 10:04:42 GMT 12
Thanks guys, really appreciate it..........Alan, I hate to think how many hours have gone into this. Dave, yes mate, it does have a rather shark like nose profile dosent it. Well this week I decided I needed a change of pace so decided to do the intake scoops on the engine cowl.  So I tried my hand at vac-forming...........it took a little practice, but here is what I did 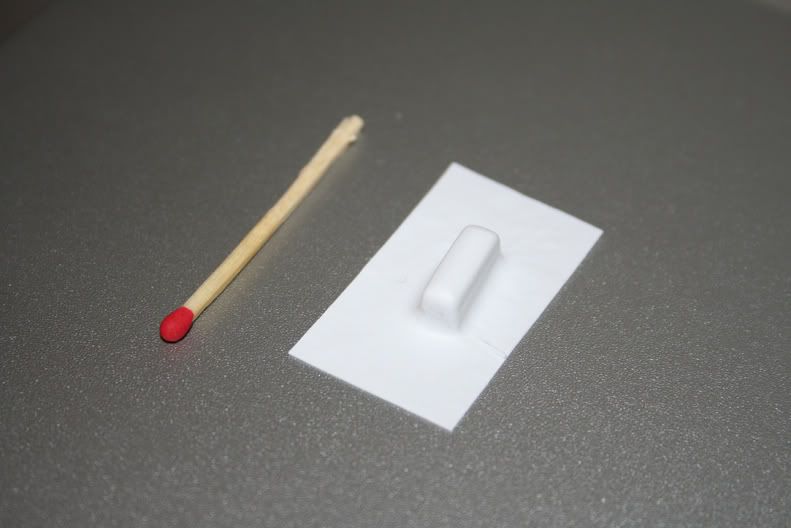 This shape gave me 2 ends (2 scoops) and I measured up the positions on the cowl and cut the openings. I then trimmed the vac part up and poked it up through the hole. 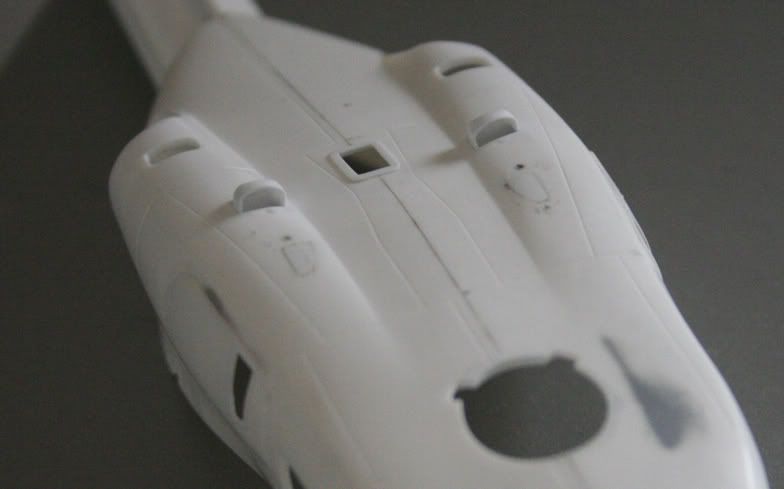 I need to tidy up around the edge where it pokes through the opening, but otherwise I think it will be ok. I just have the ones on the side to do next. Cheers and thanks for looking Anthony |
|
|
|
Post by agalbraith on Sept 25, 2009 11:20:01 GMT 12
Well, put the car back to work on the BK some more.......much more interesting! Well, whilst it (once again) dosent took like much, I went back and measured up and cut the hole and inserted the last 2 scoops on the sides. I had to be careful not to make them look pressed out on the skin as they are actually inserted into holes with a sharp transition between the cowl and intake (not a blended one). So once I had them filled with CA around the edges they were then filled with Mr Surfacer and any little areas tidied up. Once it had all gone hard, I then scribed a sharp corner into the join. 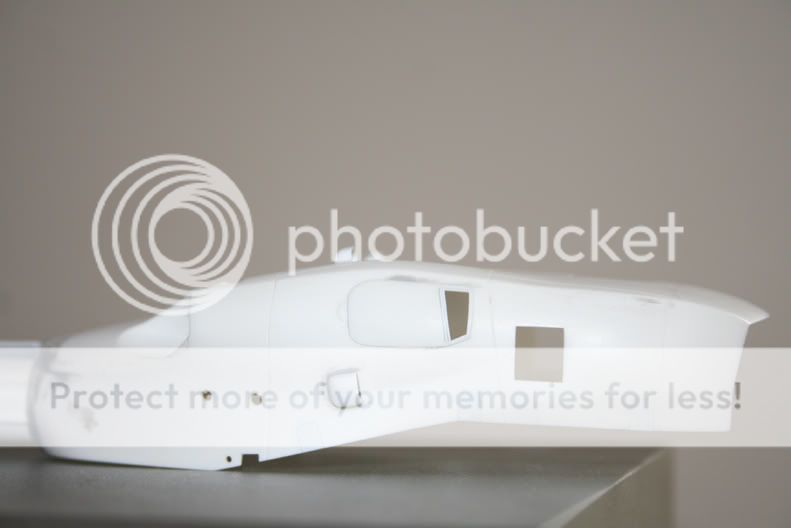 There are a couple of panel lined that can now be scribed on. Next up was the tailboom again!!!! This thing has been driving me nuts. Firstly I had 2 issues that needed dealing with.......possibly. You know the story, no one else will ever spot it. But it was bugging me so much that I just had to go back and re-do it again. There was a very gentle curve in the top tailrotorshaft fairing, so I carved and hacked it all off! Well do or die I thought as I just cant live with it! I replaced the whole fairing and it looks brilliant! I am so pleased I re-did it. I then addressed the issue of the small gearbox fairing at the base of the fin. I skinned the front edge by overlaying a strip over the tailrotor shaft and buffing it back to a scale thickness. The whole fairing was slowly built up with CA and the shape was built up. Finally with some careful scriber work and finishing off with the trusty ol Mr Surfacer to take out any slight imperfections. 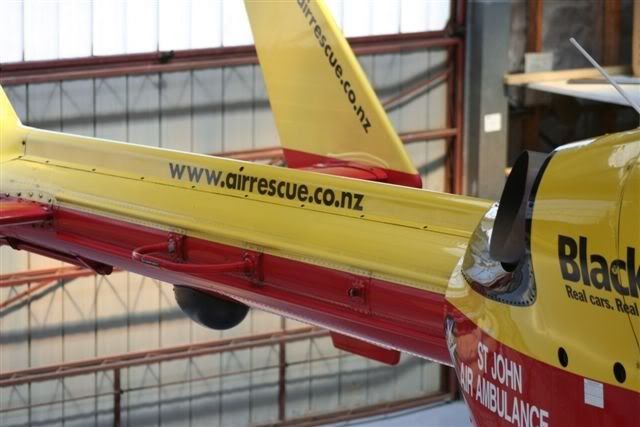   Glad that is all done......but issue 2 still needed dealing with. This one was a little more perplexing. When I look at the horizontal stab it looks to be not at 90deg to the boom (only very slightly) but when I put a 90 degree template into the corner it is spot on in all planes. Anyway long story short. Turns out the boom is just veeeeeery slightly off centre (only a couple of deg) but when on the fuse threw the angle off just enough to mess up all the alignment. So out with the razor saw and a cut was made where I thought it was needed. This was just enough (the thickness of a cut) to bring it back into alignment. You should be able to see it in the pics. Just have a question to those of you who have used the Archer rivet decals. Do I start putting them on at this stage or should I prime the raw plastic first? Cheers Anthony |
|
|
|
Post by baz62 on Sept 26, 2009 12:28:44 GMT 12
Jeez Anthony my eyes are already bad enough but making me squint looking for this curve.......... ;D
Looks good and I know what you mean about things being slightly out. I hate it too!
Baz
|
|
|
|
Post by mstokes on Sept 26, 2009 12:44:55 GMT 12
Hi Anthony, on the Archers transfersrs, I find that putting them on after the primer is the best. Like decals, they like a flat surface so I would rub down the primed surfaces until they are polished, then add them like normal decals. As they are resin screened onto decal film, they are pretty good at taking on paint. I also find that the slight colour variation (if any) add some very realalistic depth to the rivets, latches etc. Great work mate, I really enjoy this thread... can't wait until you close her up. I certainly though will be keeping my fletcher away from any model shows you enter for a while, I think the civil prize will sit on 'Westpac Rescue' for a while and deservedly so!  Cheers, Mike |
|
|
|
Post by ZacYates on Sept 26, 2009 12:55:58 GMT 12
Dude, this is some seriously incredible work! Puts my little Hughes 500 (http://modelingmadness.com/reviews/civil/yates500.htm) to shame! I can't wait to see what you do with your Fletcher! Mike, that's why we should petition for two new classes: Civil, and Civil Helicopter  |
|
|
|
Post by agalbraith on Sept 26, 2009 14:28:07 GMT 12
Hi, thanks guys.......but you are all too kind, it really isnt rocket science. Mike I wouldnt worry about going up against your beautiful Fletcher.......it is me that should be concerned, yours is scratchbuilt!! Anyway, at this rate she is a few years away still! Partly set back because of this............. I am building another one...yes thats right another for someone else. Actually I am only doing the major components and he will do the rest. It is for my friend Chris who has done all the photoetching for me as a thank you in return.   He has been very valuable and he is wanting to do the machine he flew with ADAC in Germany. |
|
|
|
Post by agalbraith on Oct 4, 2009 21:57:37 GMT 12
Hi all Well, I have been quietly beavering away on the BK cowl. This time I have been working on the oval depressions that the latches go onto. I realised that the EC cowl latches are quite different to the BK  First up, I measured the positions and then drilled a hole in the centre of each position. Then a tiny circular file was used to elongate each hole, making sure that it had straight sides not rounded. Once the 'hole was drilled and shaped, I then thinned the inside out to a correct thickness. Once this was done, I blanked off the inside with plastic card and once again "flooded" the area with Mr Surfacer and buffed back to give a pressed alloy look. I had to be careful as some of them are deeper than others. Anyway here is the result. 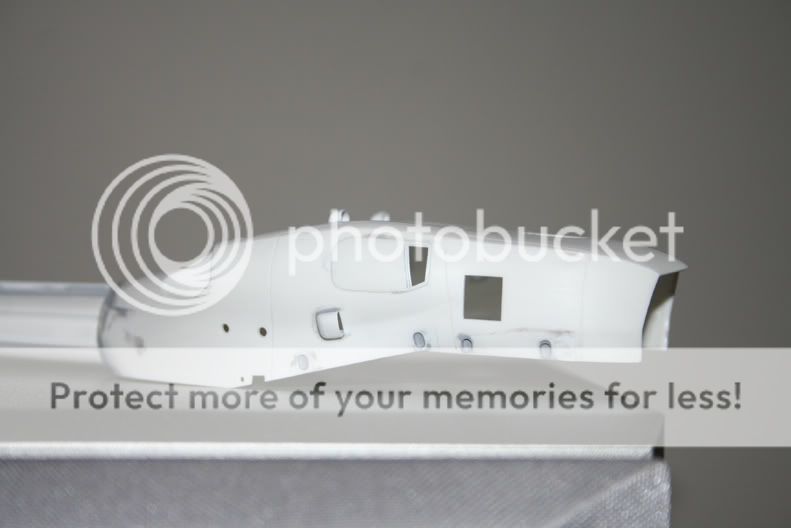 Getting pretty close to priming this piece.......just have to scribe a few panel lines etc first. Thanks for dropping by Cheers Anthony |
|
|
|
Post by agalbraith on Oct 28, 2009 20:29:34 GMT 12
Well, a quick photo update as I had to take some quick snaps for the "Air Rescue" magazine. I have actually been busy......but still trial fitting/ sanding/ and shimming it all so I wont need much filler on final assy. I spent a lot of time on the fairing in front of the engine cowl again. There are tricky compound curves on the inside roof that need matching, like this 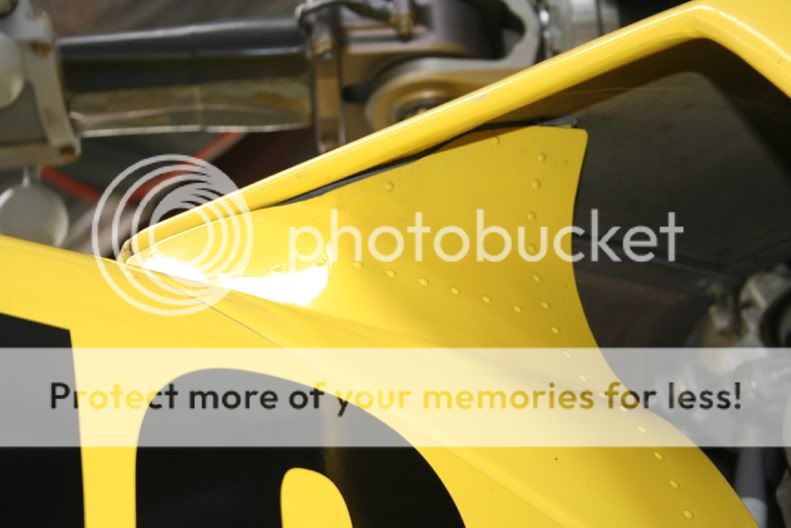 It took a lot of building up to get it right. I just realised I didnt take a pic of that area I finished. You may be able to see it in this one. 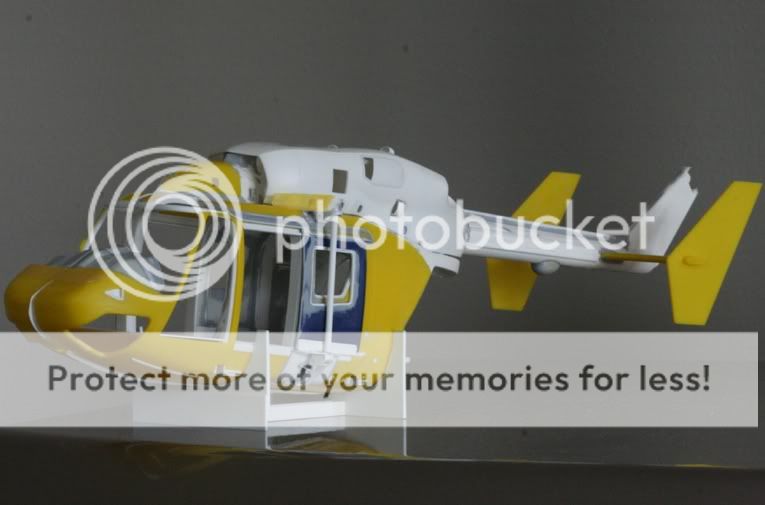 She is really starting to take shape now. I am making a template to hold the brass exhaust pipes etc. I have been also working on the end plates (vertical stabs), but I have a lot yet to do on those. 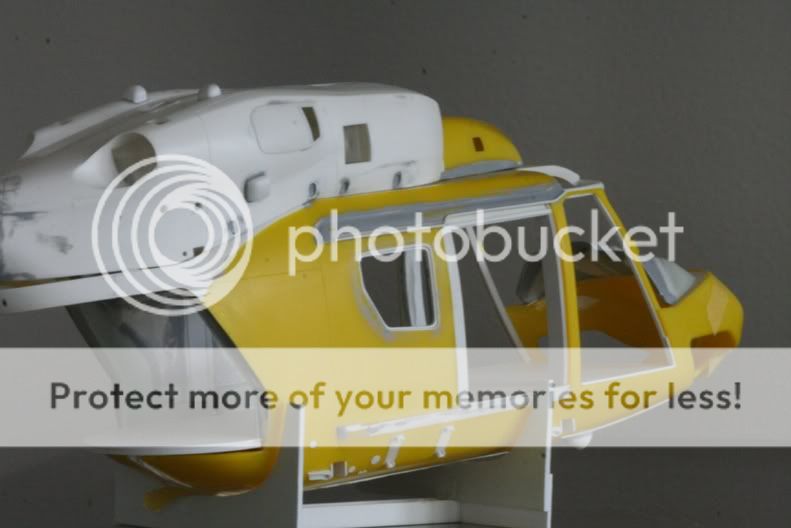  I think next up has to be the etch.................................I cant put it off any longer, I really dont want to mess it up. Cheers for looking again Anthony |
|
|
|
Post by mstokes on Oct 29, 2009 17:15:52 GMT 12
Very nice work mate... I am still working on my canopy after 6 weeks of skinning and attaching the mechanism that will allow the canopy to open and close.
Looks like it is all coming together easily now, after all... once the fuselage is closed up it is almost time for paint and decals ;D... yeah right!
|
|
|
|
Post by Dave Homewood on Oct 29, 2009 17:29:51 GMT 12
Looking really superb Anthony. Good luck with the article. Please post a scan of it when it's published if you can.
|
|


 ?? I hope so, I have spent so long on it I cant tell anymore! There may be a little tweaking here and there, but on the whole I think it is pretty close.


