|
|
Post by agalbraith on Oct 29, 2009 21:13:05 GMT 12
Thanks Guys!
Dave, yes I will send you a scan, no problem at all.
Mike, I was wondering how you were getting along my friend! Sounds like that canopy will be amazing to behold! Looking forward to pics.................its been a little quiet around here lately.
Cheers
Anthony
|
|
|
|
Post by mstokes on Oct 29, 2009 21:32:55 GMT 12
I will admit Anthony, I came very close to putting the project in a box for a while... just seems to be that I have been lacking a bit of time lately and I want to do things properly. However, I have remotivated myself and having sorted out the rubber flap that goes on the back of the canopy (seriously... this was probably the hardest thing I have had to try and get right on the plane, there were about three different curves to sort out!).
I am however spraying the wings with the white primer in between todays posts, I will try and get these on in the weekend.
Would put a pic up of the canopy, however I have liquid mask on it at the moment so it looks like a blue blob!
Fletcher construction so far is close to a year since I put the first balsa molds together... close to 1000hrs now as well...
I can imagine that this very impressive BK also has many, many hours poured into it and the efforts show this very clearly. Keep it up Anthony!
Cheers Mike
|
|
|
|
Post by Dave Homewood on Oct 29, 2009 21:53:59 GMT 12
Out of interest, does anyone know how long from start to roll out that it took to build a real Fletcher on the production line?
|
|
|
|
Post by kiwichappers on Oct 30, 2009 4:24:50 GMT 12
Now then Anthony,
Its been a while since I looked in on your build and had forgotten just how impressive it is. Great workmanship which will result a fine replica and an inspiration for us all to lift our game.
kind regards
Francis
|
|
|
|
Post by Fletcher400 on Oct 30, 2009 5:12:56 GMT 12
Nice Anthony, shes really coming together now love dropping in to see how how this build is going.
Been pretty quiet on the modelling board of late, I too have been busy, dont think there has been a day go by since last November I havnt been doing some sort of work, been busy making my moulds with rivet and panel lines and also a prop with spinner, should update soon aswell on my thread.
Dave - Fletcher production looks to be around 1 a month on average from records, but at times was sporatic.
cheers
|
|
|
|
Post by flyjoe180 on Oct 30, 2009 10:23:43 GMT 12
Anthony, coming along really well now mate, I can see this is going to be a master piece of modelling when it's done.
|
|
|
|
Post by agalbraith on Oct 30, 2009 11:12:35 GMT 12
Thanks Gents
I am starting to see light at the end of the tunnel now. Appreciate all of your comments!
Cheers
Anthony
|
|
|
|
Post by Dave Homewood on Oct 30, 2009 15:13:17 GMT 12
I can't wait to see the finished product, it will be wonderful. Do you think you might create a diorama setting for it?
Just think, then you can get back to your P-51D and your Mosquito. Cool! ;D
|
|
|
|
Post by agalbraith on Nov 28, 2009 16:25:03 GMT 12
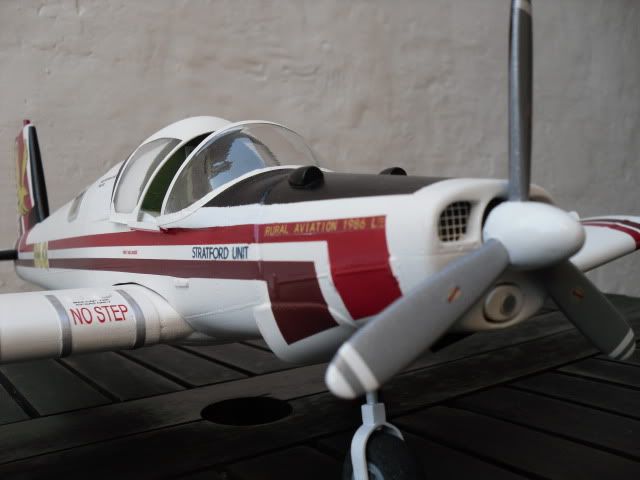
Hi again gents, well time for a much needed update. Yes Dave, I am thinking of putting her on the portable landing pad she sits on I have been away from home quite a lot again. Seems like I am away more than at home sometimes! However all is not bad......................I have been doing some research on my next project!!! 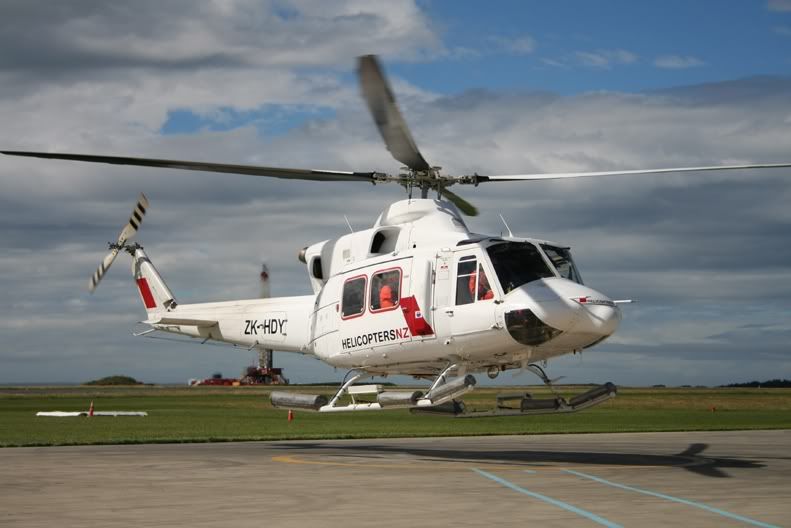 And this second photo is the actual machine I will be doing 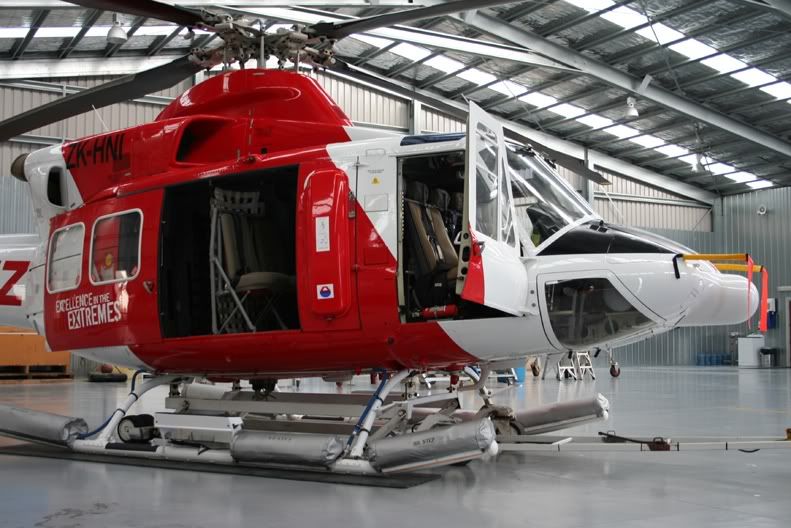 Anyway.....must not digress, this is my BK thread Now I am home again, I have been working on the skids like Oliver. This has proved quite a tough task and this is my 3rd attempt. First I marked out the skid width at the centres as well as the height of the belly at the cross tube point from measurements taken off the actual machine. This gave me the "sit" I had to achieve. I used some old skids I had left over from an EC-135 parts ship and used the much modified legs from the BK kit. These were modified at the base and had cuffs etc added. Then the lengths were cut and an extension piece of tube was glued on so that it protruded into the fuselage and can be anchered down at the correct angle. I cut down the front section of the EC-135 skid to match the BK. Then I have reamed out some tube of the appropiate diameter to slip the skid ends into, thus representing the straps around the skids. These will get more detail added once the main skid structure has been completed. Anyway I will let the photos explain a little better how it looks so far.  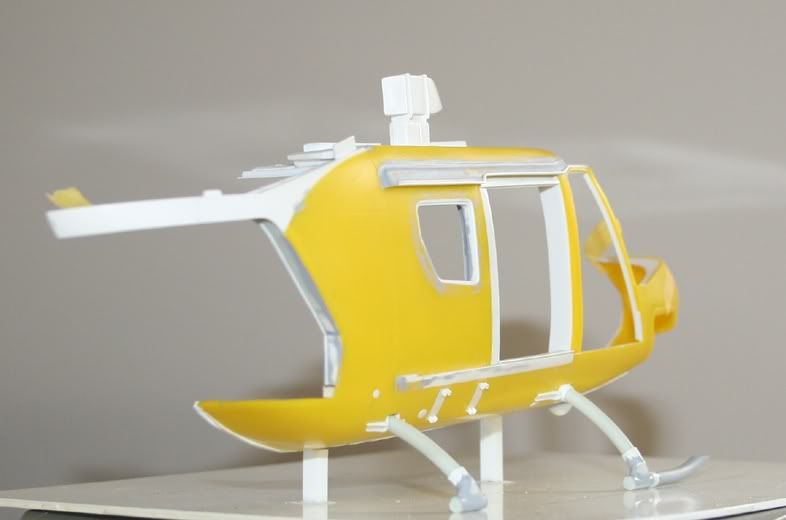 I have also done some work on the rear clambshell doors, but forgot to take a photo. Will try to update tomorrow as I have to go out for tea soon. Cheers and thanks for dropping by. Cheers Anthony |
|
|
|
Post by agalbraith on Dec 10, 2009 18:41:40 GMT 12
Ok ok, here are some photos. Sorry the quality is not so good. So I had a spare set of EC-135 skids that I thought would do the job after modifying and cutting down to shape as per previous posts. 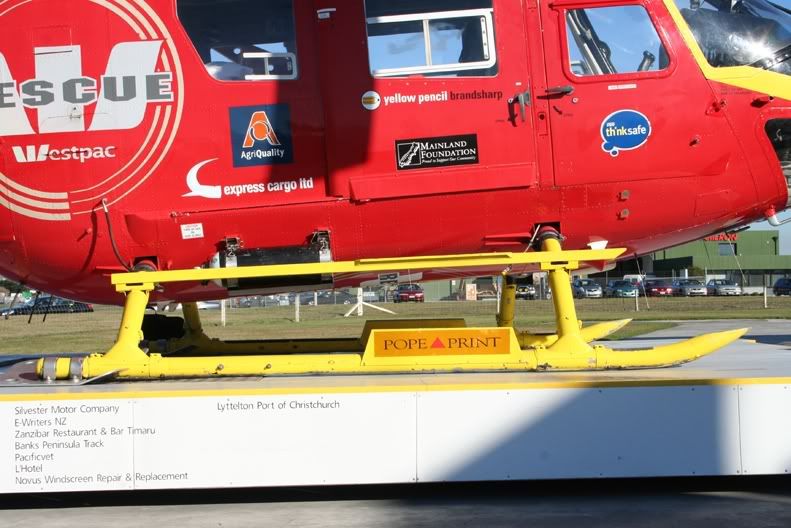 Well that didnt work well as I just couldnt get the sections to line up perfectly. Eventually I got a piece of 3mm tube and grafted the front section on with a pin and superglue. Yhis was all blended in and then the centreline of the first vertical tube was marked out (from skid tip back = 25mm). A curve was filed out of that and the previous tube I made was jigged and set at the correct angle. Then another curve was cut out 59mm back to the rear tube centre and the rear tube set and glued in my jig. Finally the rear end was cut off 12mm from the rear tube centreline. The joints were then blended in with Mr Surfacer and all sanded to the correct shape. I then got another section of the skid tube and reamed out the centre to make it wafer thin. I then slit it and slipped it over the skid tube. Being the same diameter it left a small gap with which I put the wee block in that sits on the top of those hose type clips. There is a panel join under the vertical tubes on the lower skid side. For this I placed a thin strip of plastic card and blended in the top side to the tube join. A step was made with a piece of channel on the bottom with the edges thinned so that it would slot nicely over the skid and ends put on it. Finally a tip was put on the rear of the skid. I have been putting the clips and mounting brackets on for the step mid way up the skids. 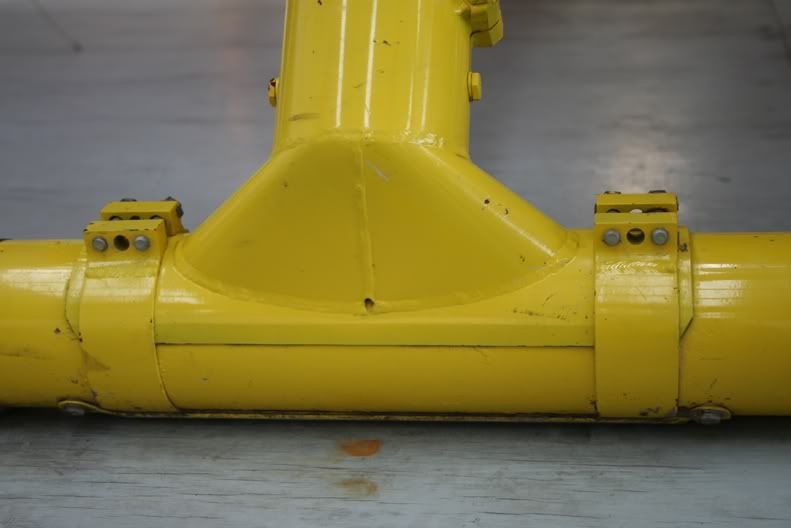 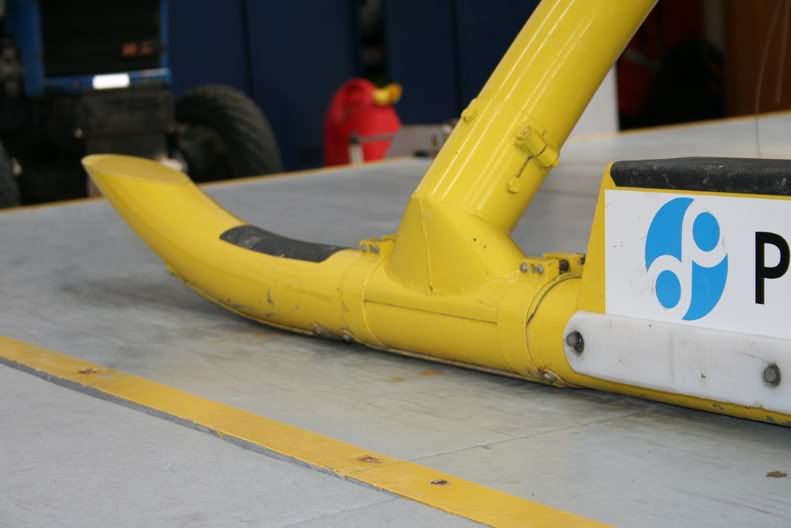 Does all this make sence??? Hopefully the pics will explain better 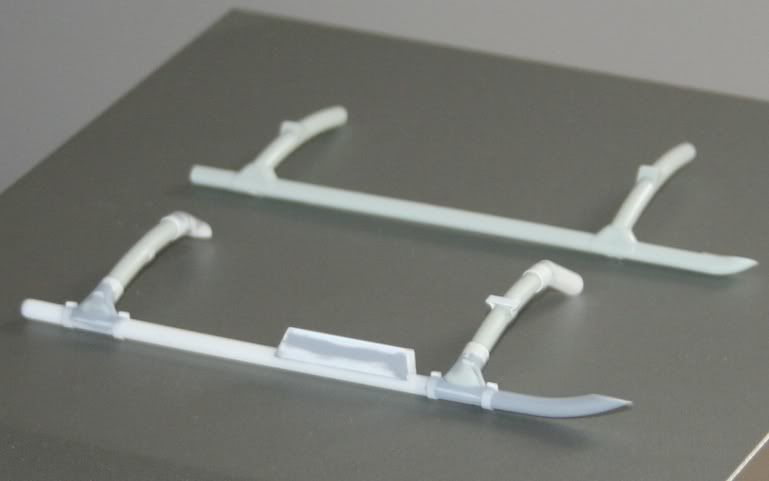 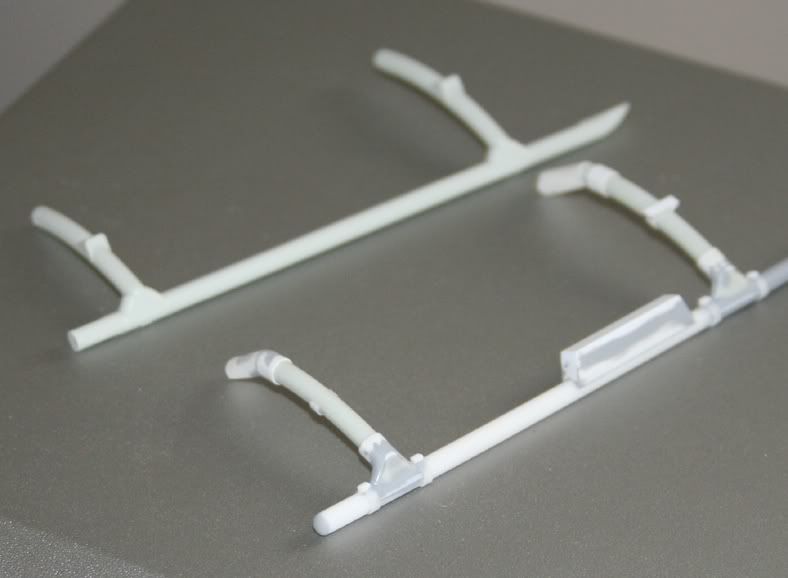 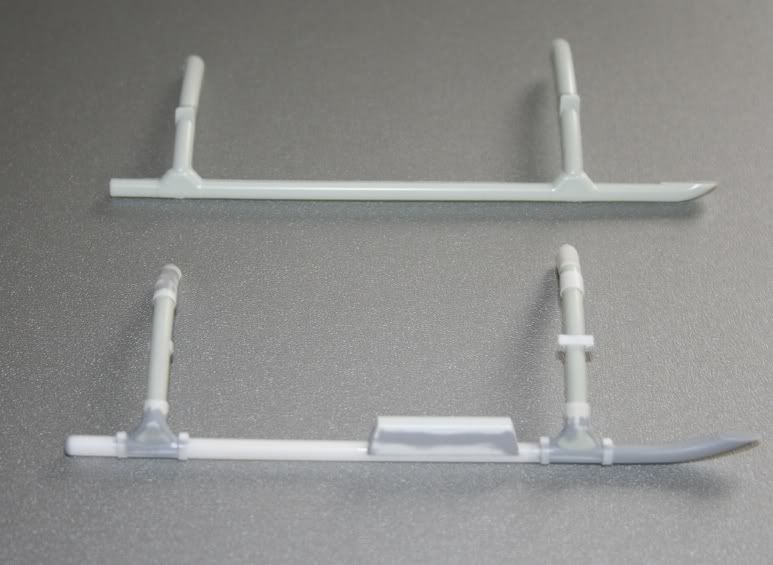 I set it all up on my jig so as to assure I get the correct "sit". The main skid centres are 2.440M or in 32nd = 76.25mm. The height of the belly in line with the rear skid is exactly 10mm and 13.75mm for the front. This will ensure your BK will sit right.......hope those measurements help those of you building one. And here they are roughly sitting in the fuse................now for port side! 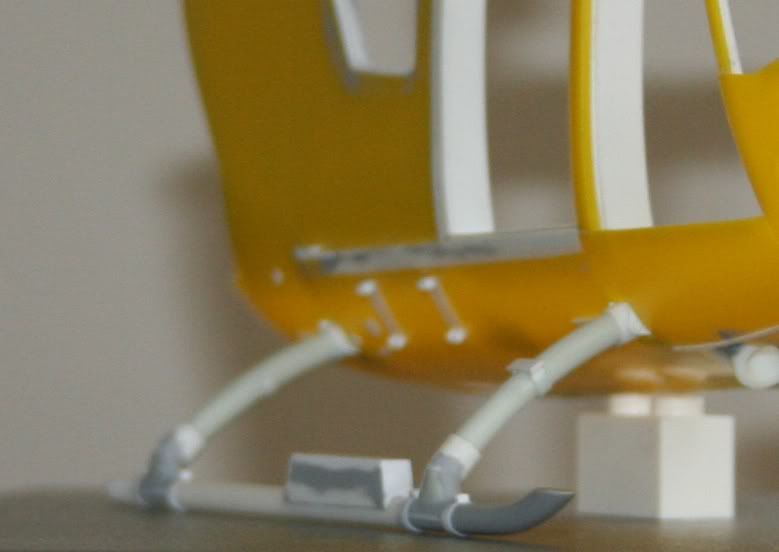  There are still a few details to be worked on still. As always, thanks for dropping by. Cheers Anthony |
|
|
|
Post by Dave Homewood on Dec 10, 2009 19:39:06 GMT 12
Fantastic detail, as usual. I wonder what the guy who made the original design for this kitset would think if he could see how much you've improved on it.
|
|
|
|
Post by flyjoe180 on Dec 10, 2009 19:40:21 GMT 12
I was thinking the same thing. Great work and effort Anthony, keep it up mate!
|
|
|
|
Post by agalbraith on Dec 10, 2009 23:08:27 GMT 12
Thanks guys, much appreciated indeed. She is in the latest Westpac Rescue "Airwaves" magazine. Pretty humbling since they devoted a whole page to her. 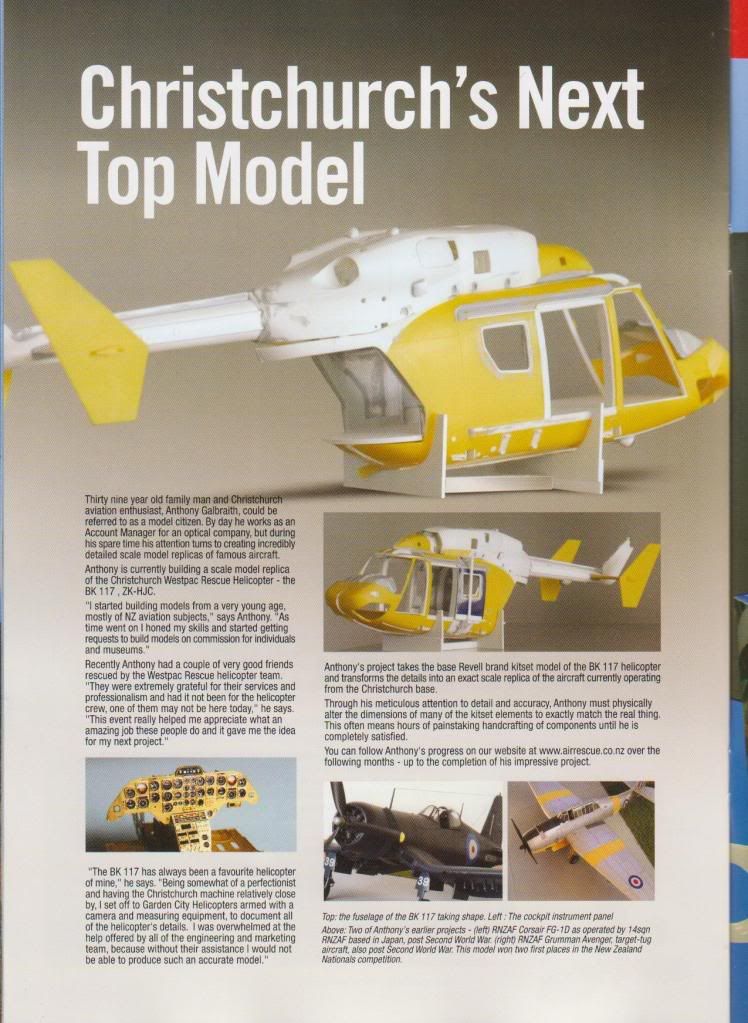 Cheers Anthony |
|
|
|
Post by Dave Homewood on Dec 10, 2009 23:34:53 GMT 12
Superb!
|
|
|
|
Post by flyjoe180 on Dec 13, 2009 10:19:16 GMT 12
Excellent Anthony, a whole page! You know you've made it when your name is in lights ;D
|
|
|
|
Post by agalbraith on Dec 13, 2009 11:24:40 GMT 12
Thanks Guys
I think I know I have made it when it is sitting in my cabinet finished!
Thanks again gents, oh and Jo I am still using those pics you emailed me for certain areas, cheers.
Anthony
|
|
|
|
Post by mstokes on Dec 13, 2009 23:17:33 GMT 12
Hey Anthony, congratulations on the article, that is brilliant!
Never put it together before but I thought your Avenger was exceptional, I did not know it was one of yours though.
Well done mate, keep the updates coming!
|
|
|
|
Post by agalbraith on Jan 16, 2010 16:11:39 GMT 12
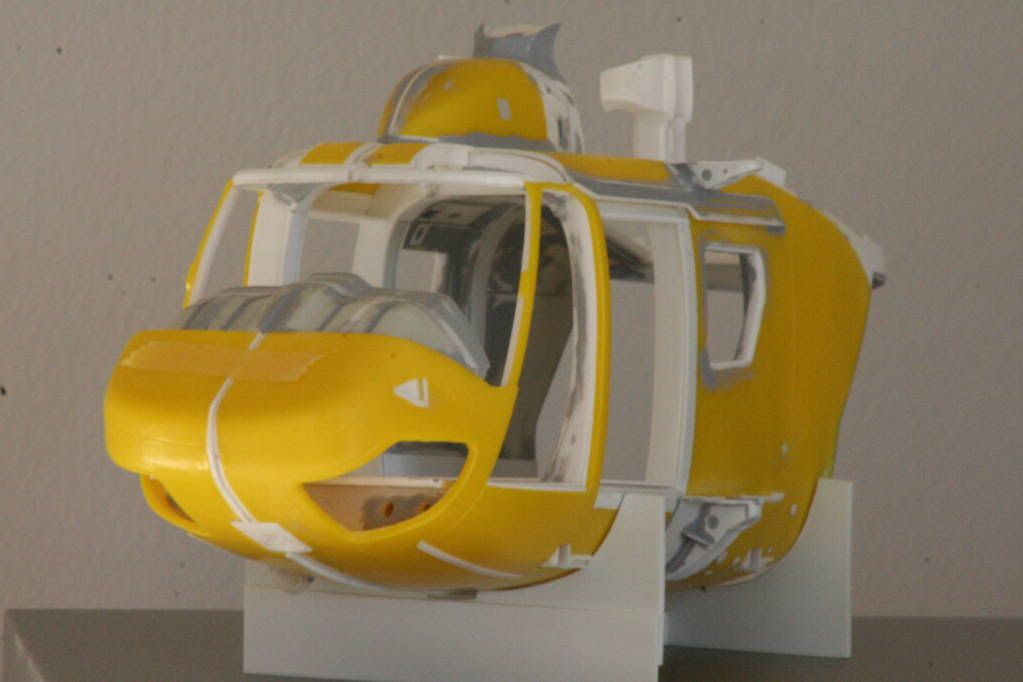
Hey thanks Mike Well, I bet you all thought I had chucked it back in the box to do something else? Been a while since my last update as I have had family over to stay with us from England and Australia. They have all gone now and I spent the last week on the BK. First off, here are some slightly better (just)pics of the skids, they are both pretty much done now but still need a few small details added like rivets etc 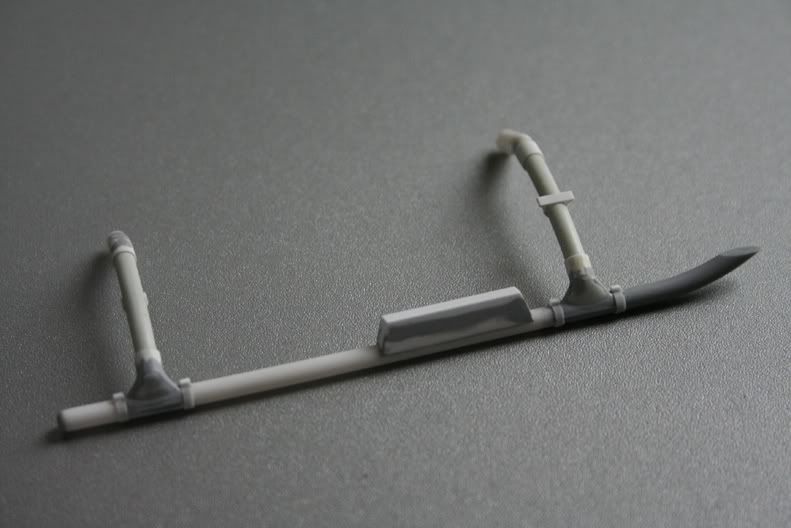 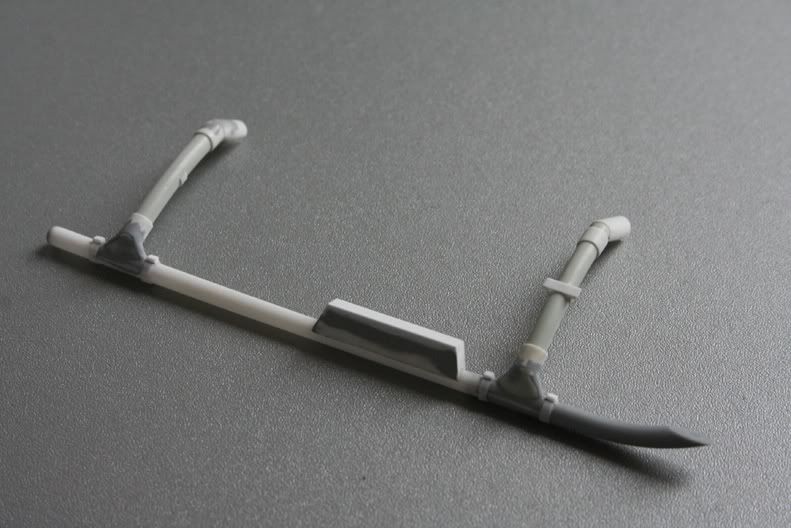 Spent a fair bit of time this week figuring out how to make the rear clambshell doors look better as they are a bit slab like on the edges. I ran a half round across the bottom edge as well as glueing a thin strip of square section card around the edges, but only about a third of the way in (leaving 2/3 inboard). I then sanded and blended it into the door edge and then filed the outside flush. A coat of Mr Surfacer again blends it all in nicely. Now it has a 'lip' around the edges as per the actual ones. 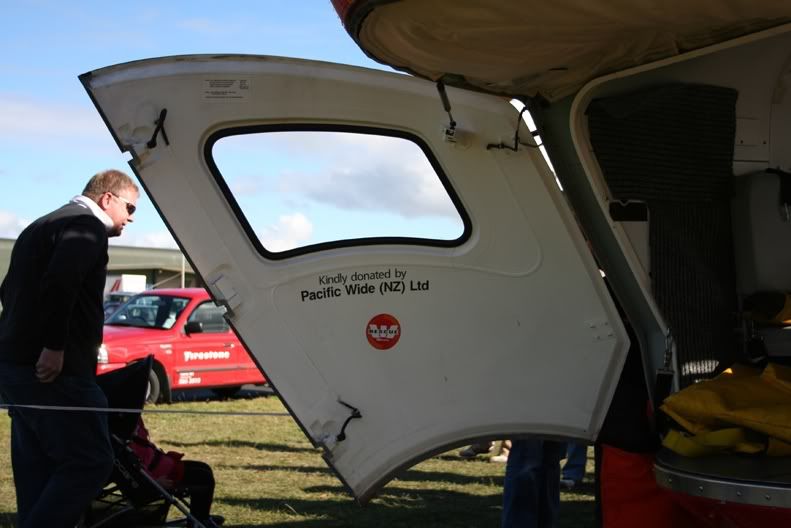 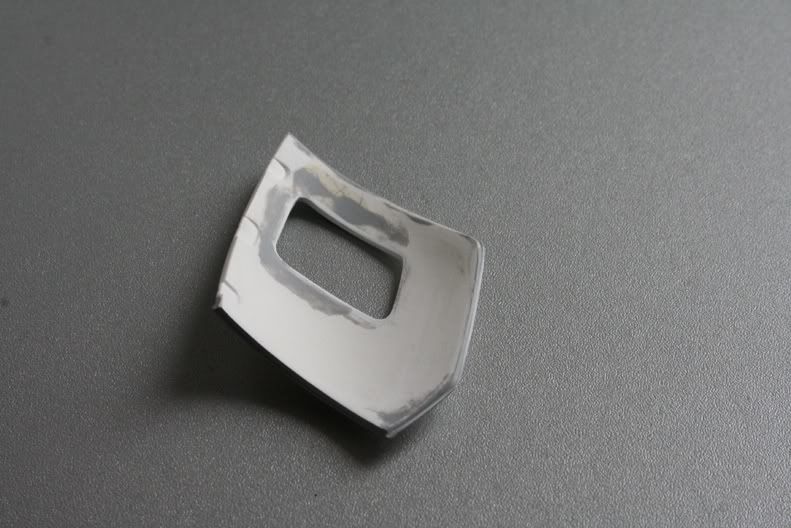 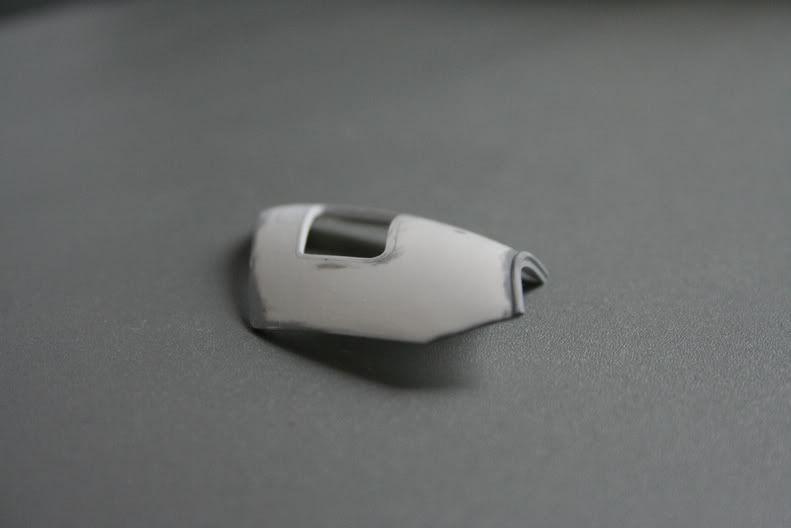 Next up was to again deal with the floor. I almost had it all fitting right, but it needed final tweaking to fit nicely. A front bulkhead was installed with 2 holes to accept the torque pedal tubes on either side. The floor also protrudes past this bulkhead as well, so a piece was measured, glued and faired into the floor. There is a panel that sits on this BK's floor that has the holes cut out for the 6 tie-down points. Now was time to measure up their positions and drill 6 2mm holes in a floor panel I made (4 times no less to get the shapes/ cut outs all in the right places!). 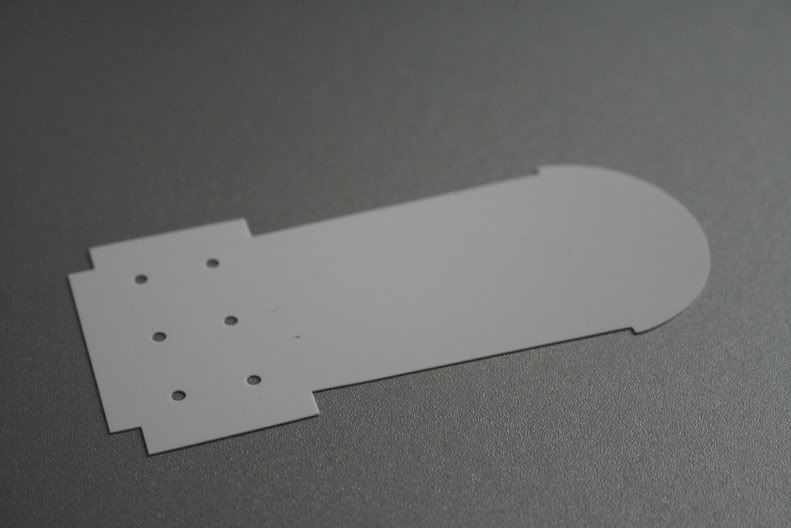 In this photo you can see the floor extension and bulkhead with the holes drilled out. 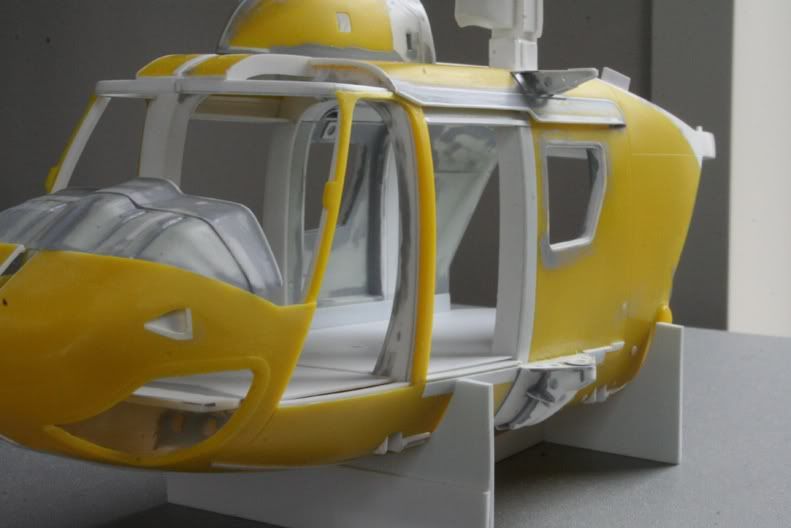 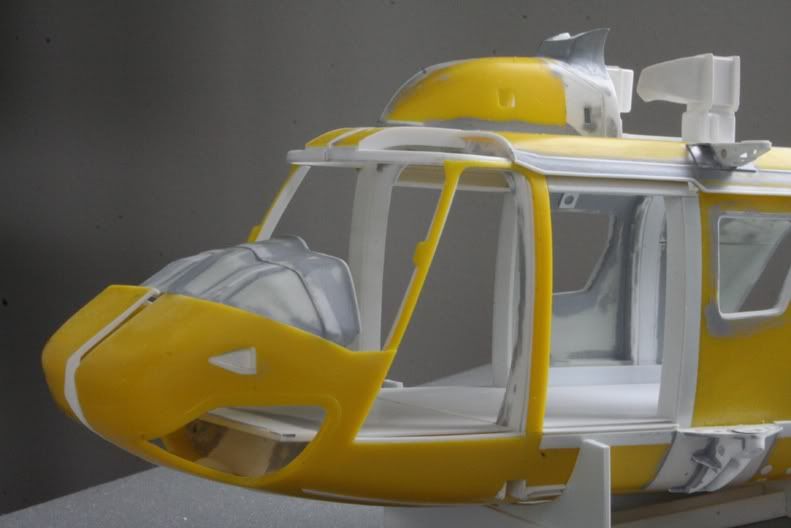 Next up was the covers for the cyclic and torque pedals etc that are installed on the passengers/spotters side of the cockpit. 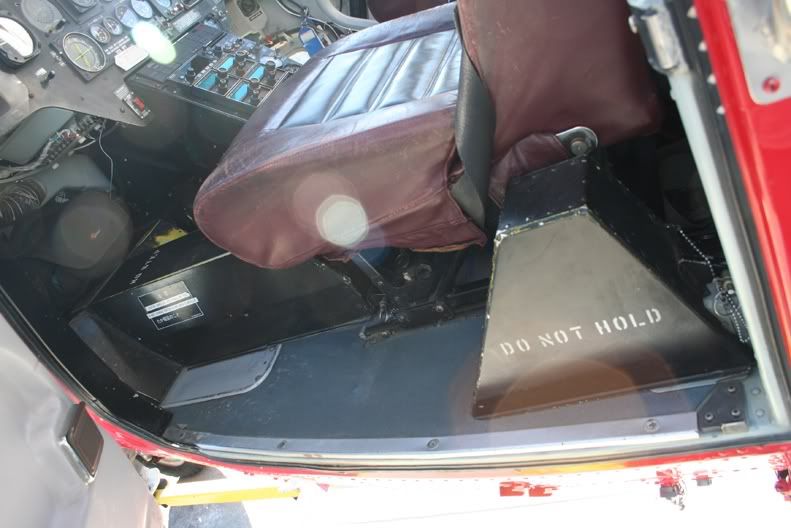 There was actually a bit of work in these even though it dosent look like it. Especially the big 'T' shaped one. My drawings and measurements took a lot of head scratching as well (mental note.........make better/ more clearer sketches!). I went back down to see the chopper and spotted a small detail I would have missed as well as a new antenna fit under the belly.....grrrrr. Anyway here they are made 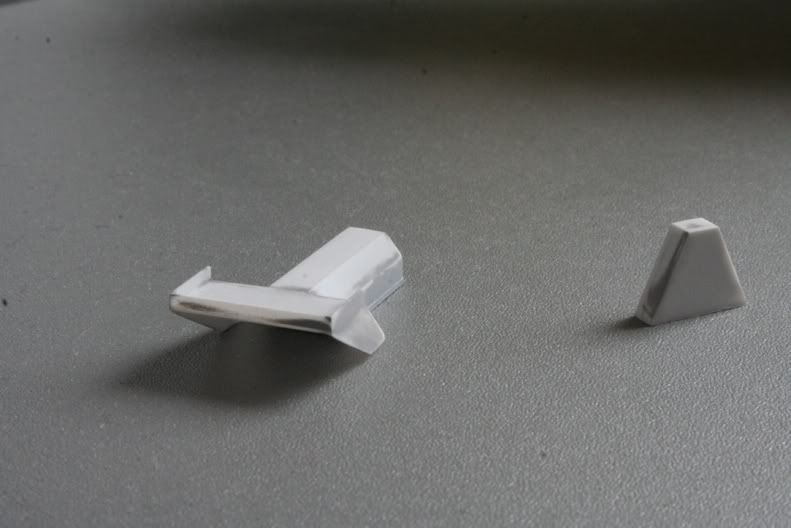 And here they are installed 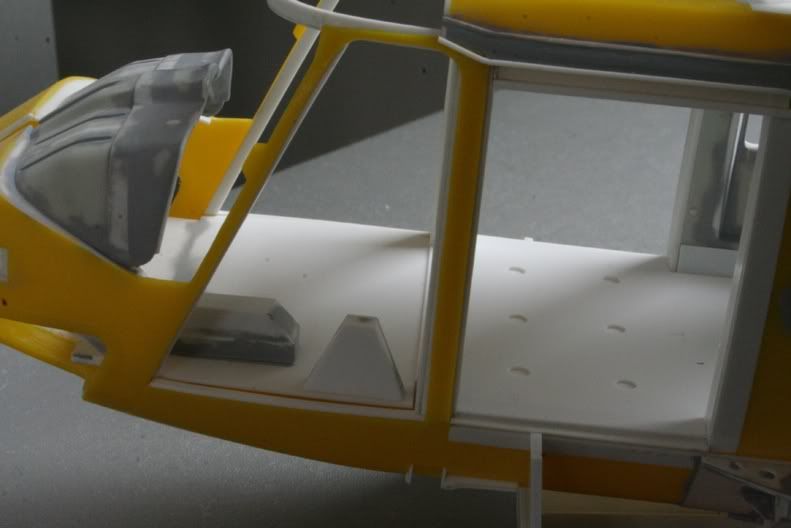 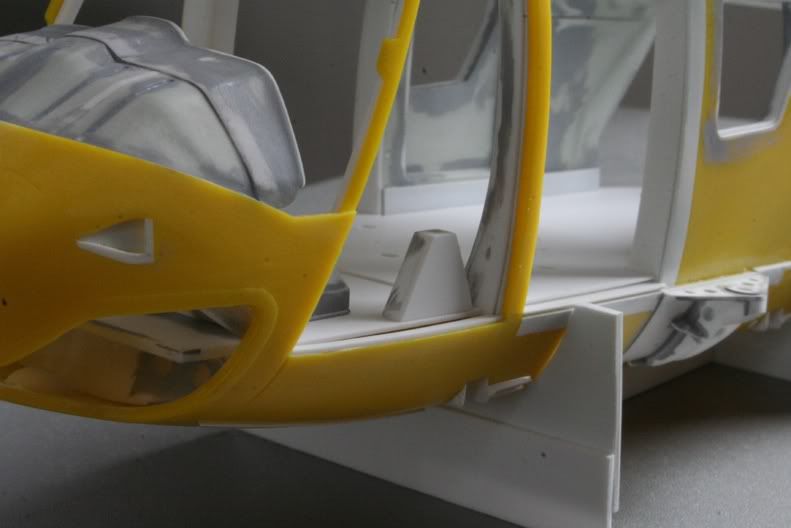 Thanks for dropping by Cheers Anthony |
|
|
|
Post by agalbraith on May 6, 2010 11:11:10 GMT 12
 Well, as you can see above I am getting to grips with my new computer software.........photos are a bit grainy though...... Anyway as you can see in the above shot I have the EC-145 light panel grafted under the nose. In this lower shot you can see that I have finished all of the door seals on the rear fuse. There is an inner and outer set. This was quite a challenge as I used fine thin strip glued around the edges and then re-glued with very thin CA. This was then flodded again with Mr Surfacer and then the edges filed down to a scale width to match photos. Note also on the lower floor now there is a new piece glued to the bottom. This is the new lower fuse structure and as you can see, the rear of the belly needs to be extended back to correct the profile. 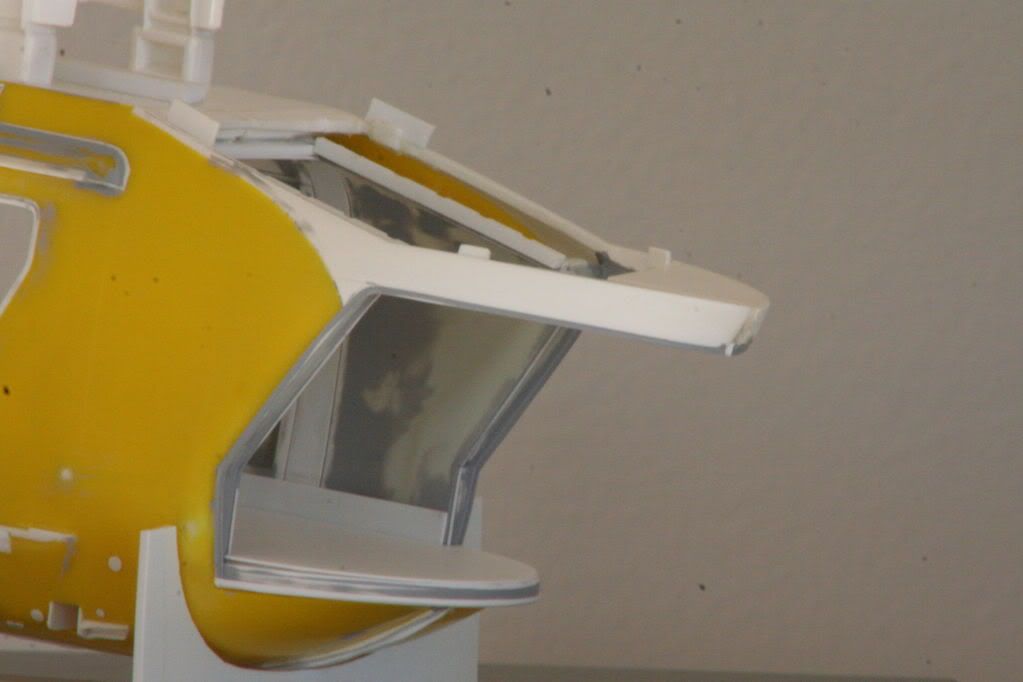 Unfortunately this next photo I took here isnt very good either, but you can see the antenna's fitted forward of the upper engine intake cooling scoops. I initially used the kit ones but they were too square, so I made little plates on the cowl, drilled 2 small holes and inserted a suitably bent piece of fuse wire to the correct shape. I got a bit ratty with it but am happy with the difference it has made. 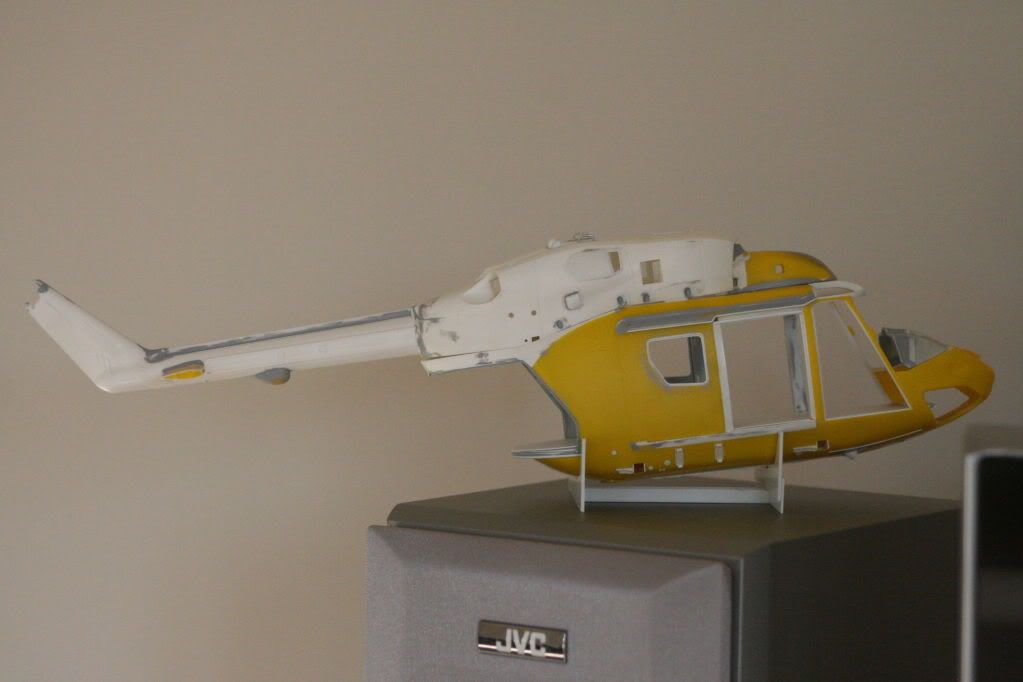 Next to recieve attention was the main rotorhead and blades ....again! Now I definately dont like the BK-117 kits rotorhead or blades.....call me fussy, but I have come too far now. The rotor dia is a bit small and the blades are not good enough. I have decided to go with the highly modified EC blades and hub. First off the aerofoil section was changes as the 145 blade is flat on the bottom whereas the BK is not. Then the 'bump' was put in the leading edge near the root and the shape and length was changed as well as tip detail. I also added a new trailing edge and hub attach point details. All in all each blade has about 25 new pieces in it so far..... The hub was improved by adding new ends. there are still qite a few new bits to go on, but I need a break from them for a few days.....they are driving me nuts. As you can see (just)I have started adding the photoetch from the Reniassiance set on the blade roots. Not much to see, but there are star shaped nuts on the other side as well, I have only just started adding these on one blade. 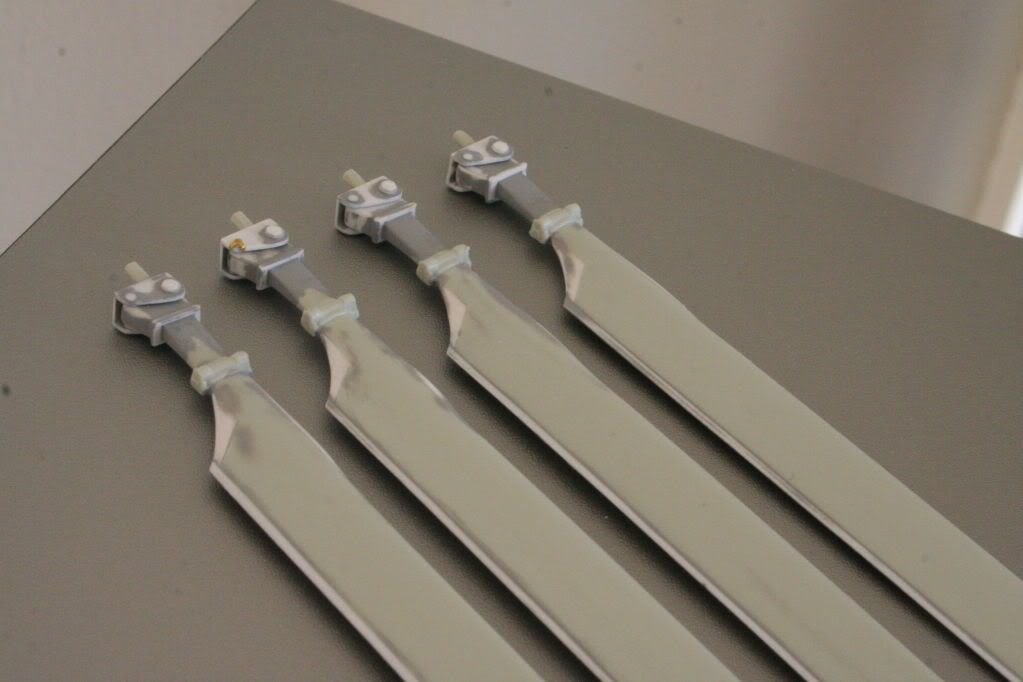 This shows the centre verticle console being made along with the main hub. I couldnt balance it in the model to take the photo as it kept falling over by the time I got back to the camera! 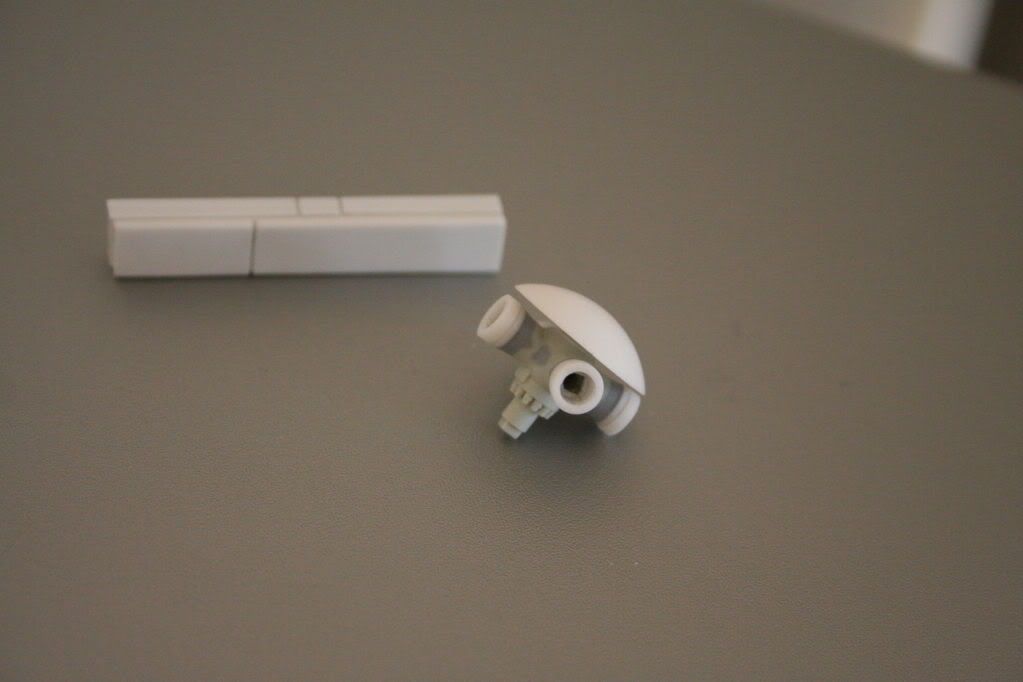 Well, thats where she is now. I have really enjoed getting back into her again. Cheers and thanks for dropping in |
|
|
|
Post by Dave Homewood on May 6, 2010 11:28:20 GMT 12
It's good to see more progress here Anthony, and it's looking great!
|
|