|
|
Post by agile on Nov 13, 2016 7:22:16 GMT 12
This month we start with the Steam Sunday, which was a great success. Here Dr Daniela Liggett from Gateway Antarctica at the University of Canterbury explains aspects of life in the field in Antarctica to a visting family: 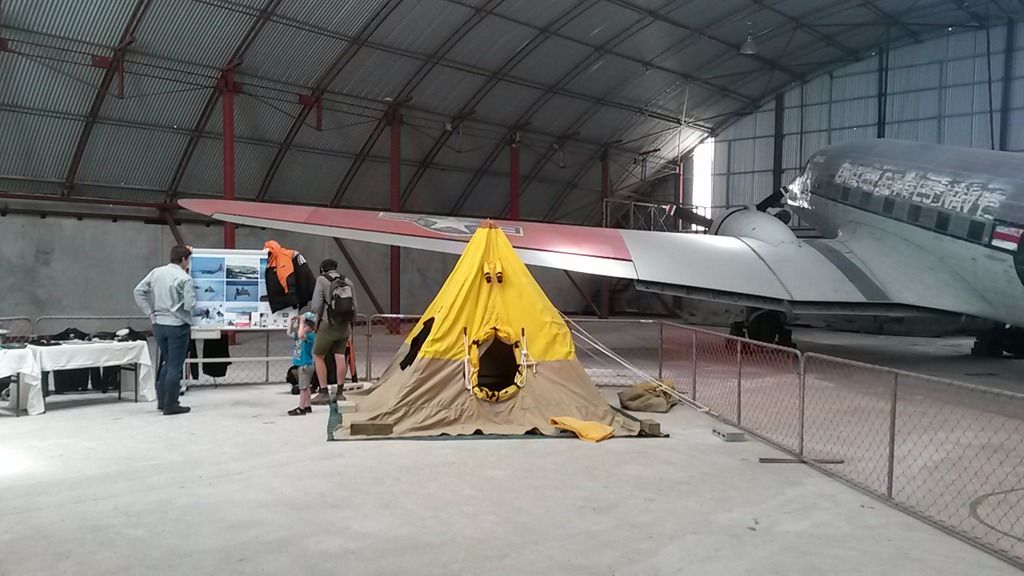 And Ephaphrus Mamabolo, a PhD student at Gateway models ECW gear in front of a Scott Polar Tent: 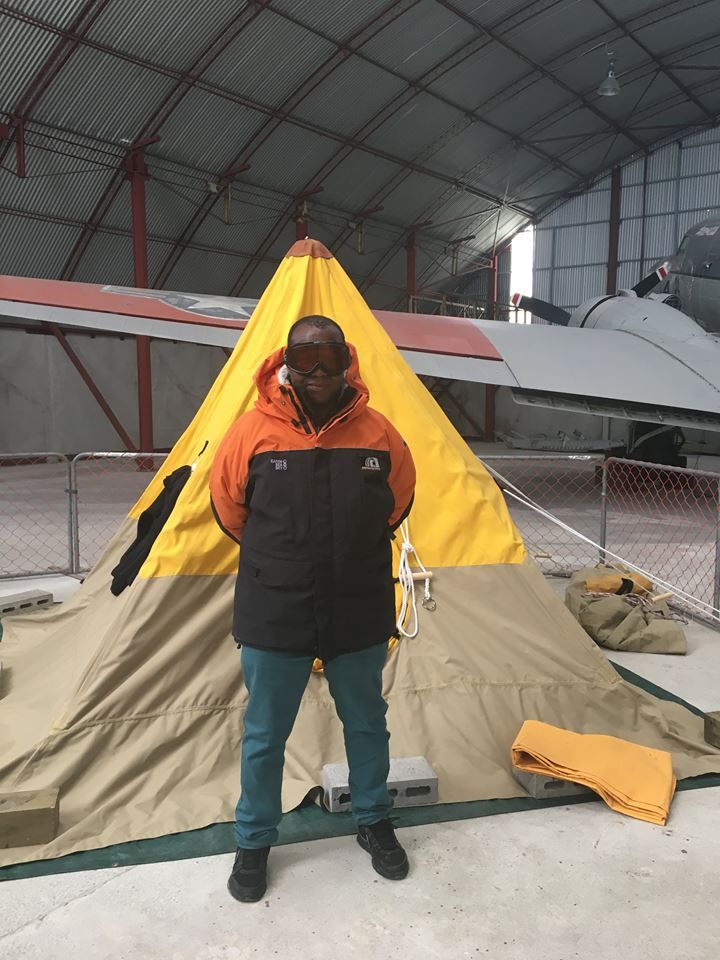 Sadly the Hiller FH-1100 once again didn't make it, this time because the two rated pilots were both called away on the day.  Thanks again to Antarctica NZ, Gateway Antarctica and Fox and Associates for helping out with what was a fun day. In the Mossie workshop we have been taking advantage of the warmer weather to cover the tailplanes. The fabric is Egyptian cotton, which is similar to but vastly cheaper than the Madapolam of the original. The process is as follows: The surface is coated with red tautening nitrate dope: 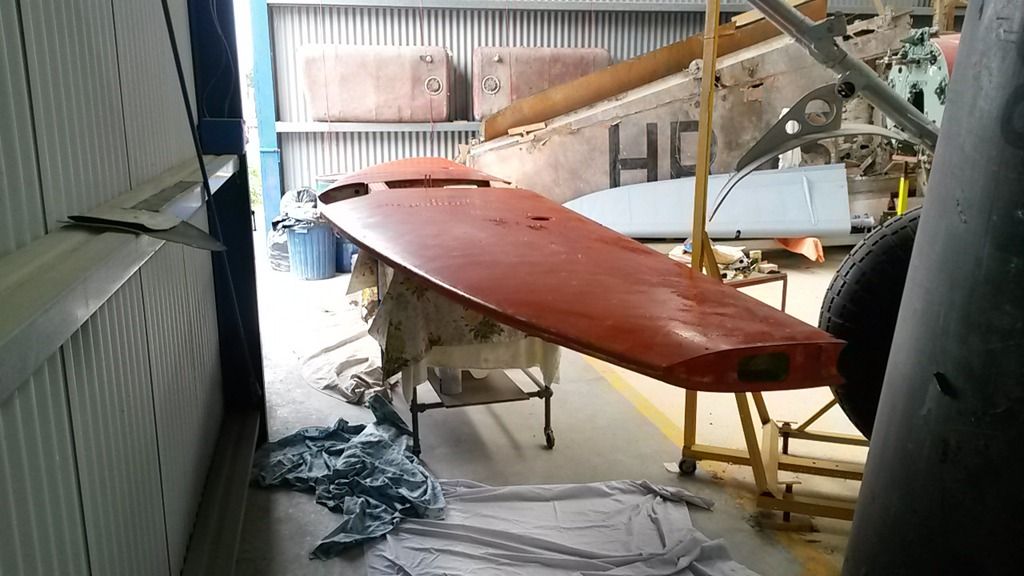 Once this is dry the fabric is cut roughly to size: 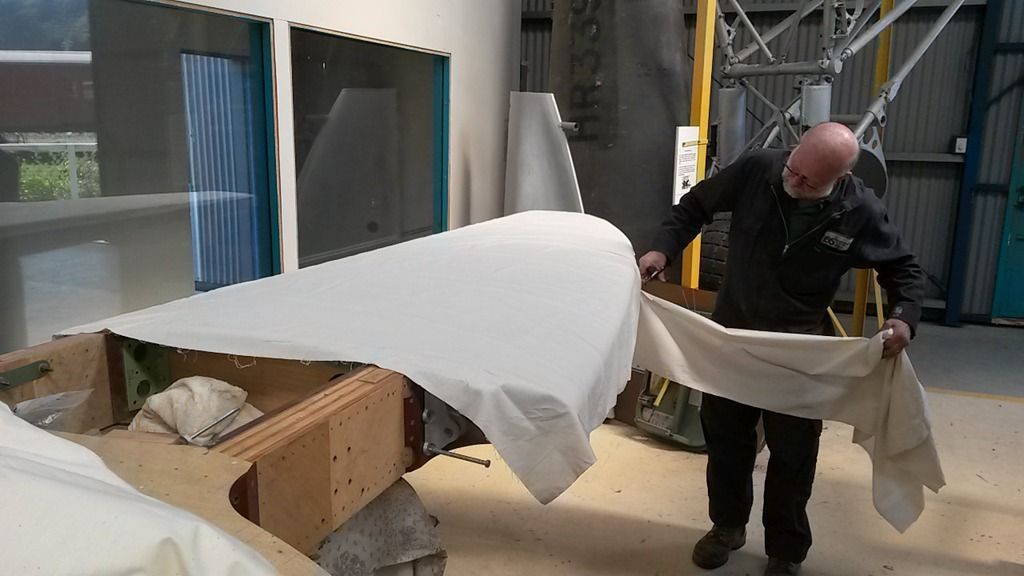 The trailing edge is pinned and then doped down: 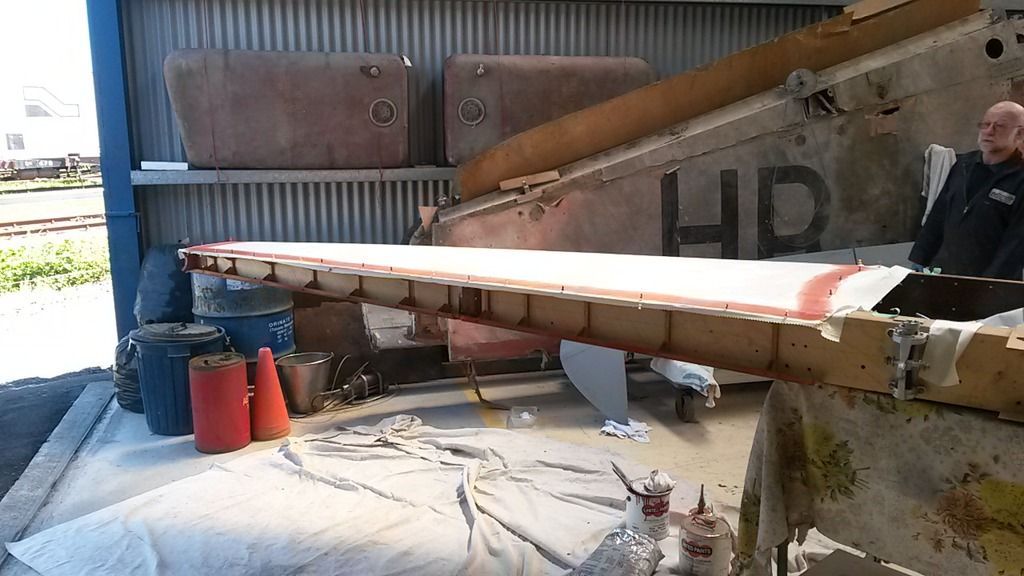 Then the fabric is stretched taut and the other edges are pinned and doped: 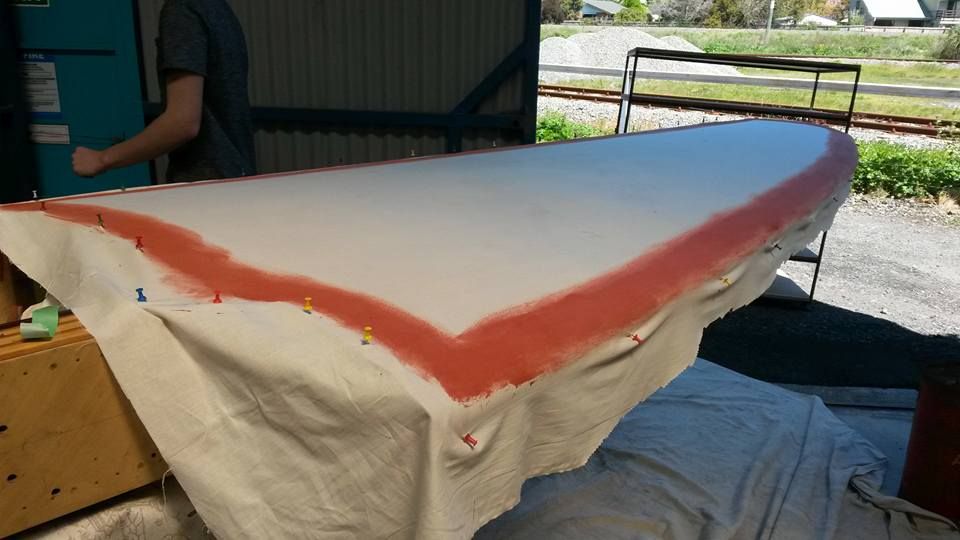 Once the dope is dry the rest of the surface is doped, and the edges trimmed, folded under and doped down: 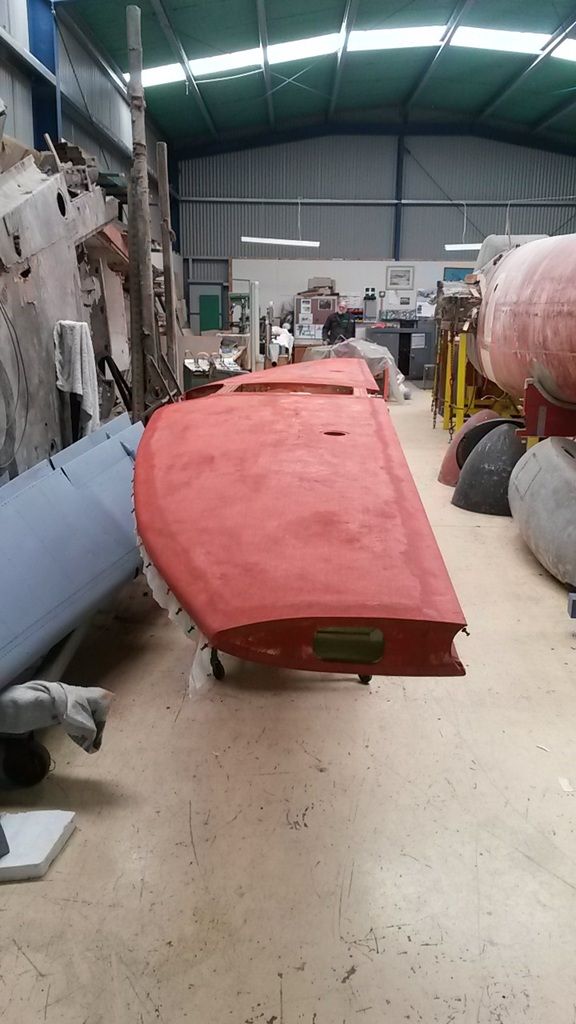 Not shown here, the edges are reinforced with fabric tapes and cutouts with fabric patches. The iffy continuity in these shots is due to the tailplane being shuffled around the workshop to keep it out of the way of tours and other activities. Fortunately it is very moveable. We should have both planes of the tailplane finished next weekend, then it is on with the rear fuselage. |
|
|
|
Post by Dave Homewood on Nov 15, 2016 20:18:20 GMT 12
Excellent!
|
|
|
|
Post by Deleted on Nov 16, 2016 9:35:19 GMT 12
Agreed!
Is all well down there after the earthquake?
|
|
|
|
Post by agile on Nov 18, 2016 21:01:12 GMT 12
Yes, thanks Zac. I popped down today to take a group from a rest home through for a tour, and everything was fine. The shaking was relatively gentle down here, compared to what they copped up in North Canterbury.
|
|
|
|
Post by Dave Homewood on Dec 12, 2016 21:00:10 GMT 12
Here's the latest update from Denys Jones... Seasons greetings.Hi Dave, In lieu of an xmas card here's a couple of shots of new additions to your favourite Hudson! Now that we've hung the port bombbay door it means that another floor panel that was "missing" could be installed. It had to be left out until now as you have to reach down through the subfloor structure that it conceals to install the rear bombdoor pivot pin. This screws through a casting mounted on the bombay rear wall and then into a bearing on the end fitting of the bombbay door top edge spar and it is on that bearing that the door swings (along with its mate at the front end). With the floor panel going in then the trailing antenna spool could be linked up with the tube which the antenna plays down out of the aircraft through the floor panel and the structure and skin below. I hope no-one's upset that the spool unit isn't strictly correct for an RNZAF Hudson but only because the brass plate on it reveals it to be of RAAF origin, as I acquired it from the B-24 group at Werribee. Meanwhile up front I've finished fabricating and installing the bombaimer's panel for the selection and fusing of the bombload. The main box structure was in situ in 2035 but the cover or lid and all the devices that mount on it were gone. I'm still however looking for the bomb release button and it's cable if anyone knows of one looking for a home. All the best for the festive season to you and our fans on the forum. Denys 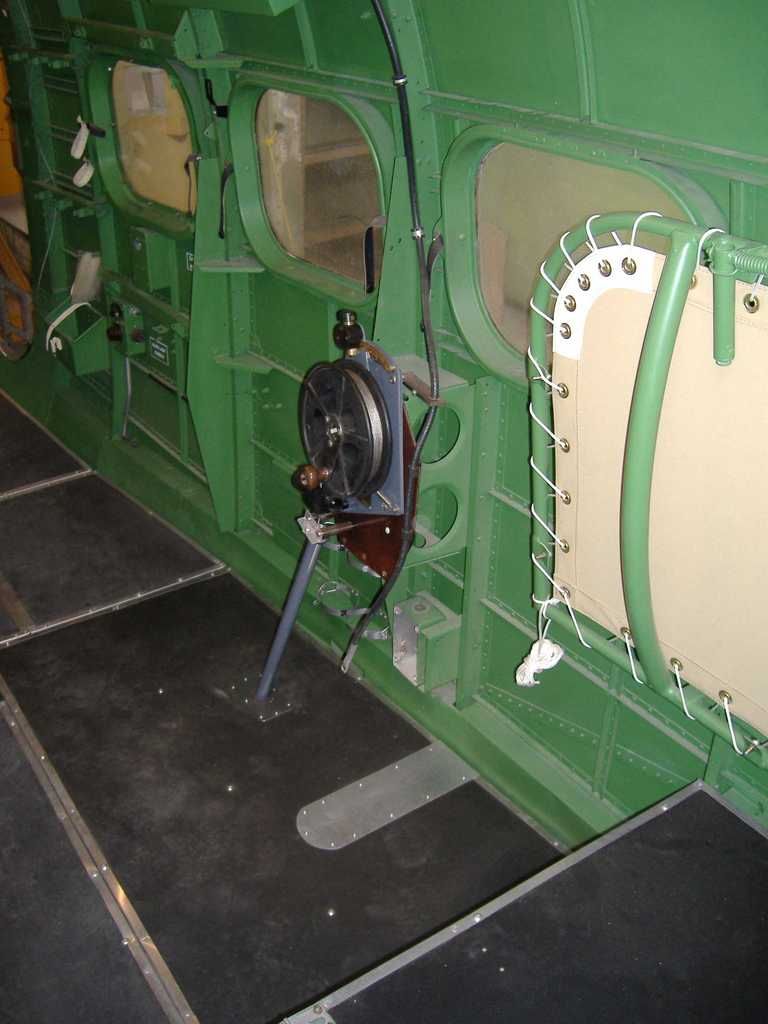 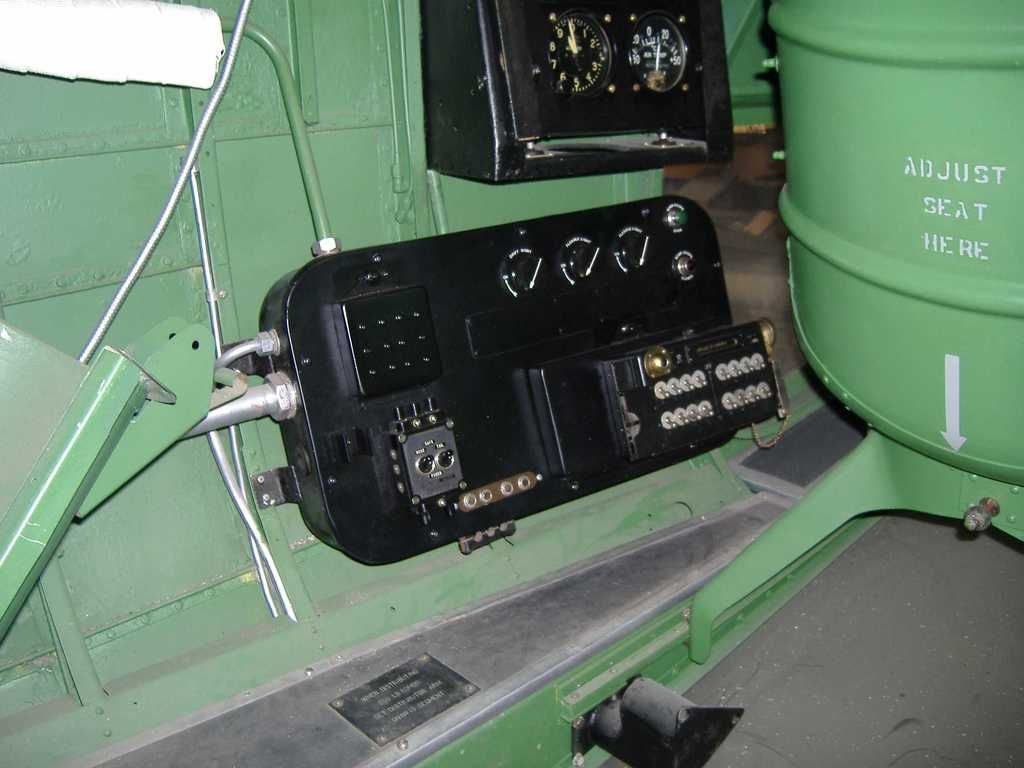 |
|
|
|
Post by Deleted on Dec 13, 2016 14:56:34 GMT 12
Lovely stuff! It always gives me a smile to see the progress on this one.
|
|
|
|
Post by Dave Homewood on Dec 29, 2016 22:13:39 GMT 12
Denys has sent this through an exciting update this evening: "... some of us have got over the Xmas excesses, unlike the book devouring Baz (!), and have got a bit of work in. NZ2035 got an Xmas present in the shape of the first bomb carrier being installed. It's an interesting one in that it is dimensionally and equipment-wise a RAF Type 1 Mk 3 but it is truncated at either end and the rail component is marked as an ARM199-1 which is a designation I have yet to track down. The other items (the release slip and the release unit) making it up are definitely AirMin 11A series items so I guess it might be a US production unit of some origin. I only need another 9 to fully equip the bomb bay, assuming all the positions were always filled with carriers. However that's a guess as I suspect the two photos I've come across are typical staged propaganda ones and perhaps Hudsons never flew with a full load such as shown. cheers Denys" 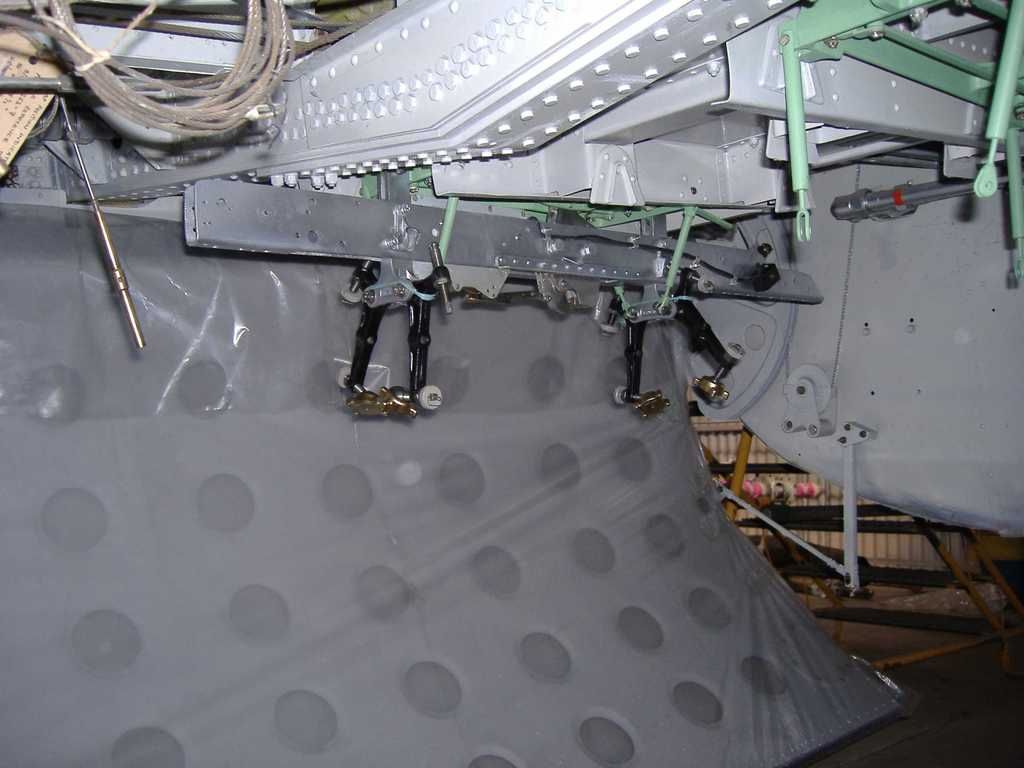 Fantastic to see!! |
|
|
|
Post by Deleted on Dec 31, 2016 8:53:42 GMT 12
Hear hear! Lovely.
|
|
|
|
Post by baz62 on Dec 31, 2016 9:09:19 GMT 12
Nice work Denys (book devouring coming along nicely but a trip to the hangar booked for January 1st 2017!) it does complete the bomb bay nicely showing what was used in there. You'll need a couple of bombs now.  |
|
|
|
Post by Dave Homewood on Jan 29, 2017 9:44:26 GMT 12
Here's the latest update from Denys Jones: "Things have been moving on BXG in the nasal department. The nose cone was in a pretty shabby state and obviously best dealt to off the old girl. It's amazing the amount of grease, asphalt, stones, dirt, plant matter, and probably other sundry things along with corrosion that had to be scrubbed out to transform it from the first shot to the second. 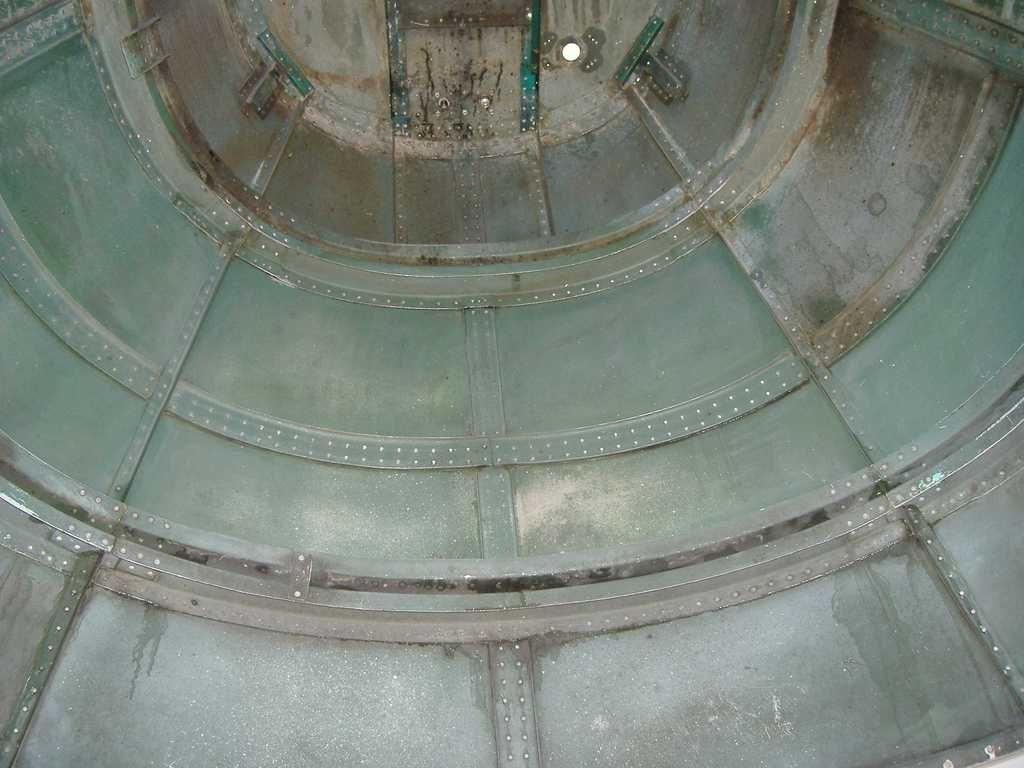 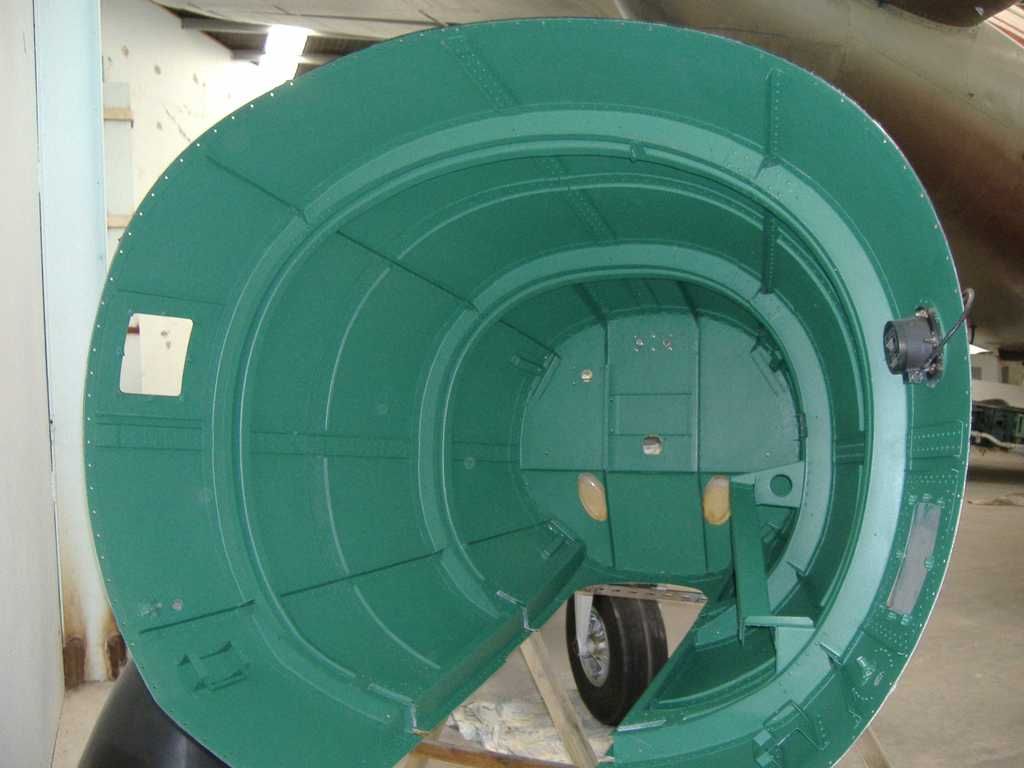 At the same time the nose leg and wheel have been cleaned up and painted in the areas that would be a bit harder to get to once the nose was reinstalled. The strop is standing in for the appropriate ram, which we don't have as yet, to hold the leg up so the wheel could be turned for cleaning. Finally then with the help of a few of the crew this afternoon the nose cone went back on. Now the front bulkhead is being dealt to and then the final nose will go on. 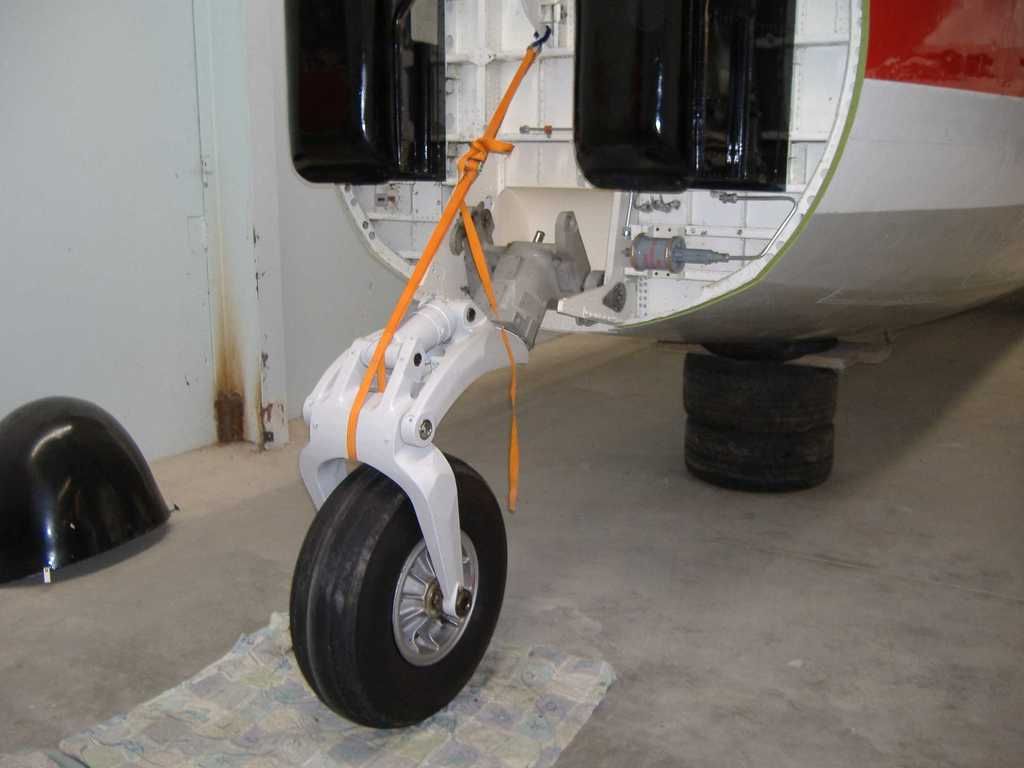 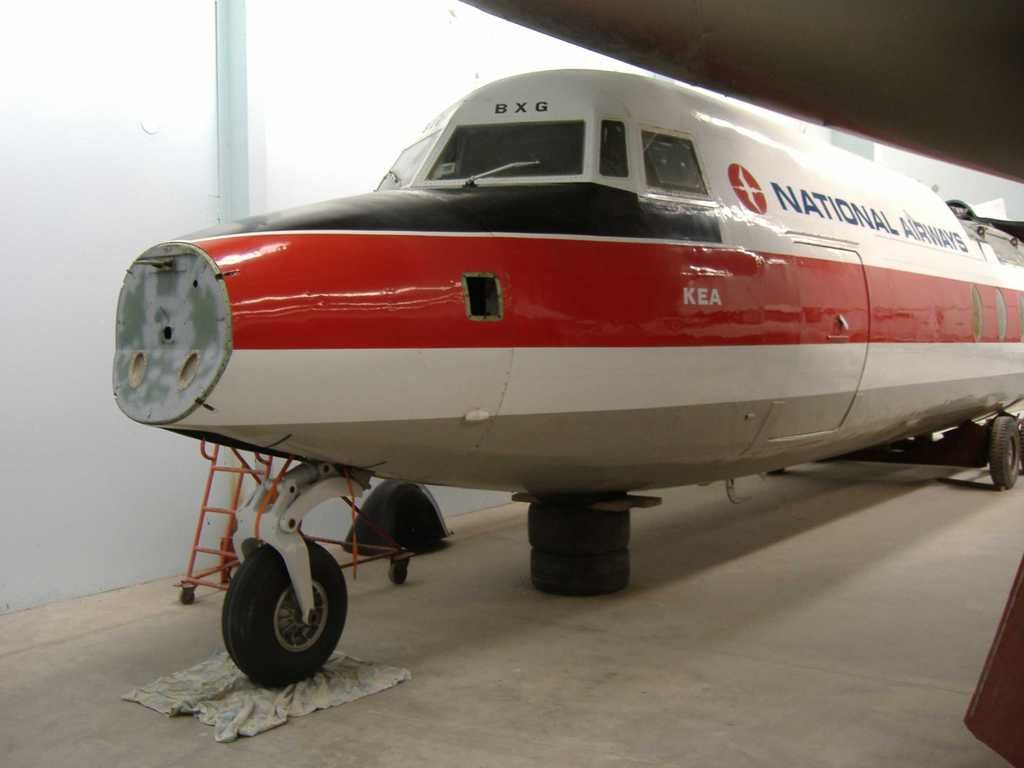 But rest assured Dave, the Hudson hasn't been neglected but its more of the stuff you won't see unless you get to grovel in the nose compartment. I've included an old shot from some years ago and then today but it would be hard to specify the latest length of pipe that went in this week. 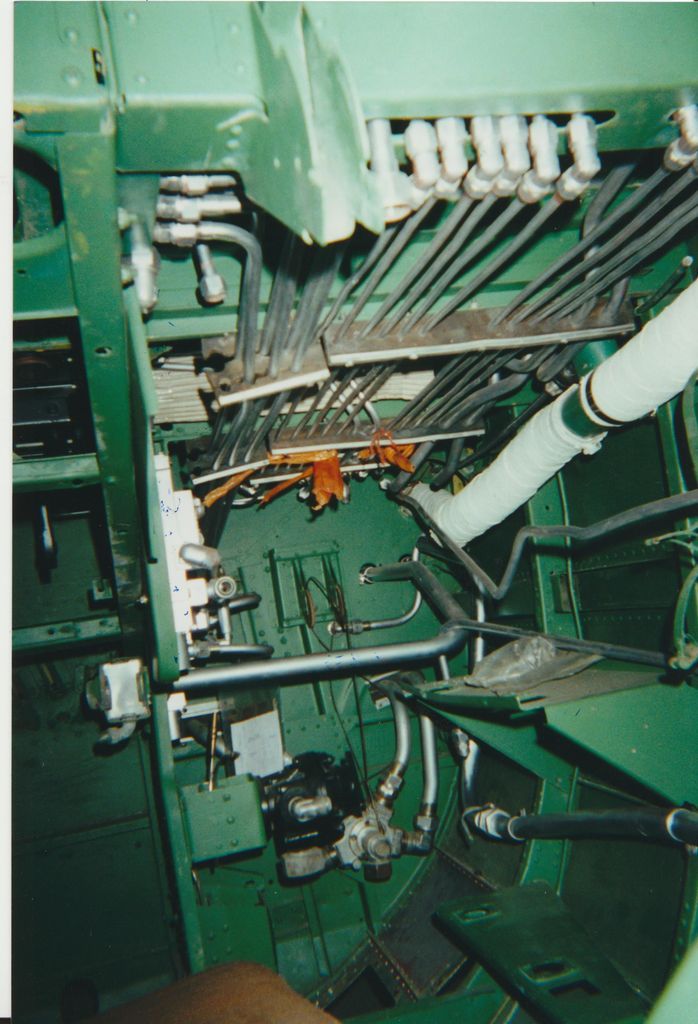 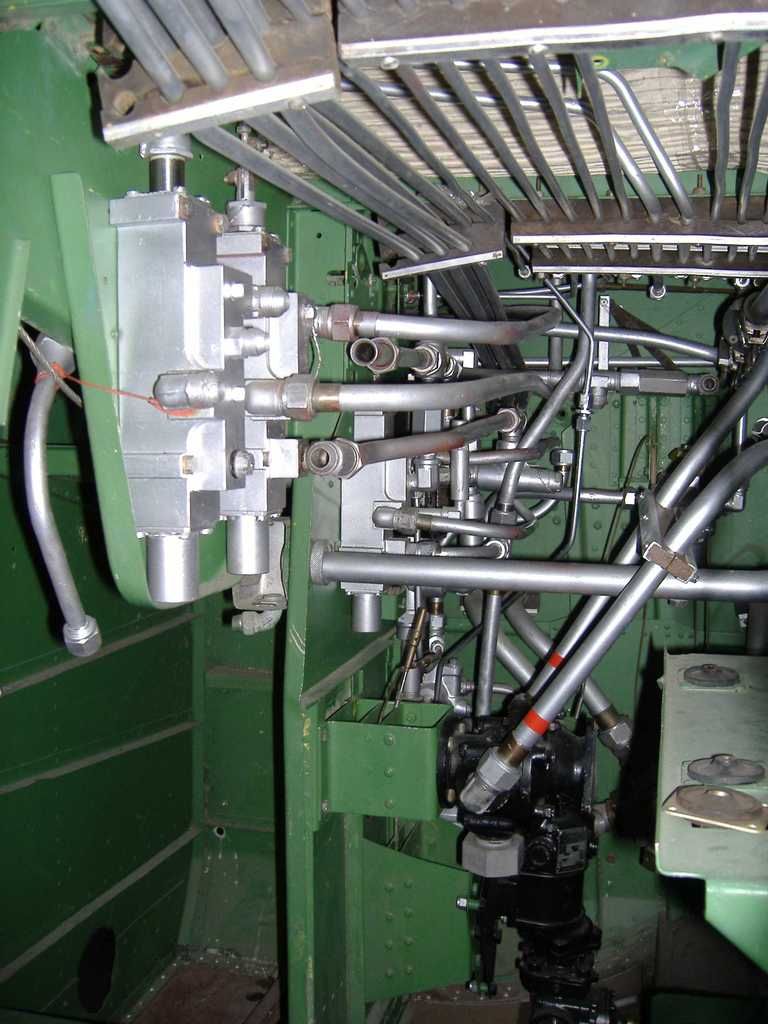 This is the bay below the pilot where hydraulic and fuel controls all reside. You'll notice it's now vastly more populated than of old. The main items of interest are the three square objects on the left. These are the four position valves that control the flaps, undercarriage, and bomb doors. Each has positions of action for open, hold open, close, and hold close and hence the multitude of plumbing. The black object in the bottom is the emergency electric fuel pump which in the fullness of time will be linked to a set of valves and yet more pipes which will lie in front of it hanging below the large grey connector you see in shot. As always hope this is of interest. cheers." |
|
|
|
Post by Dave Homewood on Jan 29, 2017 9:45:05 GMT 12
Great work Denys!!
|
|
|
|
Post by davidd on Jan 30, 2017 8:04:23 GMT 12
Denys,
Thanks for showing us all the multitude of stuff that makes up a complete aircraft, that one really does not think about when looking at the beast from the outside. Without all this other "stuff" it is just not an aircraft that can do the job it is paid to do. And same for the Friendship, although the nose of that is not so busy as in the belly of a Hudson.
David D
|
|
|
|
Post by Deleted on Jan 30, 2017 10:05:22 GMT 12
What David D said. Excellent detail info the average museumgoer never gets to see.
|
|
|
|
Post by camtech on Jan 30, 2017 17:31:36 GMT 12
What he said!
Any aircraft tradesman would appreciate what is inside the skin of an aircraft.
|
|
|
|
Post by aeromedia on Jan 30, 2017 20:50:02 GMT 12
Great to see our beloved old BXG feeling some front-end love. Great work Denys and crew.
|
|
|
|
Post by camtech on Jan 31, 2017 10:17:38 GMT 12
Another thought is that now non technical people can appreciate the havoc created by stray 20mm rounds would wreak hitting in this area.
|
|
|
|
Post by avro683 on Feb 2, 2017 14:21:38 GMT 12
The Hudson looks fantastic chaps!
|
|
|
|
Post by kiwi285 on Feb 6, 2017 18:45:35 GMT 12
Hi Deny's I am planning on being back in Christchurch in early March and again right at the end of that month and would like to come and see the progress. The Hudson look spectatular.
|
|
|
|
Post by Dave Homewood on Feb 12, 2017 12:10:02 GMT 12
Here is the latest update from Denys sent to me yesterday: Things on BXG have now progressed into the really heavy stuff after the nose job. Namely the port undercarriage bay. The following may be a bit of a sobering subject for the people who chastised us for sacrificing part of the airframe in order to save the balance under cover rather, than as was suggested by some, to try and keep her in a holding pattern outside in the expectation that in the future cover might be be provided for her. These show the true state BXG has already arrived at and the peril she would have been at if left outside for much longer. The first photo is looking rearward in the bay and you'll note the pernicious creep of corrosion product exuding in many places, especially from under the stringers along the right side of the photo. If you look really closely at 2 o'clock in the shot you'll note that the stringer there is a lacework curtain job and towards the rear totally vanishes and also all the presence of heaps of powder corrosion on the frames. It's also interesting that large areas of the skin panels show no evidence of paint, whether it was ever there or not who knows but that won't have helped things. 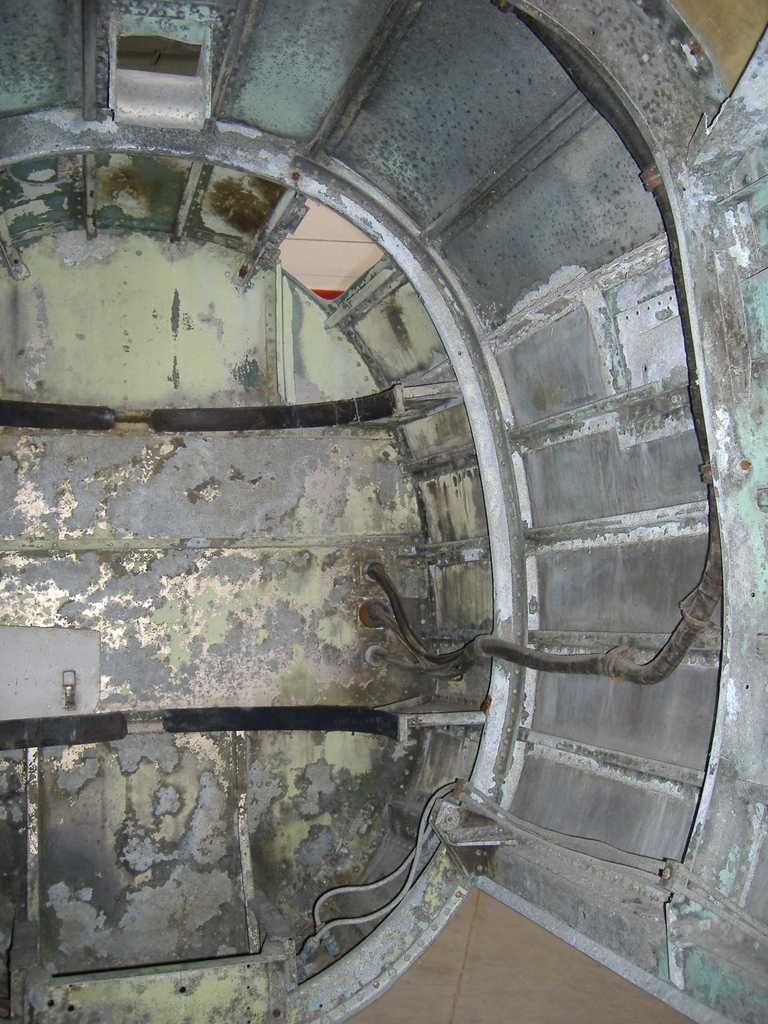 The second shot is looking forward and you can see more powder product plus rust products on the steel members. 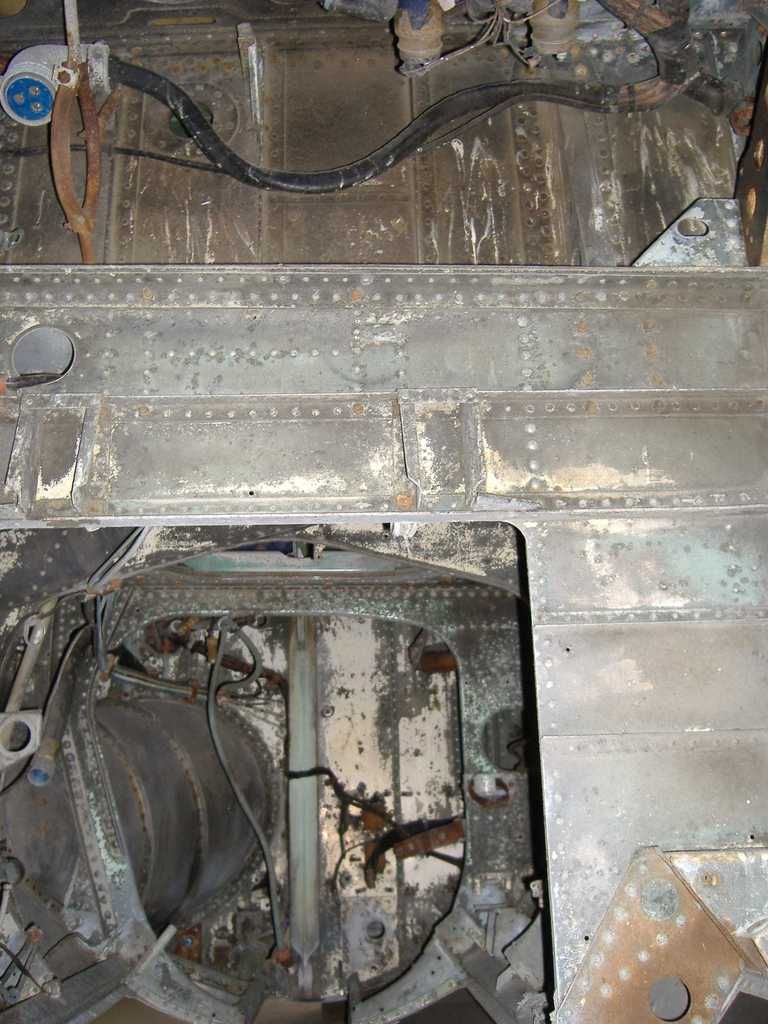 After some two hours of work, and four Electrolux vacuum cleaner loads of dust, rubber, tar, asphalt, nuts, bolts, split pins, turnbuckles etc, the majority, but not all, of the detritus was got out of the bay. A plus was that the missing hatch cover from the upper area of photo one was found buried in the rubbish at the bottom rear of the bay and that's it sitting to the left of the shot. The third shot shows the next stage where the first panels of skin have been removed and along all the stringers and frames you see yet more powder products. Removing the skin was made easy by the fact that something like 30% of the rivets had shed their heads or had totally vapourised leaving just holes and many of them simply flew apart with the first few spins of the drill bit on their heads. 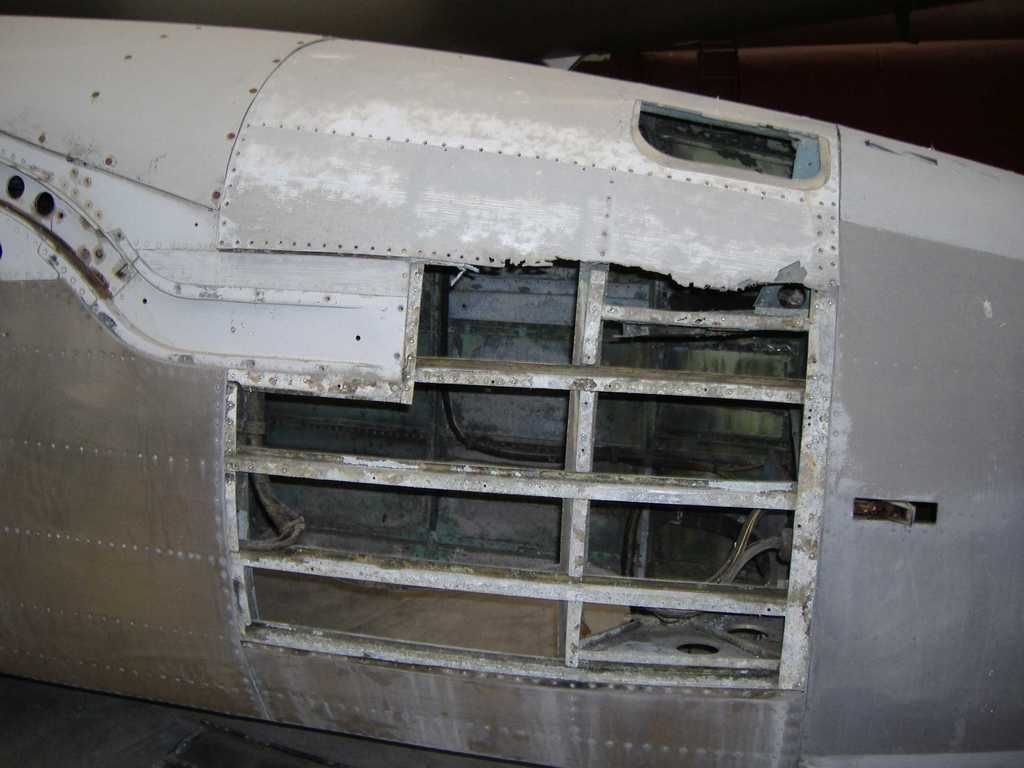 You can also see where the lower edge of the upper skin panel has disintegrated and that corresponds to the 2 o'clock stringer in photo one. Now the real hard work begins...watch this space for updates! Tomorrow is another day of grubby works. ttfn Denys |
|
|
|
Post by agile on Mar 12, 2017 15:51:29 GMT 12
|
|


