|
|
Post by kiwi285 on Jul 24, 2018 15:55:35 GMT 12
On the Classic Flyers Grumman Avenger restoration thread Dave mentioned that I had been a member of the Cambridge Model Aero Club for about 45 years and I said that if I could find some of the photos of my larger scale flying models I would post them up. At Dave suggestion I will create a thread here and post up some photos of the models I built (not all completed) over the years before I packed it in. You will have to excuse the photos as they are photos of photos as I cant find the originals now. The first model is the Aeronca 15AC Sedan at 1/5 scale. I used a smaller plan from a kitset and scaled it up to make a reasonable size model. The wings on this aircraft were metal covered so to simulate this I covered the wings with balsa wood and then cut scale size panels from old printers litho plates and glued these on in scale fashion with Ados F2. It worked very well and there were no compound curves to contend with so it was quite easy. To simulate the rivets each panels before attaching was worked over with a clock wheel on the back surface and this produced the rivets shapes which looked good once the model was painted. I think the Sedan is a really nice looking aircraft for a 30's type and I don't believe that we have ever had any in the country mores the pity. The model had a Super-Tigre 20cc engine and Futaba radio and flew really well. The photos were taken at Waharoa airfield. 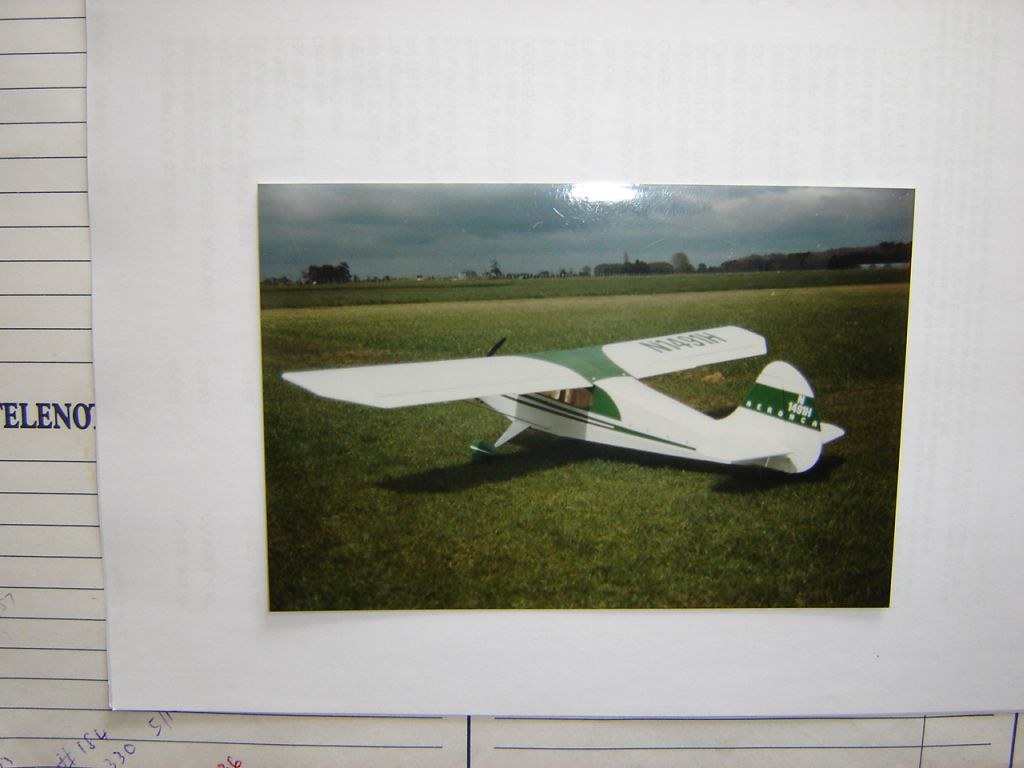 Aeronca 15AC Sedan (1) Aeronca 15AC Sedan (1) by Mike Feisst, on Flickr 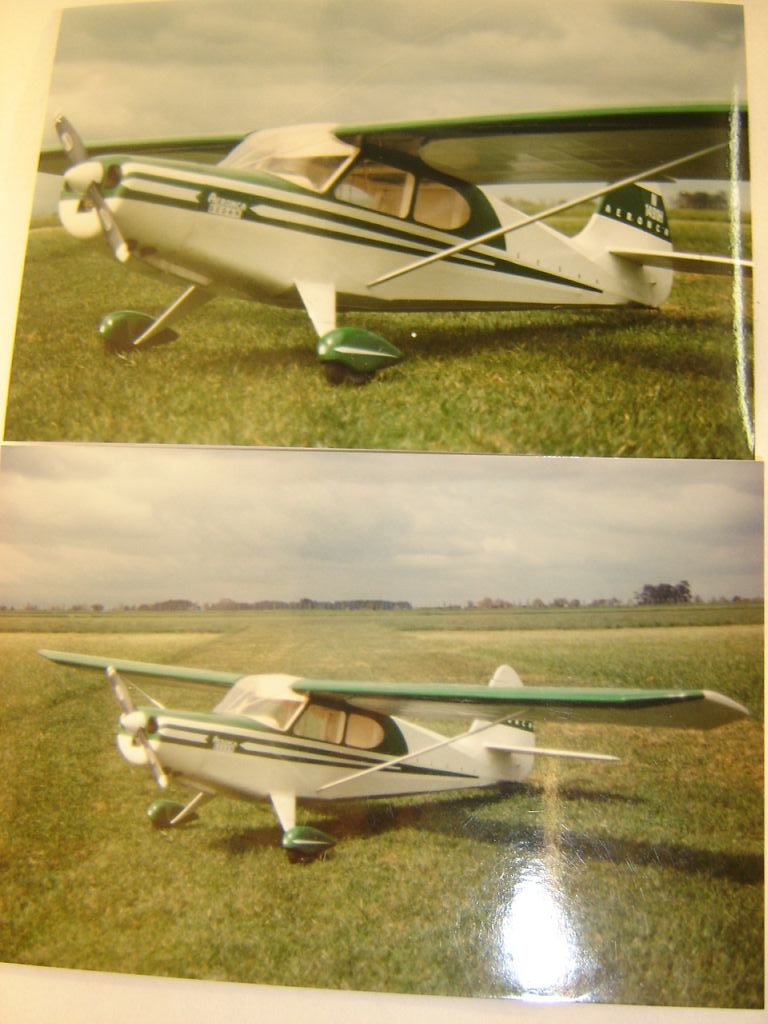 Aeronca 15AC Sedan (4) Aeronca 15AC Sedan (4) by Mike Feisst, on Flickr Will post some more up of other models in due course. |
|
|
|
Post by Dave Homewood on Jul 24, 2018 16:36:33 GMT 12
Nice looking plane! Dad built a very similar Aeronca Champ back in the 1980's, in blue.
|
|
|
|
Post by kiwi285 on Jul 26, 2018 17:50:07 GMT 12
Here is the 1/4 scale SE-5a. This is quite a boxy aircraft so building one was quite easy. I had a free flight plan of about 1/12 scale and used that to draw up and build my model. I had accumulated quite a lot of old Cedar and cut it up into 1/4" square and 3/8" square and the whole model was built with that. There was very little balsa wood used. Because the 4 wing panels were all constant chord and there was working rigging I cut the wing shape from a block of polystyrene foam, and had the wing spar slots cut whilst still in block form. The block was then cut into 1/2" wide ribs (nice and simple and quick). These were then covered in a 1/2" wide strip of 1/16" balsa to give them some strength. The wing panels went together very quickly. All the struts were made from 30 thou ali strips and then had cedar strips glued on either side and sanded to an airfoil shape. These were bolted to pickup points on each wing panel. The covering was all a lightweight polyester fabric whish was heat shrunk and painted with water based paint. The aircraft was powered with a Super-Tigre 25 cc two stroke engine which really had too much power. It would take off on less than 1/2 throttle. I ended up selling it to a gentleman in Milton and it was carted South by a truckie friend of the buyer. 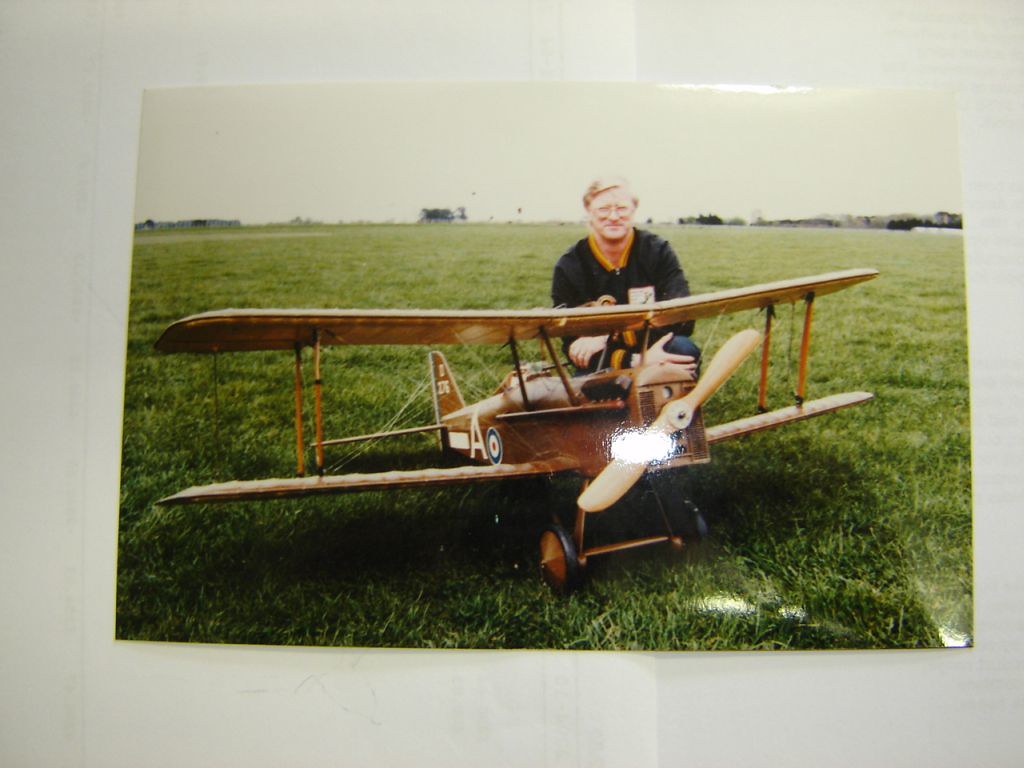 SE 5a Mannock (2) SE 5a Mannock (2) by Mike Feisst, on Flickr 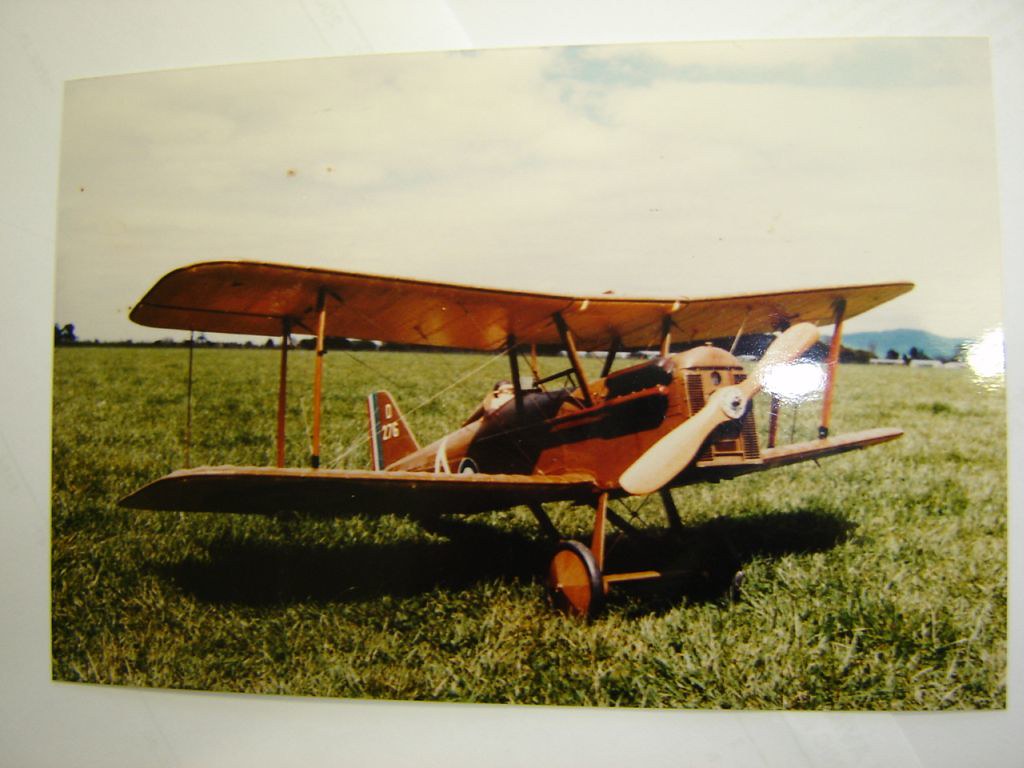 SE 5a Mannock (1) SE 5a Mannock (1) by Mike Feisst, on Flickr 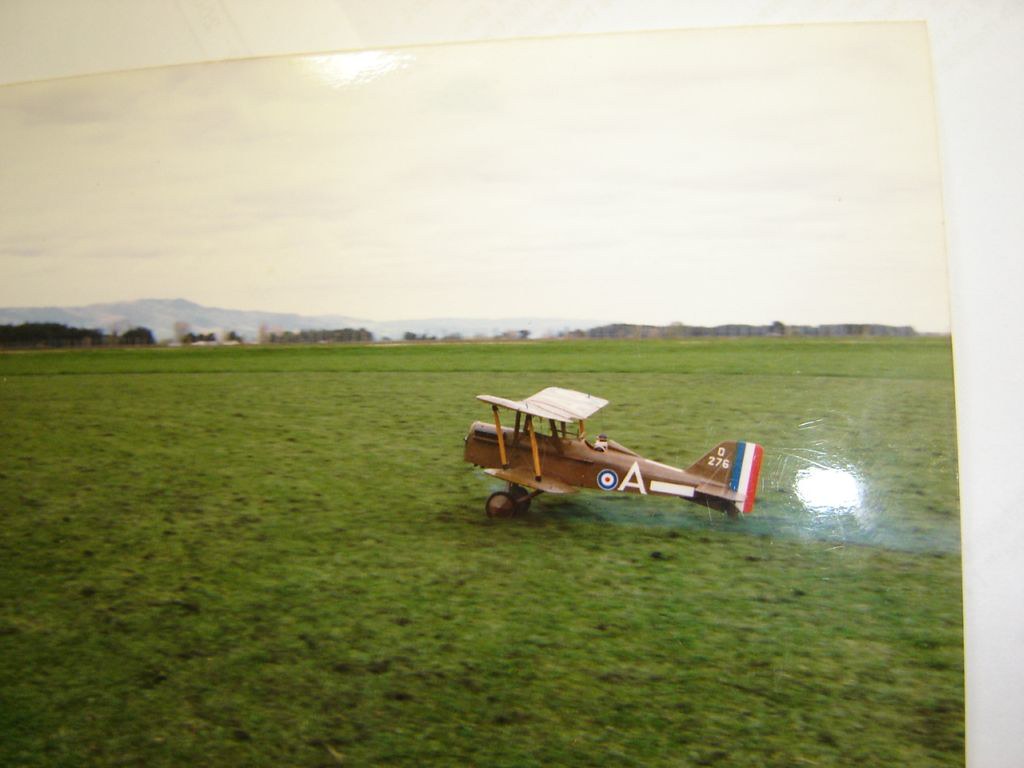 SE 5a Mannock (6) SE 5a Mannock (6) by Mike Feisst, on Flickr |
|
|
|
Post by Deleted on Jul 26, 2018 20:57:34 GMT 12
I love the work that went into the Aeronca, and the SE.5a is a real looker! Wow!
I'm excited to see - and read about - any other projects you may have to share.
|
|
|
|
Post by kiwi285 on Jul 27, 2018 19:53:59 GMT 12
Hi Zac. Here is another large model that was built from an American kitset. I was in the lucky position of being able to buy kits over there and getting them shipped to NZ free of charge as I knew a gentleman who was bringing containers into the country and always had room to spare. The model was a 1/5 scale Fairchild PT-26 and was based on a fibreglass fuse and a foam wing with built up tail surfaces. The wing wasn't the best I had seen and I spent quite some time trying to get all of the sections to match. The fuse wasn't very strong and I ended up cutting fuse formers and gluing these in along with stringers down the rear fuse to strengthen it up. I built up a scale cockpit area for it and it should have been a great model but it was one that I didn't finish for one reason or another. The engine again was a Super-Tigre 20cc two stroke. I ended up selling it to a gentleman in Palmerston North I think and I don't know what transpired after that. This is the only photo I have of it. There are a couple more models that I have photos of and I will post these up soon. 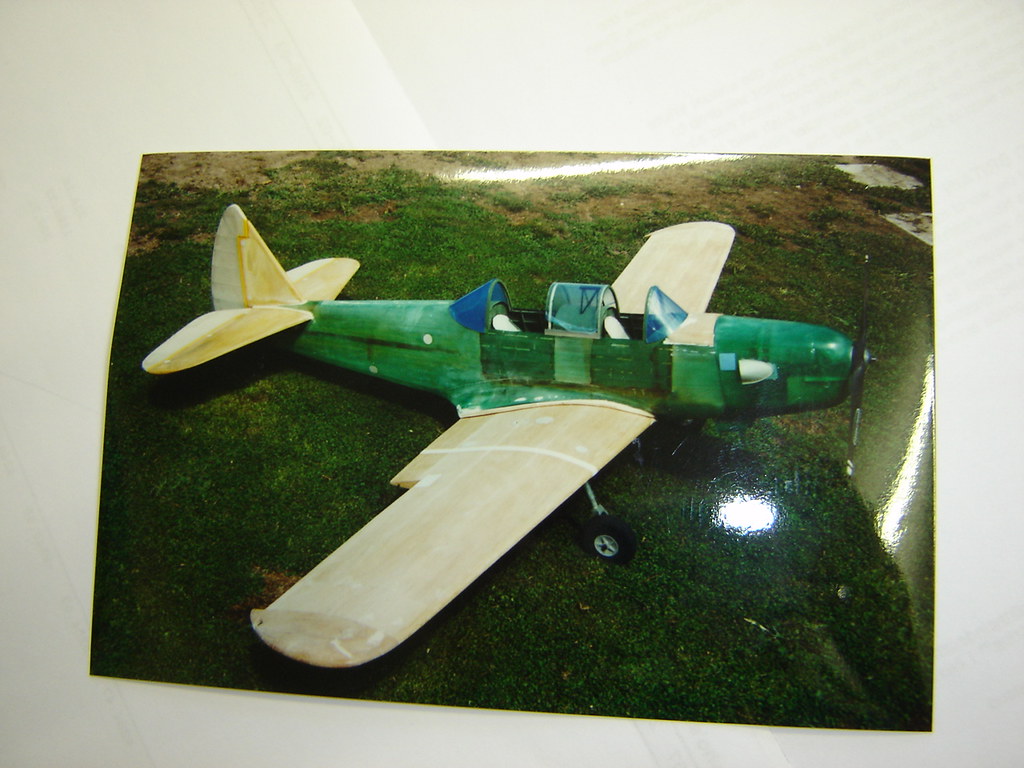 Fairchild PT 19 1 (1) Fairchild PT 19 1 (1) by Mike Feisst, on Flickr |
|
|
|
Post by johnnyfalcon on Jul 27, 2018 20:31:11 GMT 12
Like that Fairchild!
|
|
|
|
Post by kiwi285 on Jul 30, 2018 16:06:47 GMT 12
I have always had a soft spot for the 1930’ touring aircraft and for the Percival Proctor in particular. I think it is a great looking aircraft. Maybe not the best aircraft or the period but hey. I decided some years ago that I wanted to build a decent sized flying model of the Proctor and started looking around to see what was available. Not being a well modelled aircraft there was no plan available and after a search I found a 1/72 scale 3-view that appeared to be accurate. I wanted to build a decent sized model for good flying characteristics and to be able to get a reasonable sized engine in. I settled on a 1/5 scale model and started drawing up the plans such as I needed. I vividly remember starting the build of this model over a miserable Queens birthday weekend and with nothing better to do got stuck in. The fuselage was build mostly of 1/8 ply frames and cedar stringers that I had cut from a couple of planks that I acquired. The fuse came together quite quickly and the size of the cockpit was something that needed to be filled as accurately as possible. These are the areas that take up large amounts of time to complete and I was working on the wings and tail surfaces as well as making items this the cabin. The wings were made with foam ribs cut out of a tapered block and the spars were again all cedar. I intended to make the undercarriage out of 3/16 steel wire and put in a reasonable sized block to take these. The tail surfaces were built out of balsawood and covered with brown wrapping paper. The whole model was cover in this paper and it works well and was strong when finished. The engine used was an OS Max 20cc four stroke engine that fitted very well into the cowl area and completely enclosed it. The front part was made over a mould in firbeglass and all the cowl panels were made for commercial ali to get the fit and shapes right and these were screwed or hinged in place. I wanted to complete the model as ZK-APH as flown by the Waikato Aero Club as I had a few photos of it in that scheme. As so often happens, I couldn’t find anyone who could tell me the colour used for the trim and rego letters, so I guessed at them being red. In fact, they were a teally blue/green colour, but by this time I had put the model aside. The undercarriage was its weak point and it used to wobble round like a jelly when sitting on is wheels. It needed a proper scale oleo set that attached to the main spar but I was over it by then and it was left in the back of the model room. When I packed up the house in Cambridge I gave the model to a Hamilton MAC member to sell at their next auction. It ended up being purchased by a father and son team who intended to complete it and fly it. I have never heard whether it was finally completed and if it flew, what it looked like in the air. It should have been quite majestic in flight. 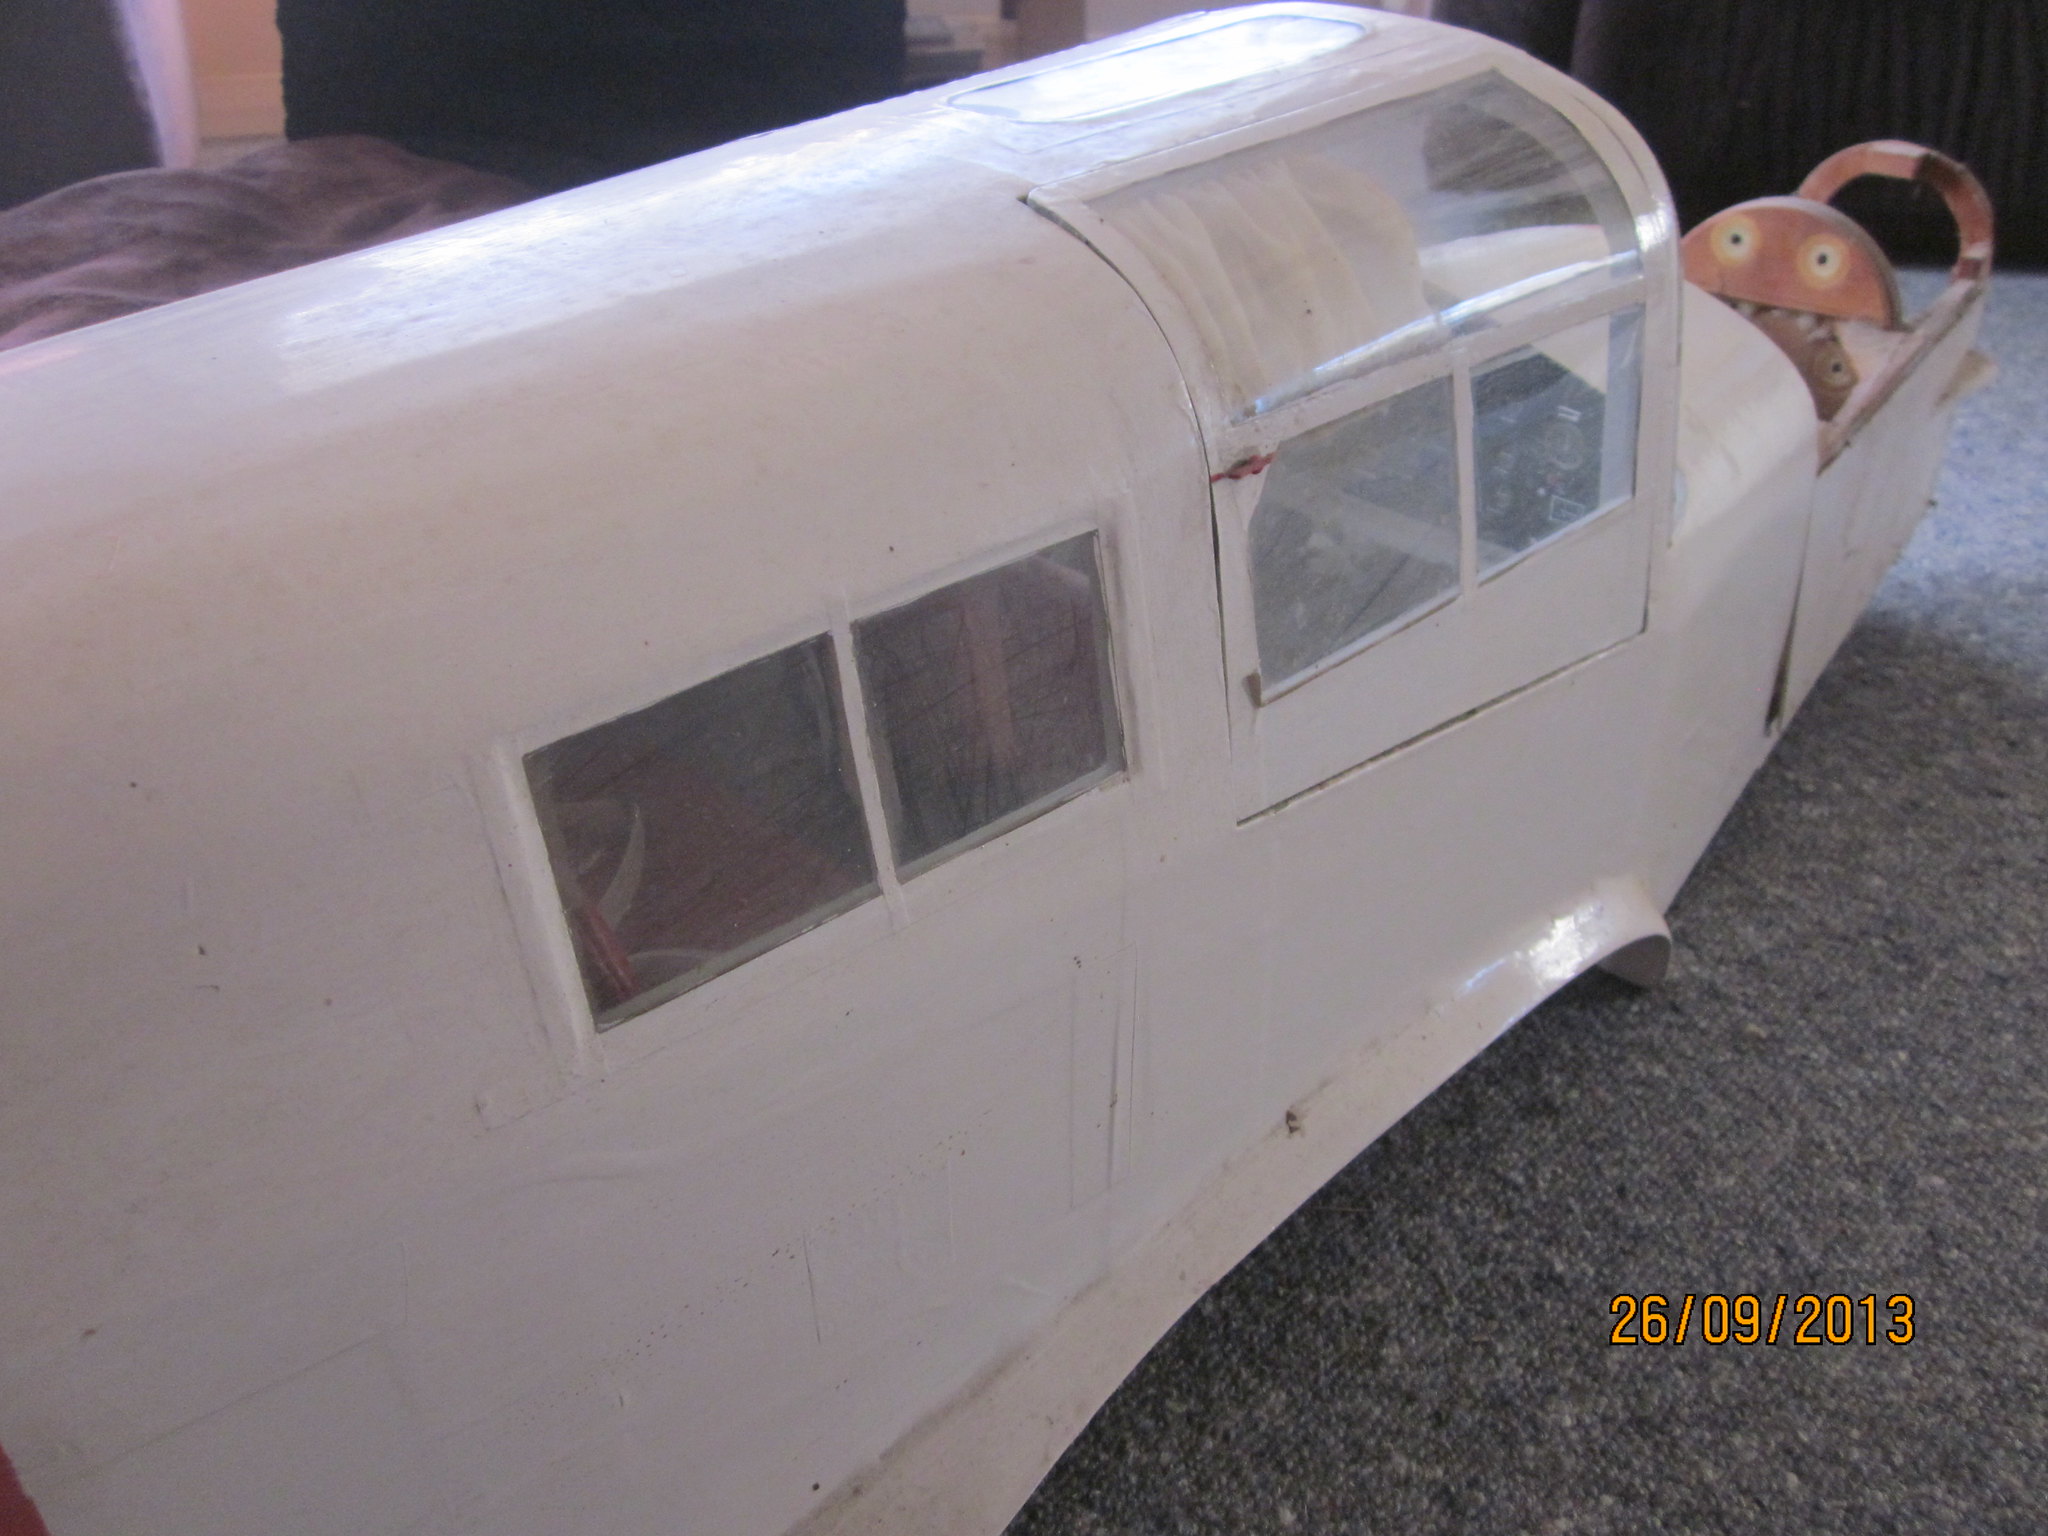 Proctor 1 Proctor 1 by Mike Feisst, on Flickr 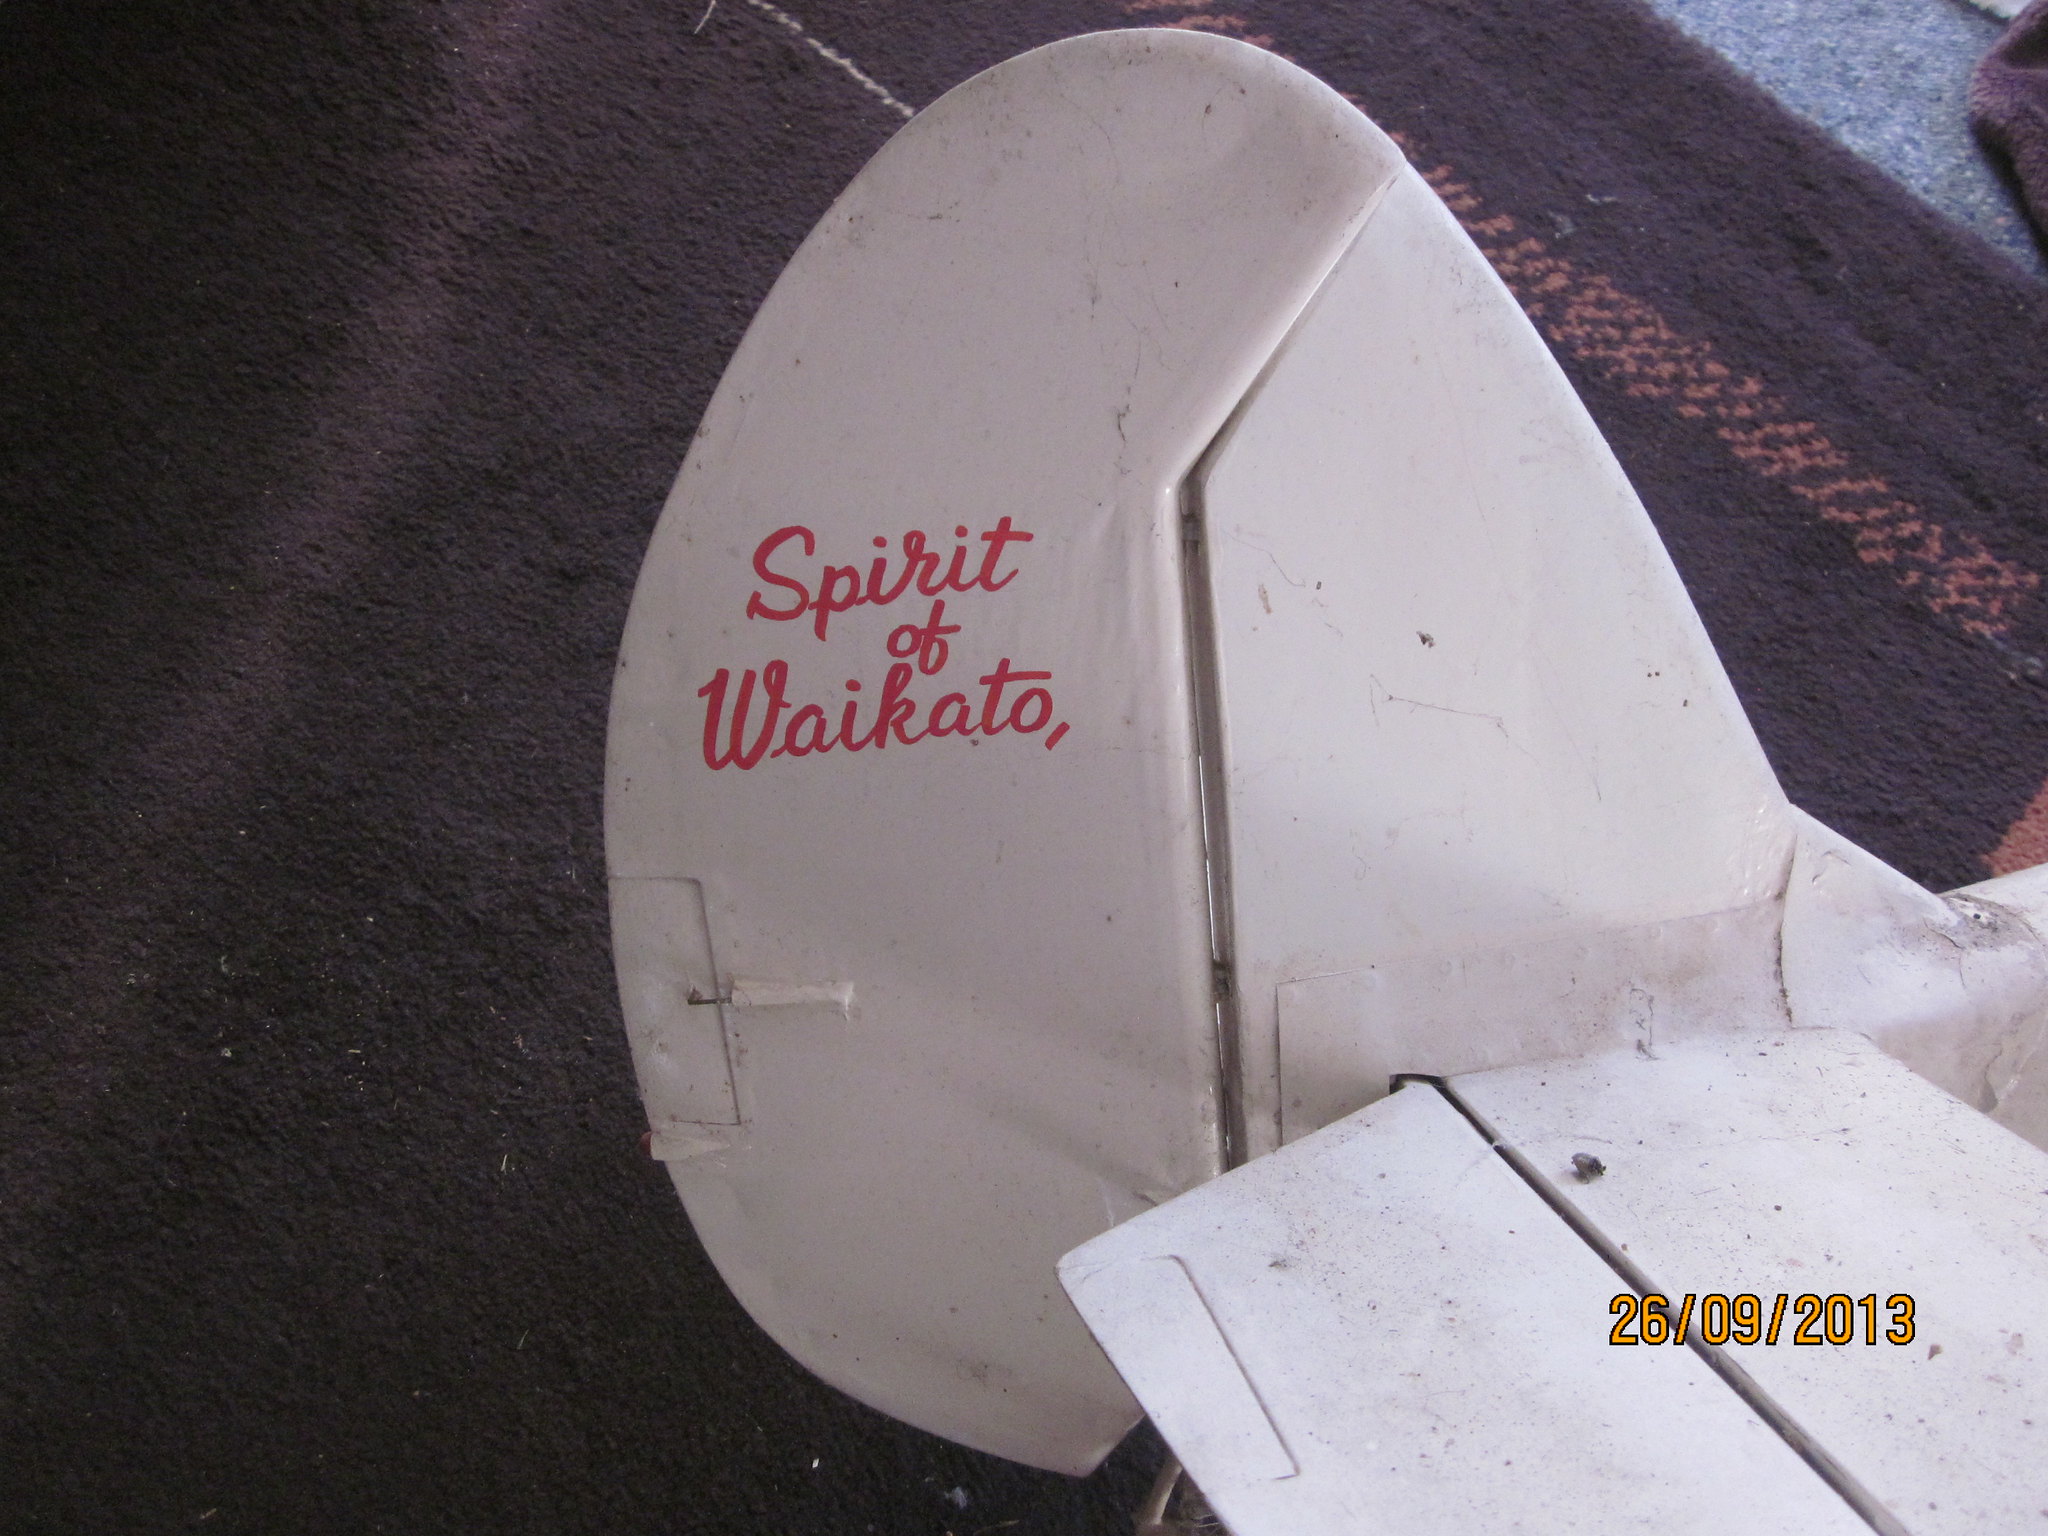 Proctor Proctor by Mike Feisst, on Flickr 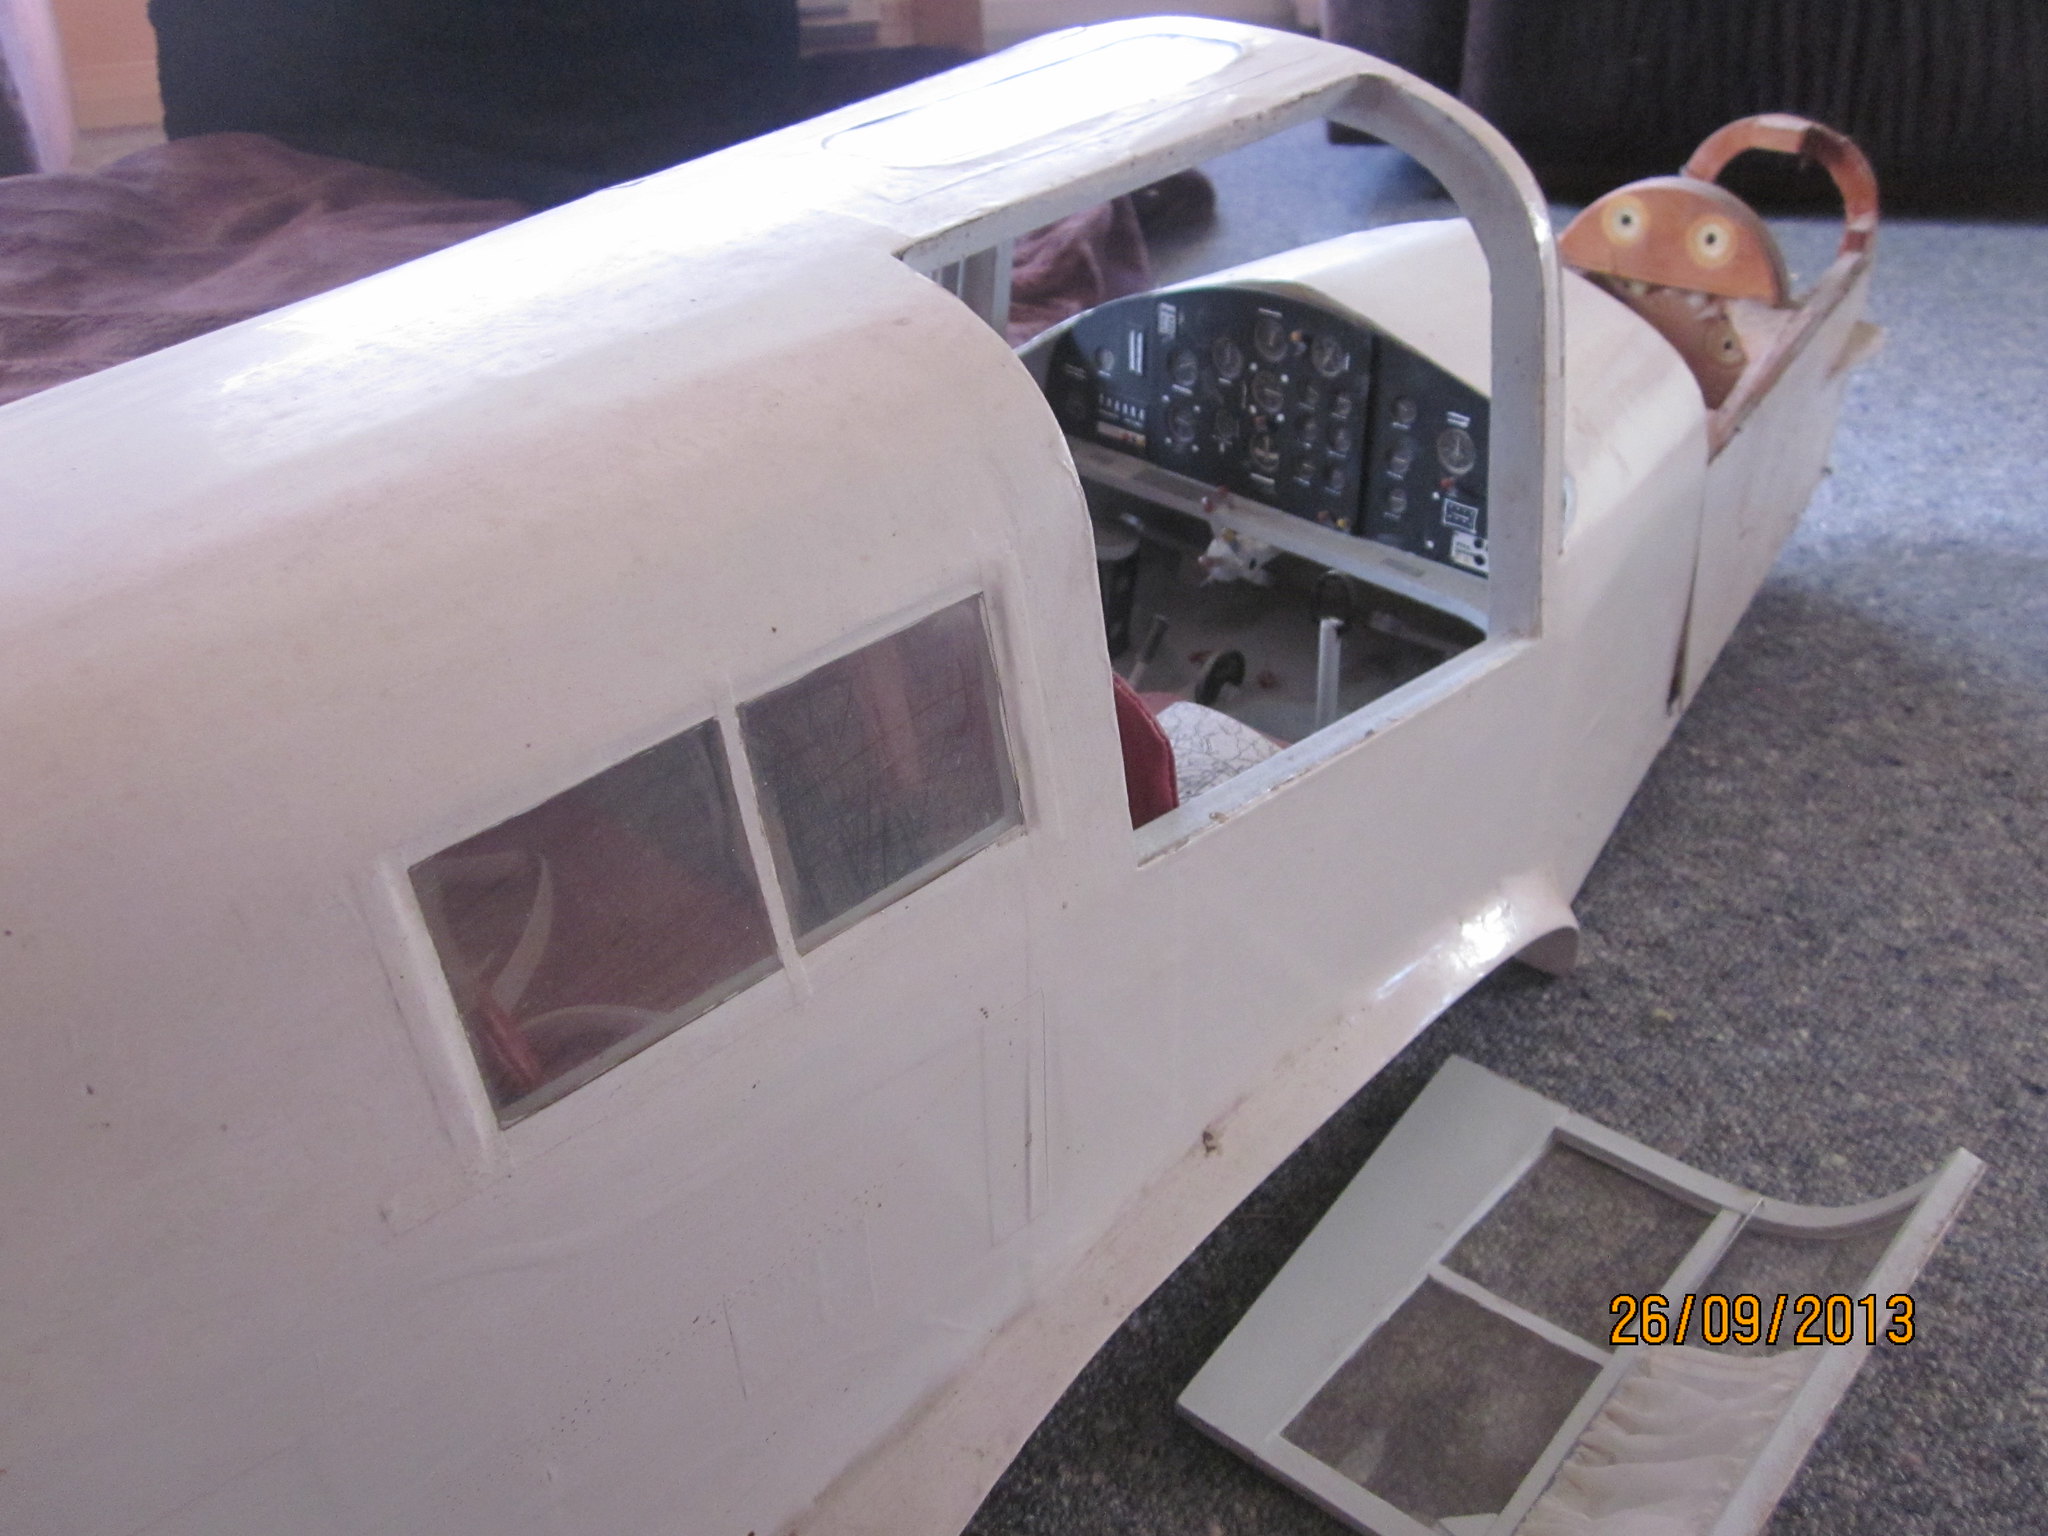 Proctor 2 Proctor 2 by Mike Feisst, on Flickr 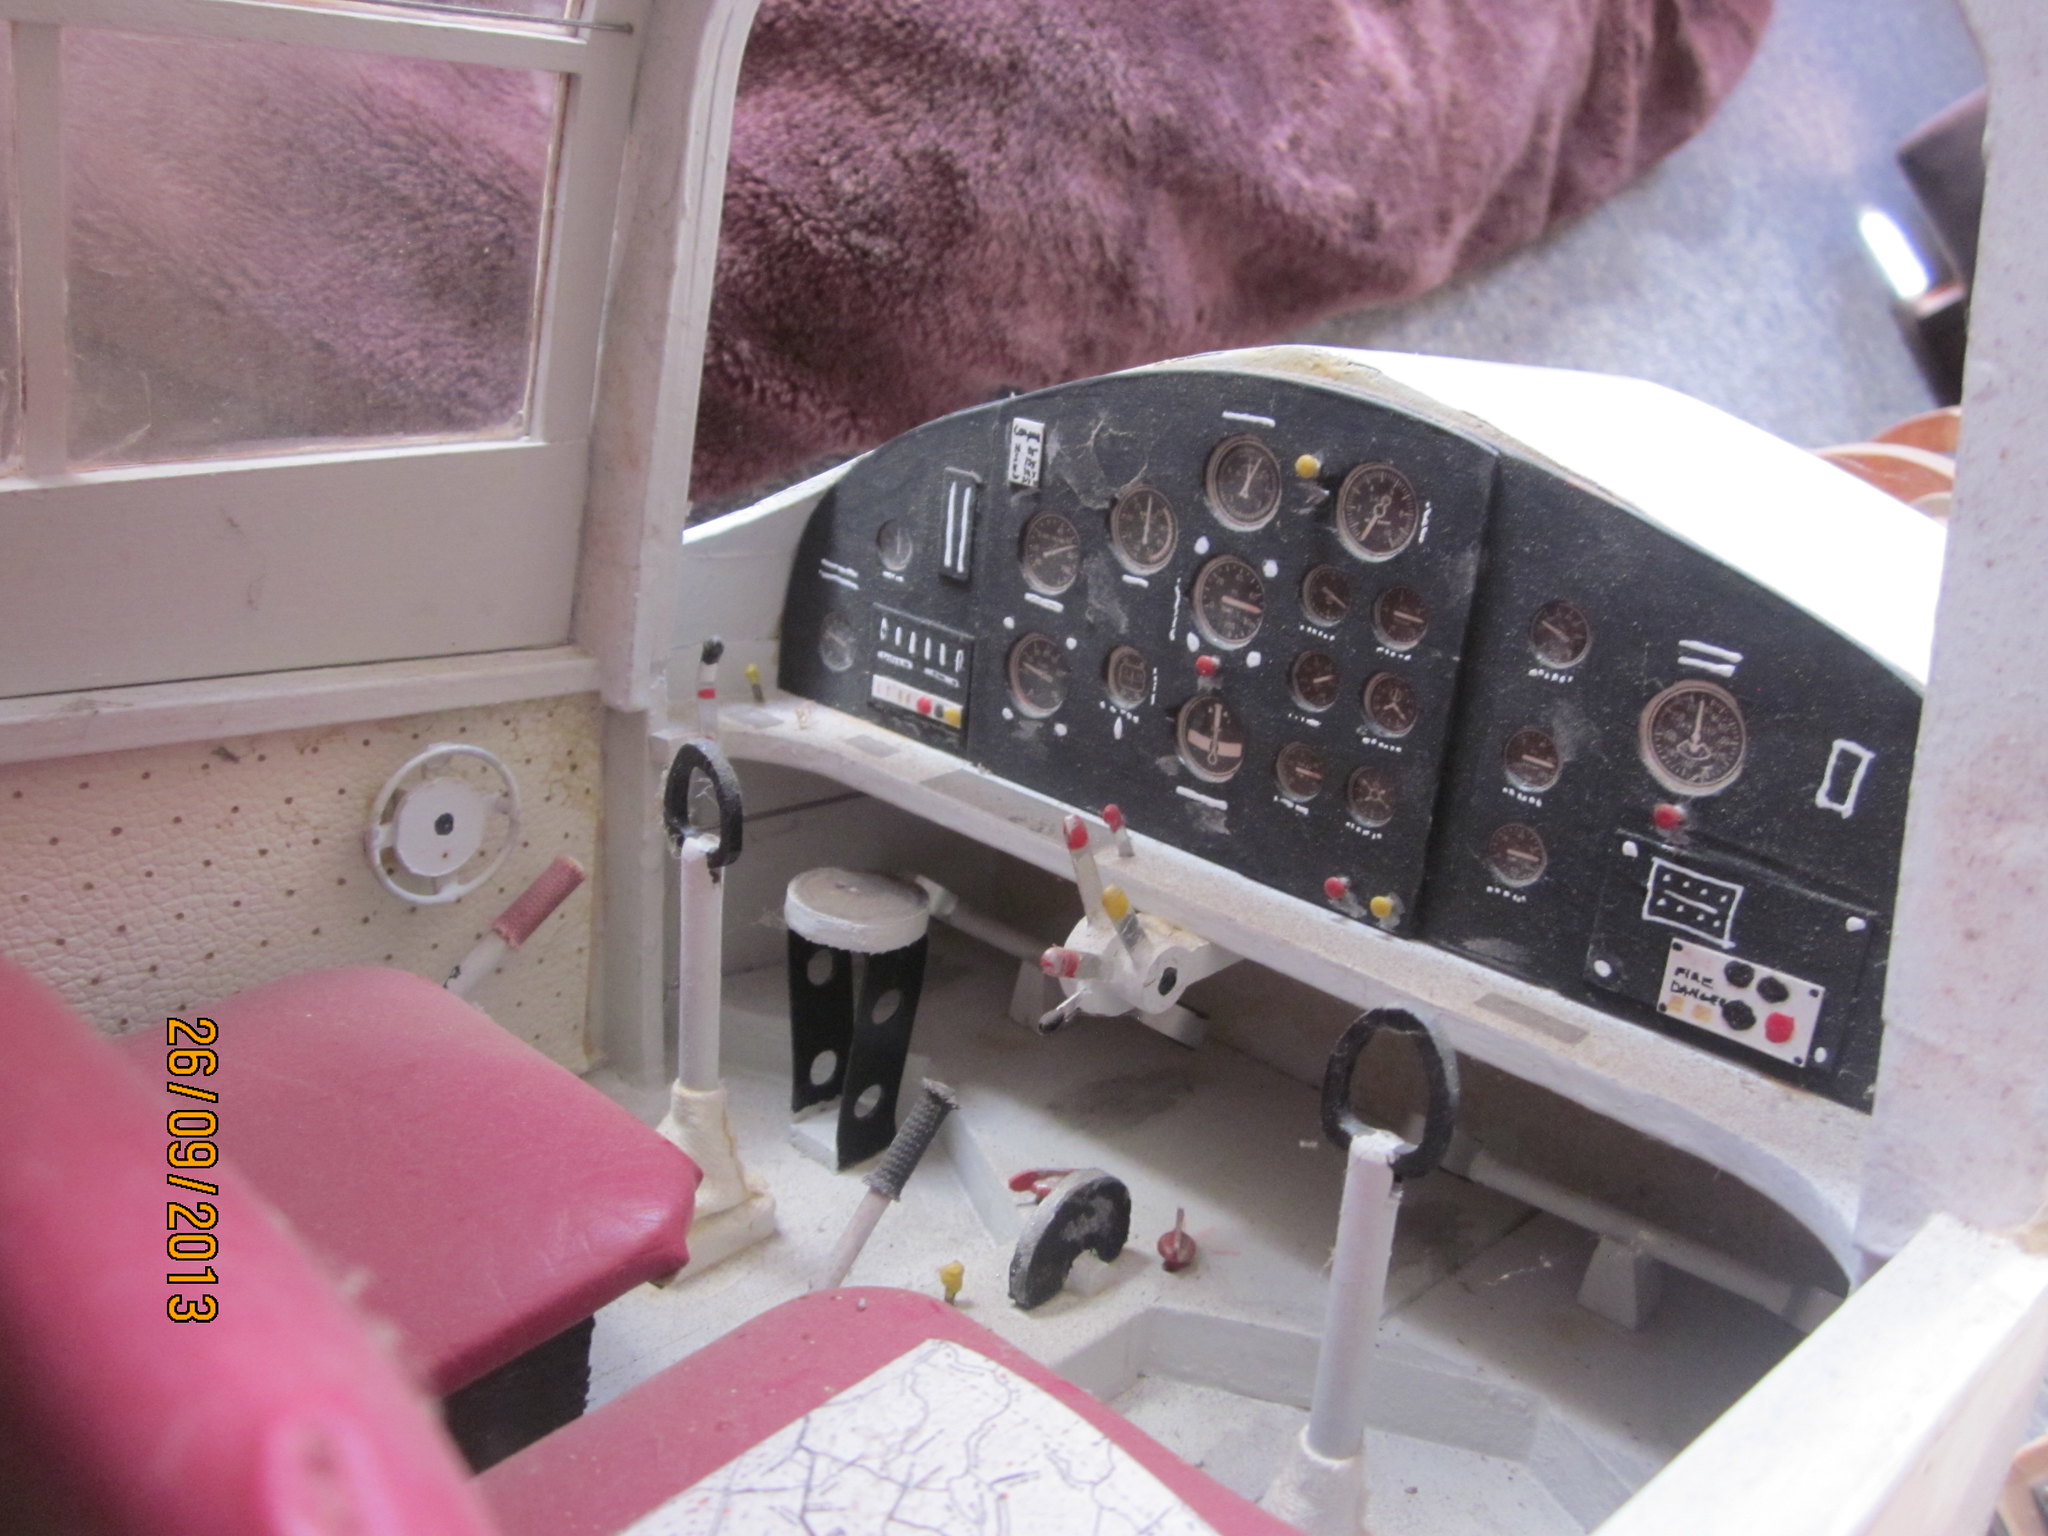 Proctor 3 Proctor 3 by Mike Feisst, on Flickr 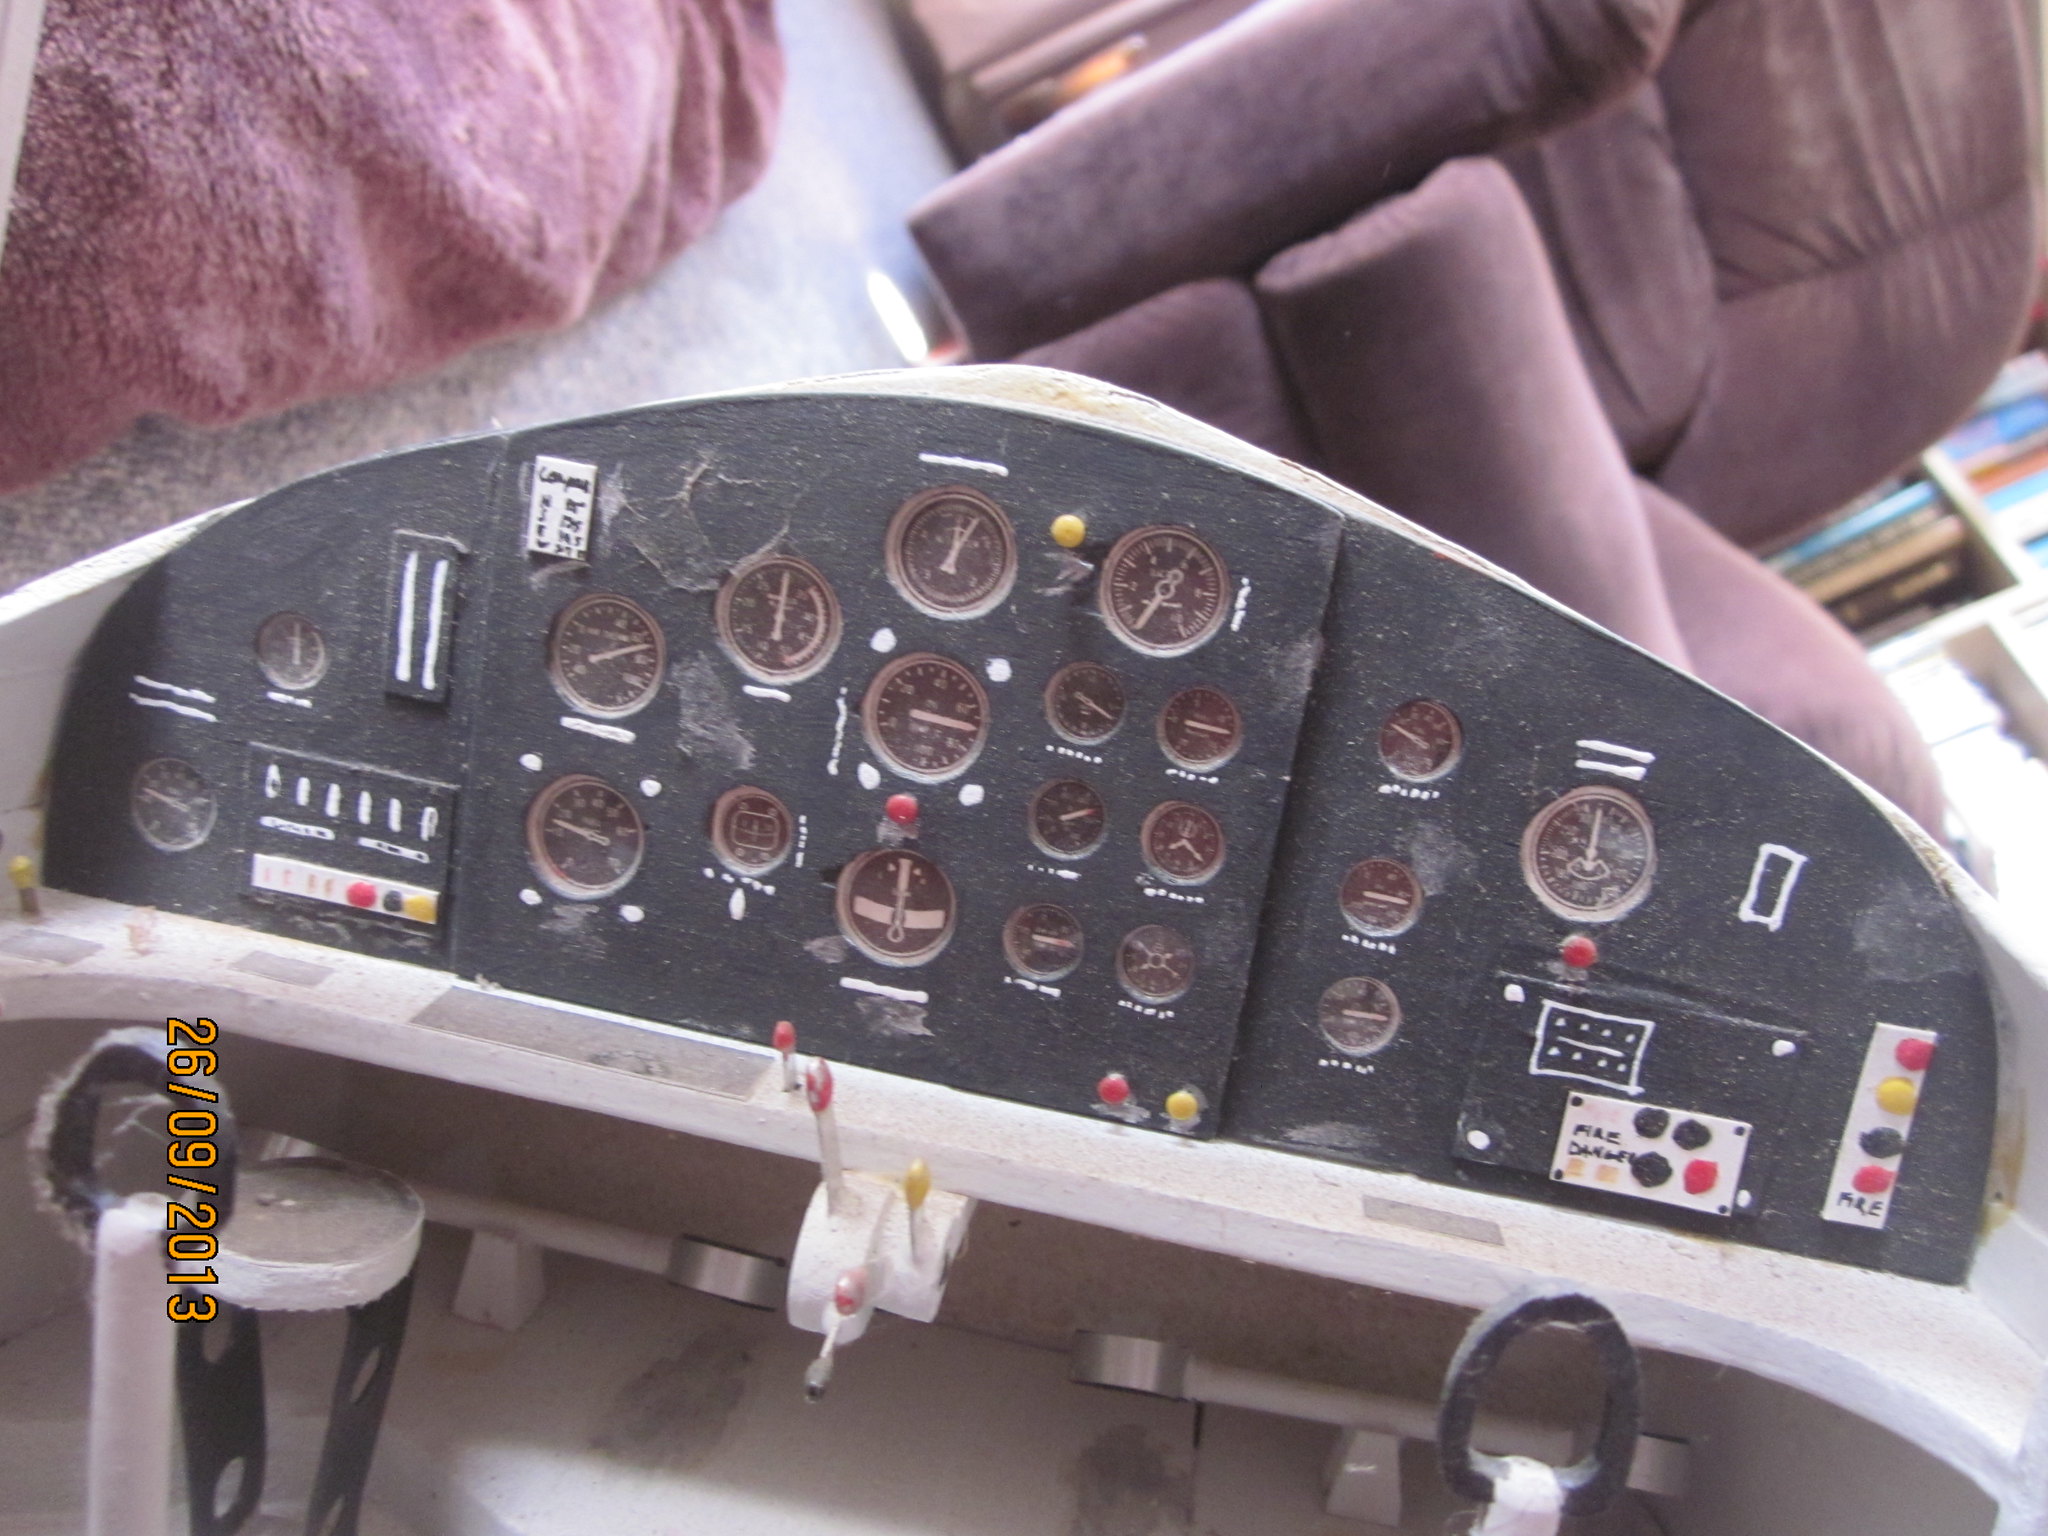 Proctor 4 Proctor 4 by Mike Feisst, on Flickr |
|
|
|
Post by Deleted on Jul 31, 2018 13:18:24 GMT 12
Mike, that's gorgeous! I hope the new owners have done something with it - work like that needs to be displayed. I love your script on the rudder, and the detail in the cabin.
|
|
|
|
Post by kiwi285 on Aug 1, 2018 19:58:59 GMT 12
This is the last model for which I have any photographs left. The Mitsubishi Ki-51 Type 99 Assault plane (Code named Sonia) I always yearned to build and fly a reasonable sized WW II aircraft. I also felt that the Japanese produced some quite nice looking aircraft and they seemed to be shunned by most modellers. Always being one to look for something out of the ordinary, I started looking through and collecting information on specific Japanese aircraft (I also have a soft spot for Italian and Russian aircraft – unusual right). What I really wanted to build and fly, was a largish model of either the Nakajima Ki-84 Hayate (code named Frank) or the Kawanishi N1K2-J Shiden-kai (code named George). I purchased plans for both of these models from the US and the UK. The Brian Taylor plan for the George was well detailed, but a little small as I wanted a scale of around 1/5. In later years I did blow this plan up and started building this model and was about half way through when I gave up modelling. I also realised that my flying skills weren’t up to it and I would have had to buy some quite expensive equipment to complete the model. So, I settled on the Sonia because it didn’t require retract undercarriage, I had a suitable two stroke engine and it looked reasonably easy to build and detail. As you might image there were no plans of any sort for the Sonia and having purchased the Maru Mechanic book on the aircraft which has some amazing details and drawings I used this as the basis for developing my plans. These books are fantastic in my opinion and I ended up purchasing about 10 of them covering most of the well known Japanese aircraft of WW II as well as the P-51 Mustang, P-47 Thunderbolt, Messerschmitt Bf-109 and Focke-Wulf Fw190. The plans were drawn up at 1/5.5 scale (about 88 inches) and the build got underway. The fuselage was a built-up structure of ply formers up front and balsa behind the trailing edge held together with cedar stringers. For strength in areas where the fuse was likely to be held I added polystyrene foam and sanded it to shape. The wing was mainly a foam section with centre area cut out to lighten the structure. Hardwood blocks were inserted to take the steel wire undercarriage and plywood was used at the dihedral breaks. The wings were covered in 1/16 balsawood. The tail surfaces were all built out of balsawood with 1/16 sheet covering and scale hinging. Plugs were made for to build fibreglass spats for the undercarriage. I spent a lot of time building up the cockpit area as the model had a hood much like the Harvard. The main instrument panel, and the sub panels were all built up with scale instrument faces and much time was consumed making the various parts for the cockpit area. The canopy was moulded over a form and this was made to slide as in real life. The canopy frames were cut from litho plate and glued onto the acetate sheet. The cowl and spinner were both moulded in fibreglass as the shapes were unusual and a three bladed scale prop was carved for display purposes. Now came the interesting part for me. I have read numerous articles by famous overseas scale modellers and decided I wanted to have a go myself and see what I could produce. The model was sanded down and given several coats of sanding sealer and then the job began. I cut scale brown paper panels for the whole model and glued them on, as a full-sized aircraft is covered with the rear panels applied first, with watered down PVA. When this had dried, and light sanding had smoothed the model, I applied several coats of high build primer, sanding between coats. When I was happy with this, the model was painted with silver paint and then a coat of the finish colour. Now the tricky, and for me most enjoyable part, of the process was started. All of the main panels were marked out and I started work with the soldering iron. Yes, an iron with a 1/32 piece of brass tubing inserted through the soldering tip by drilling the right sized hole and force fitting the tube into it. When the iron was heated the 1/32 tube also got very hot and when touched onto the painted surface it produced a scale rivet in the paint. Much practice was undertaken to get the technique and the spacing right. In the end I found this quite quick and progress was reasonably fast with panels being dealt with in a couple of minutes. Some mistakes were made and these had to be sanded and repainted. When I was happy with the results, I gave the whole model a light sanding and then started the final painting. By the was the paint was a water-based house paint closely matched to the scale paint chips I had for the Japanese colour. When this was done I started scratching off paint in the areas where wear would occur. As a first attempt at this technique I was really pleased with the results and I thought that the model looked very life like. As far as I am aware there is one complete example of this aircraft still in existence and that is in Indonesia. In the end I didn’t get round to finally flying the model and when it came time to pack everything up I offered the model to the RNZAF museum at Wigram. They agreed to accept the model but stated that it would only be put on display when they had a suitable theme and space for it. I don’t know whether it has ever been on show, but I guess not. If I knew then what I know now I would have offered it to Classic Flyers where I am sure it would be out for everyone to look at. I hope that the photos give you some idea of the finished results. 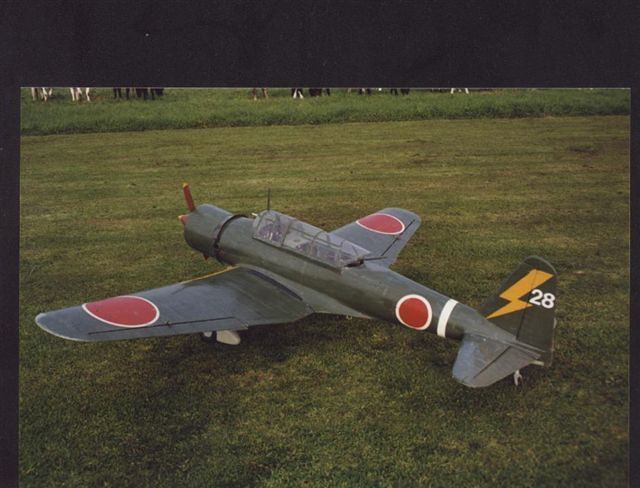 Mitsubishi Ki 51 1 (1) Mitsubishi Ki 51 1 (1) by Mike Feisst, on Flickr 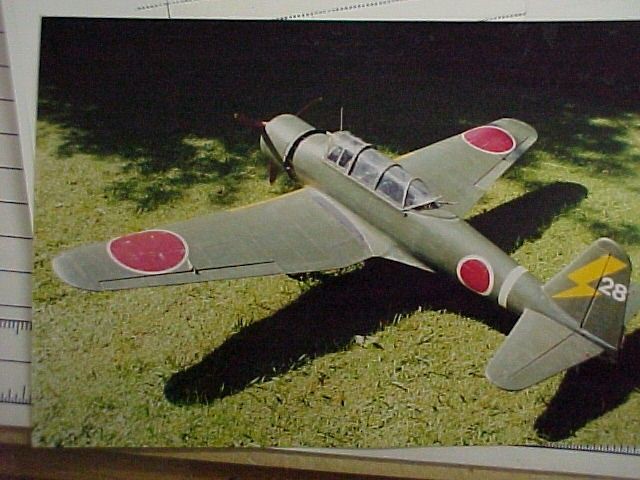 Mitsubishi Ki 51 1 (2) Mitsubishi Ki 51 1 (2) by Mike Feisst, on Flickr 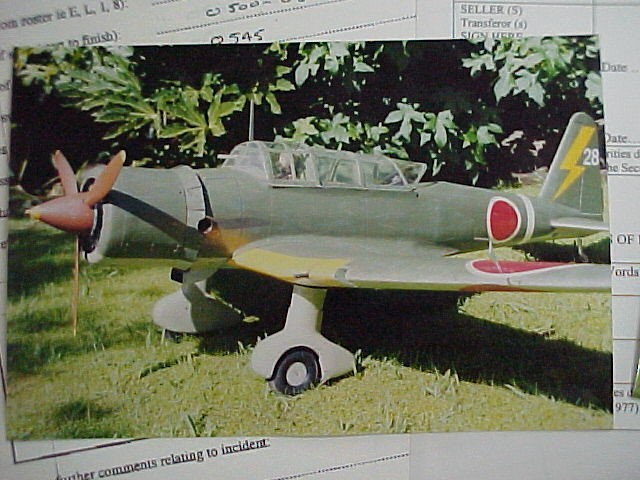 Mitsubishi Ki 51 1 (6) Mitsubishi Ki 51 1 (6) by Mike Feisst, on Flickr 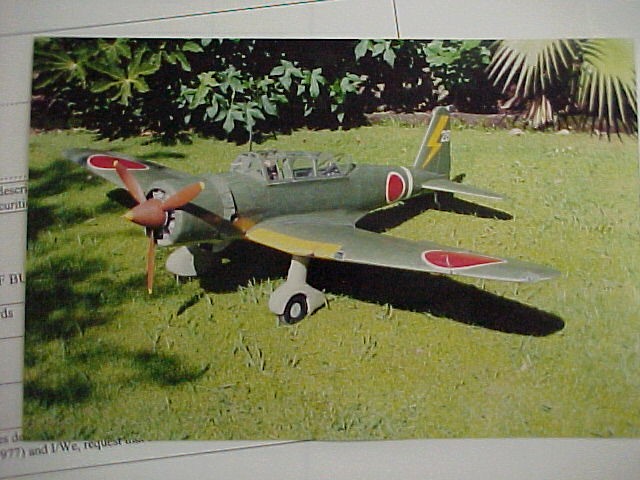 Mitsubishi Ki 51 1 (7) Mitsubishi Ki 51 1 (7) by Mike Feisst, on Flickr 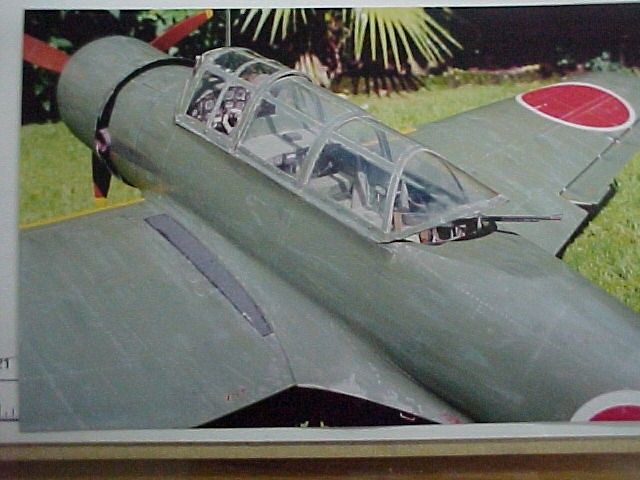 Mitsubishi Ki 51 1 (3) Mitsubishi Ki 51 1 (3) by Mike Feisst, on Flickr 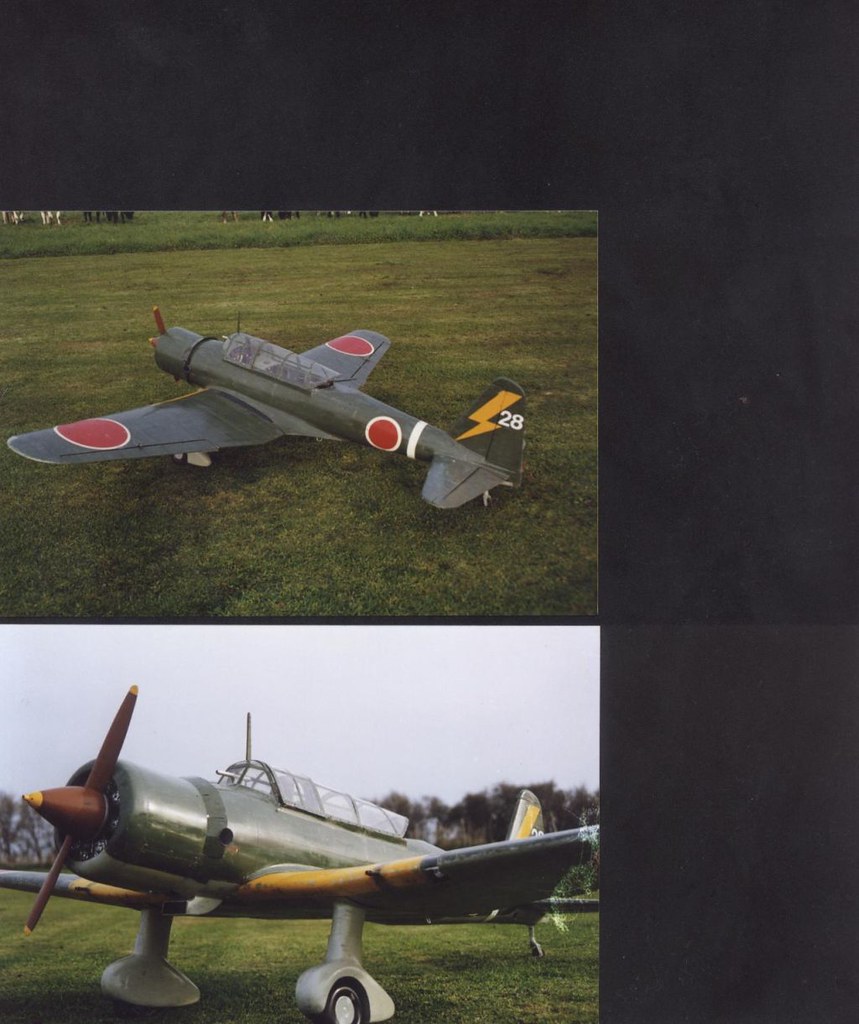 Mitsubishi Ki 51 1 (9) Mitsubishi Ki 51 1 (9) by Mike Feisst, on Flickr |
|
|
|
Post by Dave Homewood on Aug 1, 2018 22:06:09 GMT 12
Very cool, thanks for these Mike!!
|
|
|
|
Post by Deleted on Aug 1, 2018 22:12:08 GMT 12
Wonderful. It's great to see models out of the ordinary in terms of subject matter. Thanks for sharing, Mike!
|
|