Post by Bruce on May 8, 2006 19:17:56 GMT 12
In another thread Dave advises that there is a Rareplanes King Air currently for Sale on TradeMe. By Coincidence, this weekend I have just finished my Rareplanes King Air - the same kit as the one advertised.
I purchased mine on eBay, and fuelled by huge US and worldwide interest, the final price was over $100.00 US! (signs of the crazy collector I am...). Such is the worldwide demand for a King Air kit, far exceeding supply.
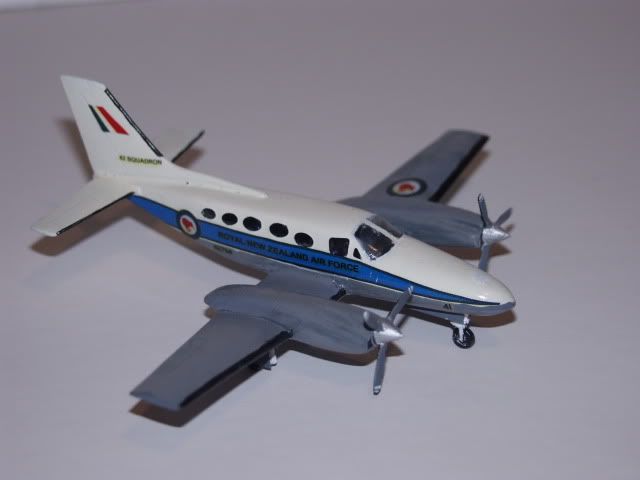
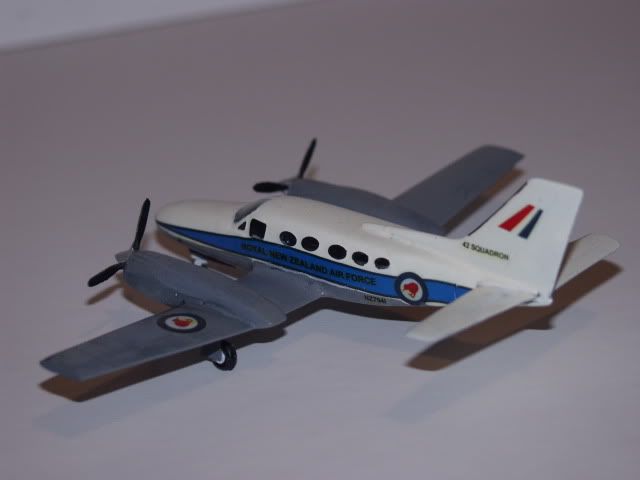
Following is a review of the kit, with some pointers regarding the RNZAF configuration, but first some photos:
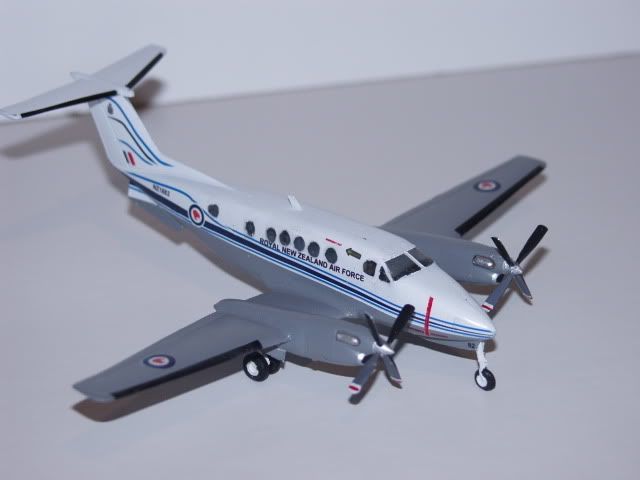
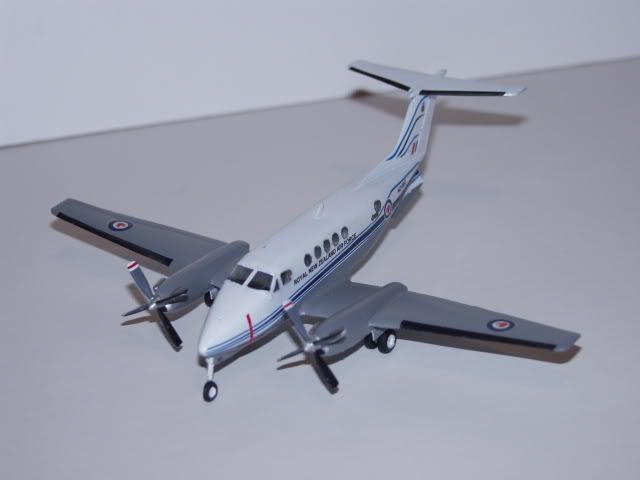
The kit is a Vacform - produced on a single sheet, with a separate package containing the vacformed windscreen and injection molded undercarriage legs and spinners. There is also a basic by adequate instruction sheet, 1/72 3 view drawings and a very poor MONOCHROME decal sheet. As a vac form, it is for experienced builders, and in this case be prepared for some hard work. The quality of the formings is O.K but the fit of some sections, especially around the nacelles and cowlings is poor. The exact sanding line for the components is difficult to judge and care has to be taken not to sand the joint edges too far. despite extreme care, the parts fit was poor, which makes me wonder if the masters dont have a few flaws. I elected early on to build to RNZAF config, but not superdetail as in this scale the frustration is not worth the results. Rather than use the black window decals supplied, I cut out the cabin windows, and later used Micro Krystal clear to "glaze" them. basic assembly was straightforward but plenty of filler was needed, especially around the wing root area. In order to get the wing to sit properly in its cut out, I had to sandwich a piece of plastic card into this area, before attaching the wing.
I also had to incorporate a number of mods to configure it as NZ1882, which I took extensive photos of at the Tauranga Airshow. RNZAF King Airs have Raisbeck after market performance kits fitted, and these differ from the stock model quite noticeably. Firstly the single ventral fin has been replaced by twin fins (to reduce dependence on the hydraulic yaw damper) - this required cutting the last 2/3 off the kit's ventral fin, and making replacements out of plastic card. There is also an additional window on the RH side, and this was cut as per the other windows. A big job is extending the rear of the nacelles. NZ1882 is fitted with raisbeck nacelle luggage lockers - although research shows that not all of the fleet have them. I built these up from plastic card and lots of filler.
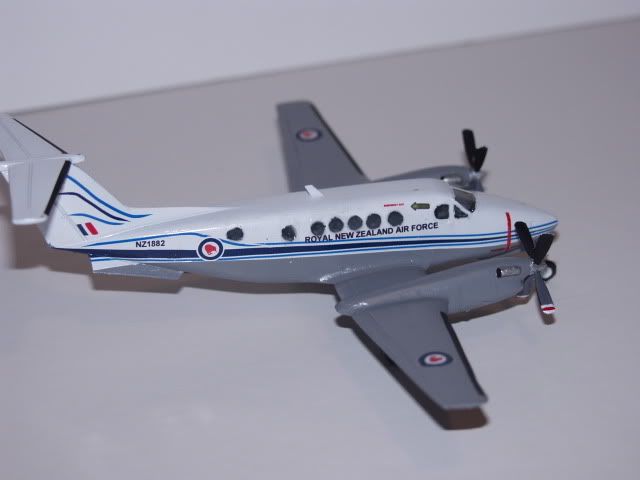
Other modification were related to the undercarriage. With extremely poor injection moldings these required a lot of work anyway. Nose gear is standard, but the mains have low pressure tyres, and enlarged UC doors. After cleaning up the legs, I fitted some spare DH Rapide mainwheels, which may be a fraction too big, but not by much. This saved using the vac formed examples which would have been a pain to get right, and which would have been too small anyway (being the standard HP size) The Raisbeck UC doors are in one piece instead of the kit version where the forward doors are closed after the leg extends. I made up the doors from plastic card, gently bend to bulge them slightly. The wheel wells are not accurate inside, but this isnt noticeable as very few people pick up my models to have a close look. the main UC legs need quite a bit taken off the top of them to get the correct sit - even more so with the bigger wheels. refer to the 3 views to get the correct forward angle on them.
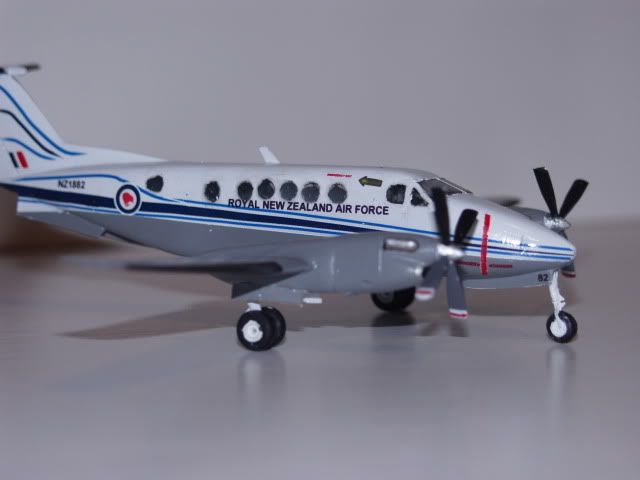
The propellers supplied with the kit have vac formed blades, and only 3 per prop, unlike the Raisbeck 4 blade units. Once again I raided my spares box and cut down some surplus blades to the correct size and shape. The spinners needed a bit of work as they were the wrong size for the cowlings by a long way.
All of these details were added after the paint job, which is Tamiya spray enamels. The markings were decals carefully drawn on the computer (using a scan of the 3 view drawing from the kit) and printed on SuperCal inkjet decal film. The 42 sqn crest was taken from the RNZAF website, cleaned up and scaled down. The SuperCal film produces very good results, but of course the white on the wing roundels needed to be printed separately on white film as it wont come out on clear.
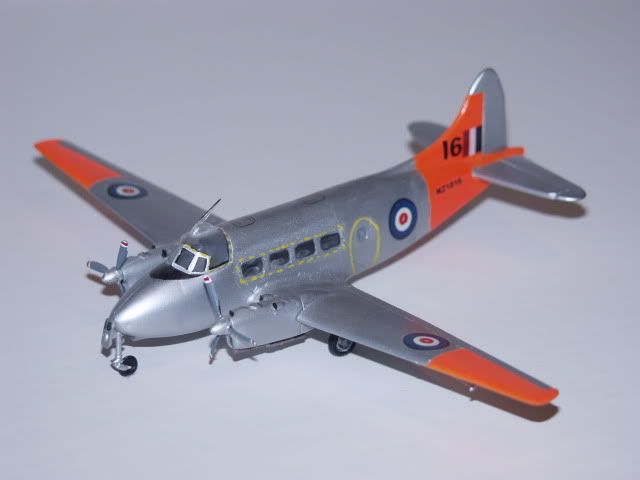
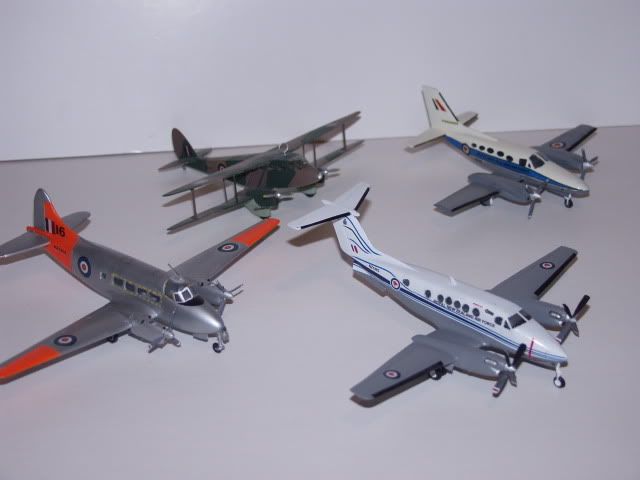
Overall, the kit wasnt worth the money I spent on it, but in the absence of any other kits of this subject, so be it. the final product looks pretty good in my opinion, I really like the new style RNZAF scheme. The kit isnt perfect, but fills a place in my collection. here it is with 3 previous generations of RNZAF multi purpose twin:
I purchased mine on eBay, and fuelled by huge US and worldwide interest, the final price was over $100.00 US! (signs of the crazy collector I am...). Such is the worldwide demand for a King Air kit, far exceeding supply.
Following is a review of the kit, with some pointers regarding the RNZAF configuration, but first some photos:


The kit is a Vacform - produced on a single sheet, with a separate package containing the vacformed windscreen and injection molded undercarriage legs and spinners. There is also a basic by adequate instruction sheet, 1/72 3 view drawings and a very poor MONOCHROME decal sheet. As a vac form, it is for experienced builders, and in this case be prepared for some hard work. The quality of the formings is O.K but the fit of some sections, especially around the nacelles and cowlings is poor. The exact sanding line for the components is difficult to judge and care has to be taken not to sand the joint edges too far. despite extreme care, the parts fit was poor, which makes me wonder if the masters dont have a few flaws. I elected early on to build to RNZAF config, but not superdetail as in this scale the frustration is not worth the results. Rather than use the black window decals supplied, I cut out the cabin windows, and later used Micro Krystal clear to "glaze" them. basic assembly was straightforward but plenty of filler was needed, especially around the wing root area. In order to get the wing to sit properly in its cut out, I had to sandwich a piece of plastic card into this area, before attaching the wing.
I also had to incorporate a number of mods to configure it as NZ1882, which I took extensive photos of at the Tauranga Airshow. RNZAF King Airs have Raisbeck after market performance kits fitted, and these differ from the stock model quite noticeably. Firstly the single ventral fin has been replaced by twin fins (to reduce dependence on the hydraulic yaw damper) - this required cutting the last 2/3 off the kit's ventral fin, and making replacements out of plastic card. There is also an additional window on the RH side, and this was cut as per the other windows. A big job is extending the rear of the nacelles. NZ1882 is fitted with raisbeck nacelle luggage lockers - although research shows that not all of the fleet have them. I built these up from plastic card and lots of filler.

Other modification were related to the undercarriage. With extremely poor injection moldings these required a lot of work anyway. Nose gear is standard, but the mains have low pressure tyres, and enlarged UC doors. After cleaning up the legs, I fitted some spare DH Rapide mainwheels, which may be a fraction too big, but not by much. This saved using the vac formed examples which would have been a pain to get right, and which would have been too small anyway (being the standard HP size) The Raisbeck UC doors are in one piece instead of the kit version where the forward doors are closed after the leg extends. I made up the doors from plastic card, gently bend to bulge them slightly. The wheel wells are not accurate inside, but this isnt noticeable as very few people pick up my models to have a close look. the main UC legs need quite a bit taken off the top of them to get the correct sit - even more so with the bigger wheels. refer to the 3 views to get the correct forward angle on them.

The propellers supplied with the kit have vac formed blades, and only 3 per prop, unlike the Raisbeck 4 blade units. Once again I raided my spares box and cut down some surplus blades to the correct size and shape. The spinners needed a bit of work as they were the wrong size for the cowlings by a long way.
All of these details were added after the paint job, which is Tamiya spray enamels. The markings were decals carefully drawn on the computer (using a scan of the 3 view drawing from the kit) and printed on SuperCal inkjet decal film. The 42 sqn crest was taken from the RNZAF website, cleaned up and scaled down. The SuperCal film produces very good results, but of course the white on the wing roundels needed to be printed separately on white film as it wont come out on clear.
Overall, the kit wasnt worth the money I spent on it, but in the absence of any other kits of this subject, so be it. the final product looks pretty good in my opinion, I really like the new style RNZAF scheme. The kit isnt perfect, but fills a place in my collection. here it is with 3 previous generations of RNZAF multi purpose twin:


