Post by amitch on Apr 27, 2006 14:34:38 GMT 12
Hi
This is an article I wrote a while back that never got used. The advice is basic but sound.
Ground to Air Photography
With the airshow season about to start once again, hopefully this guide will help you to get those stunning photos we all see in the magazines.
As the line goes, it’s not what you have; it’s how you use it. Digital or film? For instant feedback, it’s hard to beat digital and with prices constantly coming down and quality going up, if you haven’t changed over, perhaps it’s time you did. Don’t forget that with digital, you don’t have the ongoing cost of film and developing that tends to restrict the number of shots you take. At an airshow or motorsport event, I would easily take 500 photos a day, if you factor in the cost of film, the digital body quickly pays for itself. You don’t need the latest, greatest body to get good photos. Get a camera that suits your budget. The Nikon (d-70 and Canon (350D) entry level digital bodies do a superb job when used correctly. There are also a number of prosomer cameras with manual controls and inbuilt lens’s of around 300mm, these also will give good results for the beginner. Technique far outweighs the type of equipment used. If you feel inclined to spend money on gear, invest in the best lens’s you can, as this will give you the sharpest clearest shots. Those white lens’s you see on the pros at events are there for a reason.
Tripods and monopods only get in the way when you are trying to shoot fast moving aircraft, but having a tripod can allow you to get those stunning dusk shots of a warbird against the setting sun.
You will need a couple of lens’s, a short zoom for aircraft on the ground and a larger zoom (at least 300mm) for capturing them in the sky.
The popular myth is that fast film is required to photograph fast moving objects. This just isn’t true and in fact using faster film can affect the final result by introducing unwanted noise. Faster film (400iso or higher) is really only necessary those for really dark days. If you are using film 100 iso is ok and if you are using digital, set your camera to it’s best iso setting (usually 100 or 200) for the lowest noise. Remember that you are photographing the sky, where light isn’t usually a problem.
Composition is important. Think about what you are trying to achieve and frame the photo to suit. As a general of thumb, if the subject doesn’t fill three quarters of the frame, don’t take the photo.
For moving aircraft, the technique of panning is very important. This needs to be smooth and constant. Hold the camera by the lens (this is important, not only for a steady camera, but it also prevents the lens mount on the camera from being damaged by taking all the weight of the lens). Stand with your left shoulder to the flight path of the aircraft, and spread your feet for good balance. This may feel a bit odd to start with, but it will give you a good platform to work from. Follow the aircraft from left to right (or right to left) and take a number of photos. Don’t stop panning as soon as you push the shutter button, it’s very important that you continue panning after the last shot. If you press the shutter, then stop, you will at best capture half an aircraft. This takes a lot of practice. Go out to your local airport and try it out, or if there isn’t one close by, use passing cars. Remember that smooth panning is what will get the results.
The method of focusing will depend on your camera. Unfortunately here, the more expensive bodies have an edge as the auto focus is very proficient. If your camera has AI focus and it works well use this. On some bodies, one shot focus is the better option. Using this option will require you to keep the aircraft in focus by repeatedly half pressing the shutter button as you pan and fully pressing it when you want to take the photo. Trial and error will decide the best option for your gear.
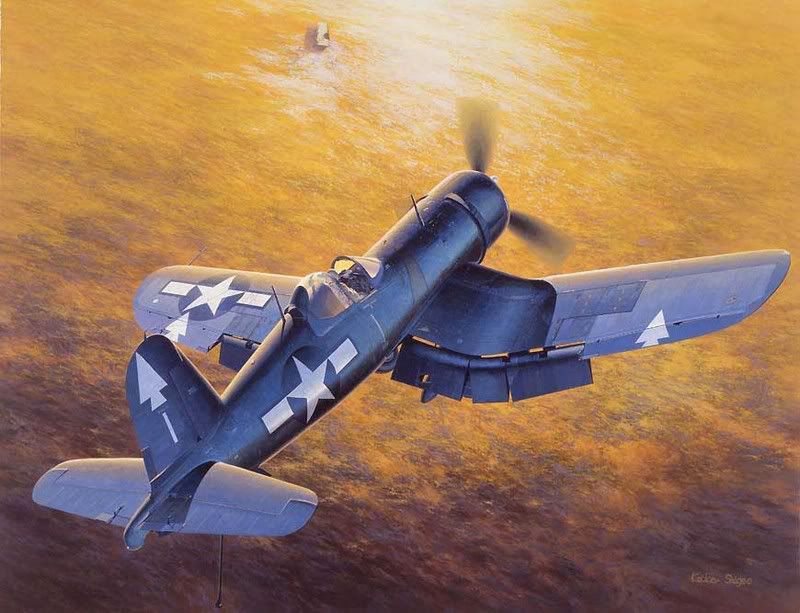
Stopped props. Not a good look, but you will be surprised how many photos are taken with frozen propellers. To get the blur in the props select TV (shutter priority) on your camera and set the speed to 250 or less. For jets, blurred props, aren’t an issue, so AV (aperture priority) can be selected. Pick one to suit the performance of your lens, f8 is a good place to start. You will get some blurry shots, but with practice this will decrease and the keepers will be worthy of any magazine
If you are using a digital camera, use JPEG, unless you have a specific reason to shoot RAW and set the file size to large fine (or what ever setting gives you the largest file size). This is to ensure that you can use your photos for any purpose. Setting my 6 meg camera to large fine allows me to get prints of up to 32” by 20”. Using a smaller file size makes large prints (and magazine covers) difficult or even impossible to achieve.
The last camera setting is metering, set it to only meter where focus is achieved, (Spot or Partial metering) as the subject is important, not the background. This may give you blown out skies, but the aircraft will be well exposed. What you don’t want is the sky correctly exposed and the aircraft a dark silhouette in the middle.
In tricky back lit conditions, set the camera to manual (M) with a shutter speed to suit (ie: no more thatn 1/250 for props and F8 for jets) and focus it on the grass out in fron of you. This will give you a shuuter sped and aperture that will correctly expose the back lit aircraft. It will blow out the sky, but that’s not what you are photographing. Check these settings often as the light will change.
Don’t forget to move around the field to get a range of photos, taking off, landing etc as a variety of photos will enhance your portfolio.
Once you have the photos, what do you do with them? You can use them as desktop wallpaper on your computer, e-mail them to friends or post them in relevant newsgroups and forums on the Internet. If you want prints, there are a number of places that do this from digital cameras or film scans. One of the best is based in Christchurch, Photo and Video’s Web Prints. By using this service, you don’t have to leave your computer and a few days after sending the photos off, the prints will arrive on your doorstep. Their web site is www.photo.co.nz and click on the Web Prints logo.
Remember practice makes perfect and don’t get discouraged by your first attempt. Keep trying and your results will get better. Ground to air is the hardest technique to perfect, but a good photo makes it all worth while!
This is an article I wrote a while back that never got used. The advice is basic but sound.
Ground to Air Photography
With the airshow season about to start once again, hopefully this guide will help you to get those stunning photos we all see in the magazines.
As the line goes, it’s not what you have; it’s how you use it. Digital or film? For instant feedback, it’s hard to beat digital and with prices constantly coming down and quality going up, if you haven’t changed over, perhaps it’s time you did. Don’t forget that with digital, you don’t have the ongoing cost of film and developing that tends to restrict the number of shots you take. At an airshow or motorsport event, I would easily take 500 photos a day, if you factor in the cost of film, the digital body quickly pays for itself. You don’t need the latest, greatest body to get good photos. Get a camera that suits your budget. The Nikon (d-70 and Canon (350D) entry level digital bodies do a superb job when used correctly. There are also a number of prosomer cameras with manual controls and inbuilt lens’s of around 300mm, these also will give good results for the beginner. Technique far outweighs the type of equipment used. If you feel inclined to spend money on gear, invest in the best lens’s you can, as this will give you the sharpest clearest shots. Those white lens’s you see on the pros at events are there for a reason.
Tripods and monopods only get in the way when you are trying to shoot fast moving aircraft, but having a tripod can allow you to get those stunning dusk shots of a warbird against the setting sun.
You will need a couple of lens’s, a short zoom for aircraft on the ground and a larger zoom (at least 300mm) for capturing them in the sky.
The popular myth is that fast film is required to photograph fast moving objects. This just isn’t true and in fact using faster film can affect the final result by introducing unwanted noise. Faster film (400iso or higher) is really only necessary those for really dark days. If you are using film 100 iso is ok and if you are using digital, set your camera to it’s best iso setting (usually 100 or 200) for the lowest noise. Remember that you are photographing the sky, where light isn’t usually a problem.
Composition is important. Think about what you are trying to achieve and frame the photo to suit. As a general of thumb, if the subject doesn’t fill three quarters of the frame, don’t take the photo.
For moving aircraft, the technique of panning is very important. This needs to be smooth and constant. Hold the camera by the lens (this is important, not only for a steady camera, but it also prevents the lens mount on the camera from being damaged by taking all the weight of the lens). Stand with your left shoulder to the flight path of the aircraft, and spread your feet for good balance. This may feel a bit odd to start with, but it will give you a good platform to work from. Follow the aircraft from left to right (or right to left) and take a number of photos. Don’t stop panning as soon as you push the shutter button, it’s very important that you continue panning after the last shot. If you press the shutter, then stop, you will at best capture half an aircraft. This takes a lot of practice. Go out to your local airport and try it out, or if there isn’t one close by, use passing cars. Remember that smooth panning is what will get the results.
The method of focusing will depend on your camera. Unfortunately here, the more expensive bodies have an edge as the auto focus is very proficient. If your camera has AI focus and it works well use this. On some bodies, one shot focus is the better option. Using this option will require you to keep the aircraft in focus by repeatedly half pressing the shutter button as you pan and fully pressing it when you want to take the photo. Trial and error will decide the best option for your gear.
Stopped props. Not a good look, but you will be surprised how many photos are taken with frozen propellers. To get the blur in the props select TV (shutter priority) on your camera and set the speed to 250 or less. For jets, blurred props, aren’t an issue, so AV (aperture priority) can be selected. Pick one to suit the performance of your lens, f8 is a good place to start. You will get some blurry shots, but with practice this will decrease and the keepers will be worthy of any magazine
If you are using a digital camera, use JPEG, unless you have a specific reason to shoot RAW and set the file size to large fine (or what ever setting gives you the largest file size). This is to ensure that you can use your photos for any purpose. Setting my 6 meg camera to large fine allows me to get prints of up to 32” by 20”. Using a smaller file size makes large prints (and magazine covers) difficult or even impossible to achieve.
The last camera setting is metering, set it to only meter where focus is achieved, (Spot or Partial metering) as the subject is important, not the background. This may give you blown out skies, but the aircraft will be well exposed. What you don’t want is the sky correctly exposed and the aircraft a dark silhouette in the middle.
In tricky back lit conditions, set the camera to manual (M) with a shutter speed to suit (ie: no more thatn 1/250 for props and F8 for jets) and focus it on the grass out in fron of you. This will give you a shuuter sped and aperture that will correctly expose the back lit aircraft. It will blow out the sky, but that’s not what you are photographing. Check these settings often as the light will change.
Don’t forget to move around the field to get a range of photos, taking off, landing etc as a variety of photos will enhance your portfolio.
Once you have the photos, what do you do with them? You can use them as desktop wallpaper on your computer, e-mail them to friends or post them in relevant newsgroups and forums on the Internet. If you want prints, there are a number of places that do this from digital cameras or film scans. One of the best is based in Christchurch, Photo and Video’s Web Prints. By using this service, you don’t have to leave your computer and a few days after sending the photos off, the prints will arrive on your doorstep. Their web site is www.photo.co.nz and click on the Web Prints logo.
Remember practice makes perfect and don’t get discouraged by your first attempt. Keep trying and your results will get better. Ground to air is the hardest technique to perfect, but a good photo makes it all worth while!