|
|
Post by baz62 on Mar 3, 2009 20:58:16 GMT 12
Greetings fellow forumers. I was looking for some Bristol Freighter photos and thought I would share some of the ones I took when I was a Sunday volunteer at the RNZAF Museum at Wigram (1979-88). Thankfully I don't appear on the lens side of the camera (well ok I'm in one shot but I am hard to make out!!) Now given Dave's book about the General Reconnaissance Squadrons coming up I thought I would start with a few Hudson pictures. The subject is of course NZ2013. My apologies as the pictures dart around a bit and to speed up the scanning process I did two at a time in places. Ok then the lower picture is taken in 1985 and shows her parked in the Museum restoration hangar (No. 7 which will be demolished one day!!). As you can see the wing centre section was gas torched off rather close to the fuselage! The top photo should be familiar to Skyhawk techs. Alan Woodley had the job of mating up the gas torched centresections back to the fuselage. To ensure the geometry was correct he used this A4 fuselage jig, useful as you can adjust it in all directions.  And a couple of Wright Cyclone Engines. Several were stripped down to build two restored examples. One was considered good enough to be run!  Next up we have the Starboard centre section.  In the top shot we have the Hudson with bombay doors in the foreground and wings to the right. The buildings behind are the old barracks from early Wigram days. I think they are are in one of the Museum's other hangars now?? And below this are the wings which were in pretty good condtion.  Ok couldn't resist putting a Bristol Freighter in this thread. This is NZ5913. This was a SafeAir machine and flew as ZK-CLT. Donated to the Museum she was sold to Trans Provincial Airlines Ltd in Canada. To make the trip she was fitted with the engines from NZ5903 as the military engine life was longer than the civilian one hence she became NZ5913! I am pretty sure she has 5903's engines in this shot s those cowlings look camoflaged to me!  The next photo is very important to me. This was THE day I got the old aircraft bug. And the first day working on the Museum's Avenger NZ2504. Taken in 1979 George Jaunzemiz is on the tug waiting to put her back in 6 hangar. Work has been done to bring the engine back to life hence the lack of engine cowlings. At this point the prop hasn't been removed and she still has the paint job Paul Harrison (forum member tbf2504) and Neville Mines(forum member Shorty) applied when she was at TeRapa as the gate guard.  The next three shots show Paul Harrison running the TBF. As you can see the paint is pretty much gone and she was put in her target tug colurs she last wore in 1959 at retirement. Below this is a rather poor shot of myself running the Avenger for the first time. I was fair sh****g myself. I was 17 I think and the only aircraft I had started up til then was a Cherokee!! Supervising by intercom is George Jaunzemiz. If you ever read this George thanks for letting me run the Avenger all those times!! Below this is a photo taken during her second restoration into WW2 markings as NZ2521. As a target tug her turret had been removed. In its place was a big round steel plate with some lead weights to offset the weight lost because of the missing turret. So with the dissimilar metals some corrosion needed treating before the new turret was fitted. heres another little gem. See the bright green object inside the fuselage? This is the Hydraulic Accumulator. Only this one is from a Citreon....................car! Th original split its rubber diaphragm during an engine run (spraying hydrulic fluid all over the place!)and this was used as a replacement. Kiwi ingenuity at its finest!! 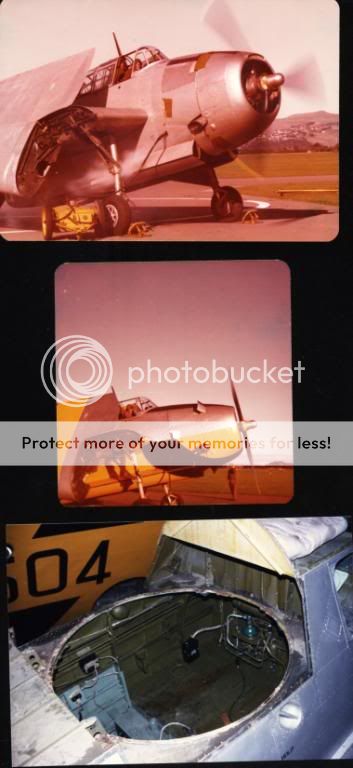 The WW2 roundels positions were marked out with masking tape and also the NZ2504 position just under the horizontal stabiliser. You will also notice all the control surfaces have been removed as they were still covered with sheetmetal rather than the correct fabric covering. Just below and forward of centre of the masking tape "roundel" is a small hole. This was the flare tube dispenser and had a mate on the other side as well.  And the last one for now. This phot makes me roll my eyes. In 1981 during a groundrun the engine threw a rod. Yeah ouch. We finally tired to remover the cylinder to see how bad it was but although we had all the bolts removed and could rotate and wiggle the cylinder it wouldn't come out. We surmised that when the rod let go the loosed rodend flailed around and "bellmouthed" the skirt of the cylinder making removal impossible. So the desicsion was made to remove the engine(I'll post some photos of that later) and send it to the engine gods at Woodborne. The large yellow stand in front of the TBF is a Bristol Hercules engine stand. To cut a long story short the engine went to Wood borne. Then Prince Charles came for a Royal Visit and visited Wigram. They wanted the Avenger outside on display so the engine came back untouched and put straight back in place. And I doubt Prince Charles even got within 10 feet of her and now she still has that damaged engine in place. (Sorry its a pet peeve of mine grrr grr  )  Until next time. Baz ;D |
|
|
|
Post by Dave Homewood on Mar 3, 2009 21:56:07 GMT 12
Brilliant photos Baz! Thanks for posting them.
Why was the roundel masked out like that? Surely they stripped the old paint before putting it into the current scheme, or at least would have painted the blue before masking the roundel. I'm intrigued by that.
Would you give permission for me to please (when i get some time) add those photos of the Hudson the the Hudson survivors page on my website please?
|
|
|
|
Post by baz62 on Mar 4, 2009 13:58:39 GMT 12
Hi Dave
Glad you enjoyed them and feel free to use any Hudson pictures you like. I will be posting more Hudson ones showing the interior on arrival and the work done splicing the centre section back together.
Can't answer your question about the masking tape roundels. Maybe someone else knows the answer?? I would have thought they would have stripped the paint off too.
|
|
|
|
Post by corsair67 on Mar 4, 2009 15:02:07 GMT 12
What a fantastic selection of shots there, Baz!  It's always amazing to see what bare bones the RNZAF Museum team often had to work with intially to build the wonderfully finished aircraft they have in their collection. I'm wondering if the tape roundels were applied for positioning and/or scale test runs? One question someone might be able to answer for me - did the Avenger turret rotate sideways, or only up and down? |
|
|
|
Post by baz62 on Mar 4, 2009 18:56:15 GMT 12
Thanks Corsair67. Yes the Avenger turret rotated as well as up and down. Before I forget(again!) Some of the pictures I'm showing(and I can't recall which are which now) were given to myself and my brother Ken by a friend of ours, Hamish Kim. Hamish was in our ATC squadron (18) then joined the RNZAF flying Friendships then the Golden Eagles before leaving and flying for Air New Zealand. So if you read this Hamish thanks again for the photos! Now as promised here are some more photos! As mentioned before the centre section was gas torched off fairly close to the fuselage. As you can see the alloy structure shows the still molten look after all these years. In the close up is the maiin spar which carries on through the fuselage.  Next we have the Starboard centre section on the Skyhawk jig. Below this is the repair carried out to the port centre section. It was important that the structure was joined in a manner that would be able to support the weight of the aircraft and engines as if it had never been cut.  And here we have the structure on the fuselage cleaned up and ready to match up with its lost companion after 40 odd years!  Now the two sections are sitting where they would have been prior to being cut.  As you can see there is quite a gap here but it was necessary to get back to "good" metal that hadn't been effected by the gas torch.  Here we have the plates riveted to the spars to provide a near airworthy repair.   Next is a shot of the rather empty fuselage. The girder-like beam is the main spar and beyond is the doorway leading to the cockpit.  And as you can see a lot of work was needed to return the cockpit to its original state!  Back to my favorite topic..........engines!! Here is a shot taken from the other side of the engine you've seen above. As you can see from the position of the exhaust shroud this was the starboard engine.  I'm not sure but this may be the same engine being stripped down to its component parts. Some of the pistons have been removed along with the reduction gearbox from the nose of the engine  Thats all for now folks. Baz ;D |
|
|
|
Post by obiwan27 on Mar 4, 2009 20:44:11 GMT 12
Yep, those were the days Baz!! I'm Baz's brother Ken and I promise that I'll get some of my photos scanned and posted up this weekend as well.
|
|
|
|
Post by lumpy on Mar 4, 2009 21:27:57 GMT 12
Hmm , Hamish Kim . That name rings a bell from my ( atc ) jnco course at Wigram . He was the guy ( if I remember correctly ) who woke us up in the mornings , and turned very red faced when I turned right , after he yelled left . He was already rnzaf by then , and refered to as " officer cadet Kim " if I recall correctly . ( I believe he was doing the atc courses on his own time ) . Think I ran into him one year at Dip Flat also .
|
|
|
|
Post by baz62 on Mar 4, 2009 21:43:18 GMT 12
Yep UnderOfficer Kim was a scary dude lumpy. I was at Dipflat in 78(I think) working with the cooks along with a few other 18 squadron cadets. I made his day when I stayed with him up in Woodborne and accidently ran over his letterbox that the Airforce had finally put up to replace the broken one!! The red face came into view I can tell you but a few beers calmed him down ha ha.
|
|
|
|
Post by Dave Homewood on Mar 4, 2009 21:44:16 GMT 12
Stunning photos of the Hudson's interior and the work needed and done to repair the wing structure. Alan and his team worked miracles to revive this beautiful aircraft and I fully feel it is one of the greatest restorations ever carried out in New Zealand. Another on the top of that list is the Anson which was perhaps in worse condition and in similar farmyard chookhose circumstances. I think the average visitor to the museum just couldn't realise and appreciate wheat has been done to bring those two gorgeous bombers up to the state they're currently in.
Thanks for the permission to use those photos, I'll add them to the site when I get a chance. Can you PM me your full name for credit purposes please? I can't just put Baz.
|
|
|
|
Post by lumpy on Mar 4, 2009 22:24:23 GMT 12
I must have been there when you were Baz . Cant remember the years , but I did the course in either 77 or 78 , and returned as a " fatigue " for the next two years . Pretty sure only Blenheim and Nelson sqns were picked as fatigues when I was picked , so you must have been there when I was on the course . I would have loved to have run over Kims letterbox ! ;D
|
|
|
|
Post by obiwan27 on Mar 5, 2009 16:16:16 GMT 12
Ah yes, the famous running over of the letterbox episode. I was watching out the bedroom window at the time so, as the younger brother of one who regularly told me what a superior driver he was there was only one thing to do. March into the dining room and say "Hamish, how do you feel about having your letterbox run over"? Cue Hamish and the boys dashing outside to have a look and take the piss out of my older bro!!! lol, Well what younger brother wouldn't resist? Yes he is a better driver but it was worth a laugh. Photos of the Anson restoration to come Dave. Cheers.
|
|
|
|
Post by baz62 on Mar 5, 2009 17:00:26 GMT 12
Some of these shots are pretty bad light wise. It was a cheap camera possibly made by blind nuns in Tunisia  If you read my other thread (Baz's Big Bristol Adventure) you would seen a shot of me putting a sparkplug back in for Al on CPTs starboard engine. Here's a shot of me doing the same thing on the Museum's Freighter NZ5903. Its even the same side just a bit higher up. I was going round removing a spark plug from each cylinder and spraying fresh inhibiting oil in all the cylinders. Must have done a good job because the engines ran ok when they were put on "NZ5913 shown above!)  And another shot showing the tightly cowled engine with outer cowlings open. The top of each cylinder head can be seen in the cutouts.  And Dave enquired about photos of the other Hudson the Museum had being NZ2087. Heres a shot taken at Weedons in the Museum's storage facility or Aladdins Cave as I like to call it!! Plus some assorted aircraft jacks and chocks!  More from Weedons and a mystery. What Harvard is this? It looks like it may have been in a crash going by the cowling damage. And the colour might be the wartime yellow but as to whether its a Mark II,IIa or III I can't tell.  Next is a rather time worn T55 Vampire pod with my brother Ken peering into the cockpit. I presume the lamp in the foreground is RNZAF official ;D  Jeez he's in this shot too! Here we have a single seat Vampire pod and tail booms. Presume a FB5? As the Museum already had a FB5 on display this was surplus. Not positive but ADF serials websites records INST.186(formally NZ5735) as being stored with the Museum and you can see 18 on the pod's side. And the 202 on the tailboom points to INST 202 formally NZ5767.  Now back to Wigram and once again inside 7 hangar we have pretty crap photo taken under the Dakota NZ3551. We have a ground power unit plugged in providing power to check out the avionics. Actually we had Alex Warriner who was instructing on Friendships (avionics side of things) at the time looking after all things radio. I recall the radios were borrowed out of the Dakota by the RNZAF for reasons I forget now. Visible in the background are the Avenger and the Freighter to the left.  Heres a shot of Porterfield 35W NZ598. Actually the RNZAF impressed this aircraft twice during the war. She started life in New Zealand as ZK-AFT. The RNZAF impressed her in May 1940 as NZ581. She went back into civilian life as ZK-AHJ in June the same year. Then in October 1942 the Air Force got it back again as NZ598. Finally back to civvie street as ZK-APJ in 1946. She is now on display at the Ashburton Aviation Museum  More action shots now. Heres a better one of me getting to grips with running the Avenger for the first time. It wasn't a smooth start as I had the throttle a fraction too far forward and when she fired there was quite a bang! As you can see all the hydraulics worked including wingfold,flaps, cowl flaps etc. Even the landing light would fold down and shine. In fact when the Avenger arrived at Wigram in 1978 I remember as an ATC cadet walking past George Jaunzemiz standing by the Avenger with a battery cart plugged into her. All her navlights were on and I stopped and asked if they were going to fly her. George said well all the electrics work so you never know! Little did I know i would be running the aircraft myself!!  Heres a photo I know Hamish Kim took as his camera was way better than mine. Going by the little puffs of smoke George(in the cockpit) has just got her running. The cowl flap just forward of the wing was for the oilcooler. There was a matching one on the other side. The later TBM-3 Avenger went to a large single oilcooler under the nose. Personally I think the TBF have a nicer nose profile. Nice picture with the Friendships in the background. I think at this date they only had two of them as the first one didn't have wing tanks til a bit later.  Lastly and not the most clear shot of the Museum's Devon being run by Kel Alderidge with myself visible in the right seat. Great view out of those Devons! Kel Alderidge, who sadly is no longer with us, also ran the Avenger and taxied her and the Dakota as well. he is famous for doing a takeoff run down Wigram's runway in the Avenger and legend has it he hit a bump(cough cough) and daylight was visible under the tyres!!!!!!  Thats all for today folks! ;D |
|
|
|
Post by corsair67 on Mar 5, 2009 17:40:58 GMT 12
These photos are amazing. Sure the quality of some might not be the best, but they sure as hell are a great record of very interesting times at Wigram. Thanks again for sharing. |
|
|
|
Post by baz62 on Mar 5, 2009 17:42:18 GMT 12
Ken just reminded me that Hamish Kim ended up flying the Hercules after the Golden Eagles. Oh and the Avenger's bombay doors worked too. The only item we didn't get to test was the undercarrige. I had been in contact with an Avenger owner in the US and he had sent us drawings for the U/C leg tool plus info about jacking her up for testing. But it never got done.
|
|
|
|
Post by Dave Homewood on Mar 5, 2009 17:43:30 GMT 12
Super photos. Thanks particularly for the shot of Hudson NZ2087. Really nice shots of the Avenger too, and great to see inside the Weedons hangars again.
Just one important point, there's no such word as Airforce and that "stupid media" coined word is formally banned from this forum. It's Air Force. Sorry to be pedantic but we who have served cannot stand to see it written like that.
|
|
|
|
Post by baz62 on Mar 5, 2009 17:48:09 GMT 12
Oops i meant to fix those I'll do it right now! ;D
|
|
|
|
Post by tbf25o4 on Mar 6, 2009 11:54:55 GMT 12
Cheers Baz,
the photos and text certainly took me back a decade or two!
Yep there are many tales to tell on the avenger rebuild - of how the official airforce supply system didn't want to know about this museum piece!
Of how 36 ft of C130 piano hinge for the leading edge inspection panels just happened to arrive at wigram to replace two bombay door hinges!
Of visits to the flight store in 4 hangar during joe breaks when the friendly storeman was at morning tea and rabbitting through the AGS spares for nuts bolts etc , then booking them out against whatever harvard was seen through the door.
Of a prop rebuild courtesy of ANZ prop shop at no expense
Of hydraulic flexible hoses made courtesy of a local agricultural overhaul shop we found that the TBF's hoses and fittings were exactly the same as those used on combine harvesters.
The Hydraulic reservoir was a great story. When it split we were scratching our heads to find a replacement. I had the u/s one on my office desk when a mate was visiting from wellington on communications work (My actual airforce trade!) and spotting the said object he commented as a citerion fanatic that it appeared to be the same as one used on a particular model of that car.
A trip to Blenheim Road auto wreckers and voila!! he had one. When I explained what we needed it for, there was no charge!
What about the saga of obtaining the oil for the first engine run.
George identified that the modern equivalent oil OM270 was used in airtrainers as a running in oil post engine work. I went down to the oil store at 2 hangar and the GSH who ran the store just happened to be an ex-winch operator in the old TBF. Noting that we couldn't officially requisition a 44gal drum of oil, we went into the oil store where he opened a brand new drum and then spat into it. "Look at that he said, obviously contaminated!, can't use that in an Airtrainer. It will be delivered in 30 minutes."
As an aside we used 25gals of the 40 gallons of oil in the first engine run as all the old seals that had been dry for 20 years expanded and settled in. After that she only burned about a gallon per engine run.
Ah those were the days!!!
Paul
|
|
|
|
Post by baz62 on Mar 6, 2009 12:23:08 GMT 12
Thats really good Paul, I always knew George was a scrounger, now I know here he got it from ha ha.
Were you involved with removing the prop? I know George told me that the engine at first seemed to be seized as you couldn't move the prop. It turned out to be the bearing in the nose of the reduction gearbox that was the problem. Apparently George had hell of a job getting the prop off. Oh and the paintstripping the awful paintstripping. What was it? 7 coats of paint?? At least the house paint you applied came off easily but man that US Navy paint was hard to remove!
|
|
|
|
Post by tbf25o4 on Mar 9, 2009 7:38:02 GMT 12
The saga of the prop was quite a long story.
The front bearing was rusted solid from all those days in the open at Te Rapa. George daily soaked the bearing from the outside with penetrating oil and after two weeks we could get movement.
The next problem was trying to remove the prop nut to remove the propellor assembly.
We had a special box spanner tool made by the machinists but try as we could it wouldn't shift.
One day an old guy visiting the hangar told us that he worked on TBF's during the war and that their method of "cracking" the prop nut was to have a 6ft bar on the prop spanner and then drop a heavy guy's weight onto the end of the bar. This was tried and yep it worked!
The amazing thing about the aircraft being standard US of A was that the propellor hub was a standard Hamilton 22E40 and when we refitted the prop one from a Dakota (spare from Weedons) was used. The generator also came from a Dakota.
Remember putting in the two Devon batteries into the bomb bay each time we cranked it up! The occasional short lived up the proceedings
cheers
Paul
|
|
|
|
Post by baz62 on Mar 13, 2009 19:19:11 GMT 12
Right I've loaded up some more photos so back in time we go! First off we have some shots from a Sunday afternoon ground run of the Dakota and the Avenger in 1980. These shots were taken by Hamish Kim trying out his new camera. By now i was an "old hand" at running the Avenger so George (along with Alex Warriner) ran the Dakota. So first off here's NZ3551. The port engine is purring away and now the starboard engine has roared into life with appropriate smoke effects!!  And now a similar shot with both running. The smoke from the Avenger starting is visible on the grass.  Having plugged in the battery cart I am now climbing into the cockpit. The Avenger has a really roomy cockpit and, unlike the Wildcat and Hellcat, has a two piece sliding canopy with a handy central rail at the top which I am holding onto as I clamber in. I also have a few "passengers" in the rear cockpit!  This shot shows everyone(including the Dakota "crew" looking at something beside the Avenger. I think it was a young lad who was very interested in what we were up to so I invited him onboard. You can see the "clamshell"style canopy on the second cockpit. Being an early model Avenger she had a second control stick which wasn't fitted at the time. I can't recall if there was a set of rudder pedals as well??  This is my all time favourite photo of the Avenger (and not just because its me running her!!) I think it shows her off really well from this angle. This is not long after startup and I have closed the cowl and oil cooler flaps plus the bomb bay doors. Before exercising the prop at 1800RPM I'm waiting for the engine temps to get up to normal so she's running at around 1200RPM here. If you look out at the port wing tip you can see a couple of small doors. A small cable lives in here and when the wings are folded this cable attaches to a fitting on the leading edge of the horizontal stabilizer. Then once the engine stops and the hydraulic pressure dies away the cable holds the wing in the folded position. (Good idea to make sure its undone before spreading the wings I feel!!) Normally of course these doors would be closed. (And if we were going flying that pitot cover would be removed too!!)It was a blustery Nor'West day and I made sure to keep the stick back as standing the aircraft on her nose would not be good!!  Part of the runup included exercising the hydraulic system. Flaps down....  Fold and spread the wings. In this shot the cowl flaps are still closed but I have the oil cooler flaps open(the port one visible in front of the wing). With the oiltemp at normal but the cylinder head temps still rising it was a good idea to keep the oil cool.  Ok we now warp forward to 1981. Here we are starting to remove all the engine cowlings so we can remove the damaged engine and send it away to RNZAF Woodborne. That's me on the right modelling the latest in workshirts!!  Here I am undoing screws holding the cowling rail running back from the ring cowl.  On this side all the cowls are off. The dud cylinder is just visible in front of the opening for the exhaust(which has been partially removed). Its a rear cylinder (the Wright Cyclone R2600-8 is a1700 Horsepower 18 cylinder comprising two rows of 9 cylinders each. This engine is also fitted to the B25 Mitchell) which made it interesting trying to undo all the bolts around the base of the cylinder to try and remove it!) The round blue object is the port oilcooler.  Here's a closer shot. The orange tags are to identify all the controls, wires and hoses as we disconnected them. I think some of them are still there today!! The green object to the right is the main oiltank and beside it are the control linkages for the throttle, mixture, etc.  With the Avenger being a tail dragger she was put up on a trestle at the tail to make it a bit easier to remove the engine.  Here the prop has been removed and safely stored.  With the prop removed the ring cowl is taken off. The engine looks quite small with all the cowls off. The dud cylinder is more clearly visible here as it is the one missing the rocker covers near the bottom.  And she is off! Sitting nicely in her Bristol freighter engine stand.  Last one for now. With the engine out we decided a good clean up of the engine bay was in order. Here Dennis Pett is removing the oiltank. He is doing up the oil tank retaining straps to keep them up out of our way. On the bulkhead behind this tank is a piece of armor plate.  Hope you enjoyed this trip down memory lane. I'll post some more tomorrow. Baz ;D |
|


 )
)