|
|
Post by flyjoe180 on Jul 11, 2010 13:58:56 GMT 12
Glad the photos are proving to be useful Anthony. If you need any more feel free to email me.
|
|
|
|
Post by agalbraith on Aug 9, 2010 10:59:47 GMT 12
Ok, some more progress................ Been working on the smaller exterior details. I trimmed off the oval blob from this part and replaced it with appropiate size fusewire and superglued it in place. Then it was all blended in with Mr Surfacer 1200 to represent it welded etc, as well as sanding up the part to make it a better round cross section. I then threaded on the two tiny brackets that will attach it to the boom. 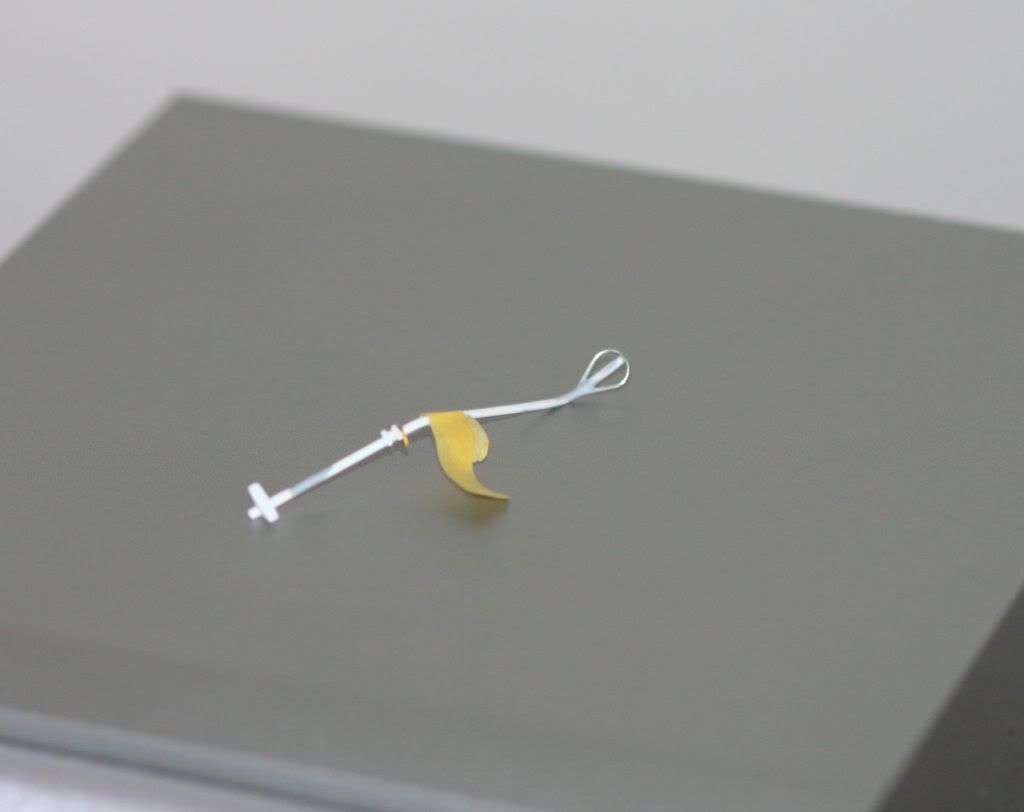 I then decided it was time to get on to the door latches. As usual, the EC door locks are slightly different to the BK ones. So I utilized most of it and modified the rest with plastic card and trimming the etch. Again flooding the areas that showed scalloping like the actual machine. I have noticed with p/etch that sometimes you cant take for granted it is right for the area you are doing and it may need slight modification or blending (still makes life easier though, rather than starting from scratch!). I also decided to work on the rather delicate etched louver on the engine cowl sides. The safest way I found is to box the grille and put another trim around the inside of the box. This way the part drops in perfectly and then all I will need to do is make the opening a little bigger and glue the whole unit in. I still have to put a little ducting in behind which will add to the strength.  Next up was the rotor mast..........this I had been dreading. I have recently picked up a partly made Revell Bo-105. I looked at the rotor assembly and decided that it was actually pretty good. With a little modification could look just like the BK-117 one. It even has the swashplate assy and linkages.......just what I was looking for! I took loads of measurements, sleeved the EC-145 mast with a new stronger plastic tube one and started adding the 105 parts. More measurements ant copius trimming (as well as modification/tweaking of the cowl opening) I got a solid assembly. As you can now see, I have the rotor mast and bell housing pretty well sorted. It is sitting 1mm too low, but that is because I have a piece to still add to the bottom assembly.  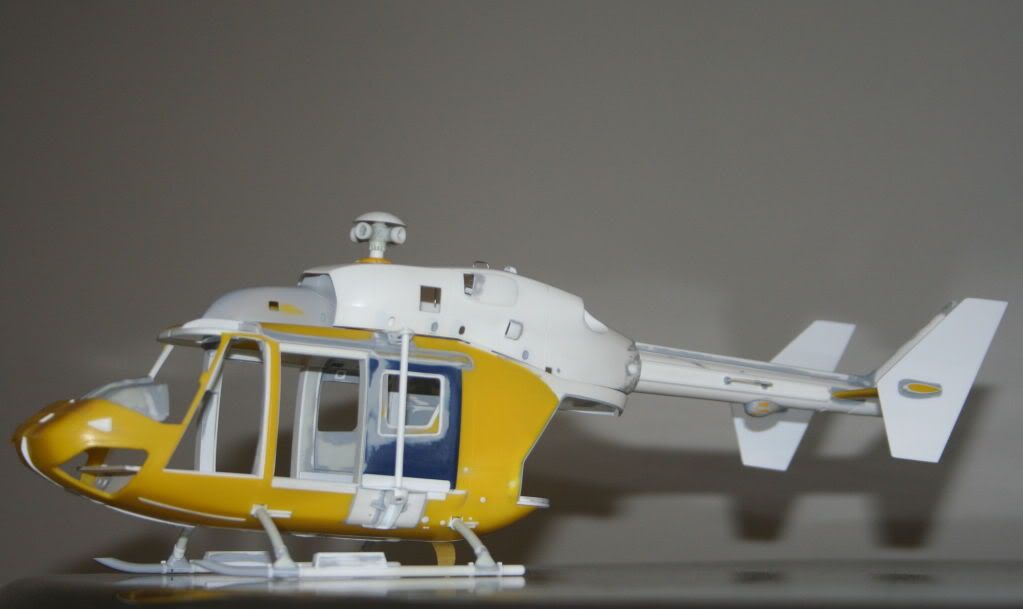 I have now added the rear antenna's to either side of the boom. These were cleaned uo with new mounting plates added using my Waldron punch and die set and again, blended to the antenna itself with Mr Surfacer before finally attaching them to the boom. Finally it was a moment of truth for the project. I had to now check the major dimensions were still correct after this work, and most importantly now the rotormast and head assy height was set..................was it the correct height?  ? 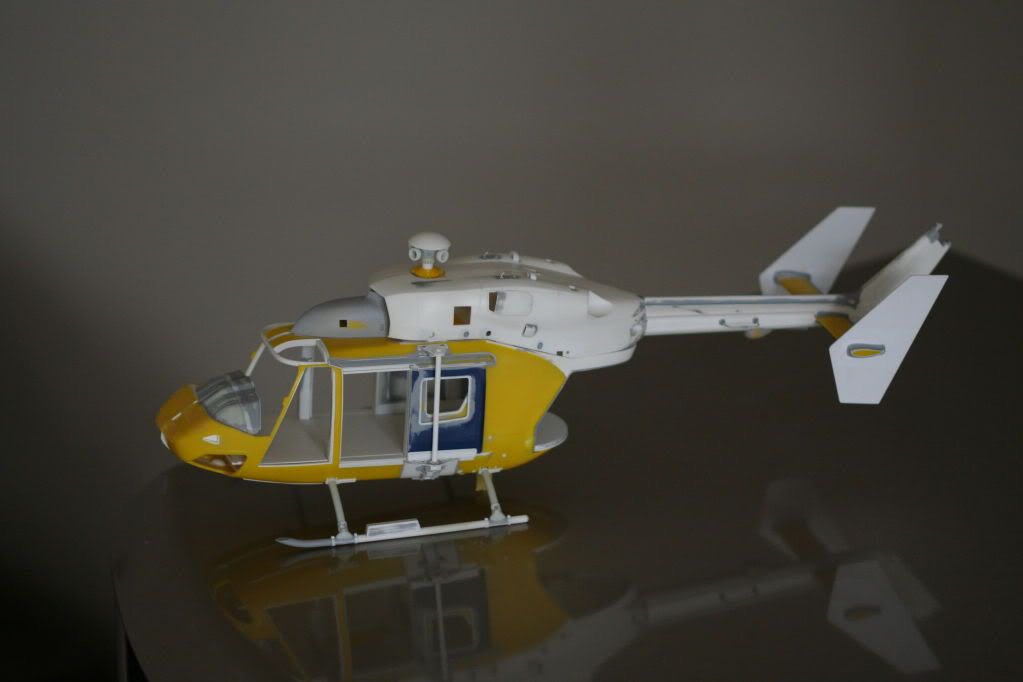 Yes.............phew! Thanks for dropping by Cheers Anthony |
|
|
|
Post by Dave Homewood on Aug 9, 2010 20:52:02 GMT 12
Wowsers! Intricate work there Anthony. Good stuff.
|
|
|
|
Post by jimtheeagle on Sept 10, 2010 7:13:17 GMT 12
Hi Anthony, Great to hear you are all well after the earthquake. Did the 117 survive?
Jim
|
|
|
|
Post by agalbraith on Sept 11, 2010 8:14:42 GMT 12
Thanks Guys
Yes Jim the Bk survived well. However I keep it in a safer place during the build now........just a bit nervous!
Hopefully another update again soon.
Cheers
Anthony
|
|
|
|
Post by agalbraith on Sept 25, 2010 8:40:10 GMT 12
Well finally a bit of an update. I have been extremely busy trying to get some finishing touches sorted in prep for a Mr Surfacer 1200 primercoat. As you can see I have added the Reniassiance p-etch grille on each side. This turned out to be quite a job. I placed the framed grille into the cowl and then built up all of the correct contours around it. Then scribed the opening around the edge of the grille as per the original. Also an area I felt needed attention was the forward 'upward' curve on the sides of the cowl (front lower). I cut some dymo tape to the correct contour and stuck it to the correct place. The edge was then built up and blended up to the dymo tape. You must pull the tape off before the Mr Surfacer is dry otherwise you will rip a ragged edge when you pull it off (as I experienced!!). Best run your knife blade along the edge before you do so as well. Finally I went all over the cowl, tailboom and vert stabs etc fixing any little imperfections before a prime. I finally washed the parts in mild detergent and rinsed off and left to dry overnight. Yesterday I highly thinned mt Mr Surfacer 1200 and slowly and carefully primed it all up.....as you can see.     I know it dosent look very exciting and it isnt helped by my useless photography. But actually it has come out awesome (even if I do say so myself!!). The areas I was worried about came out really good, the contours and shapes I sculpted into it came out much better than I expected. An area I was especially concerned about was the tailboom attach point as there was a ton of superglue and scraping etc. There are a couple of areas that still require attention, but nothing too serious. I will address a few small imperfections and then lightly buff the surface in prep for later on. I am just deciding wether to use my archer rivets now or my rivet tool for the surface details. I need to add a few extra bits n bobs as well as a few panels to scribe on still. I havent glued in the mesh yet as I dont want it to get to get clogged with primer etc. Anyway, thanks for looking, I know it dosent look like much of an update, but there has been a huge ammount of work gone in to get the cowl to this stage. Cheers Anthony |
|
|
|
Post by Dave Homewood on Sept 25, 2010 9:50:46 GMT 12
I think it looks fantastic with the primer on. The grills came out superbly.
|
|
|
|
Post by agalbraith on Sept 25, 2010 20:32:11 GMT 12
Well, I was mowing my lawns this afternoon when I heard a low sounding helicopter overhead....................guess what, I looked up and it was the object of my obsession at the moment! She was landing in the park over the road. My wife and son came running over to let me know and we grabbed the camera and crossed over to the park. Aparently a guy had cut his hand in half, dont know what with, poor guy.............he even walked to the helicopter. Anyway they didnt muck around................... 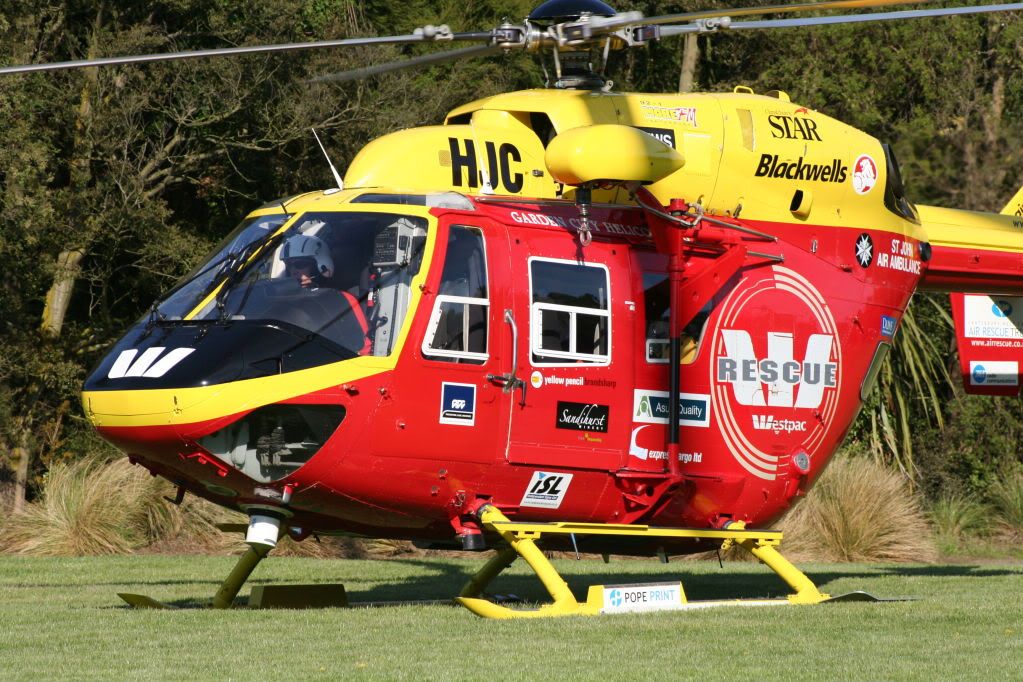 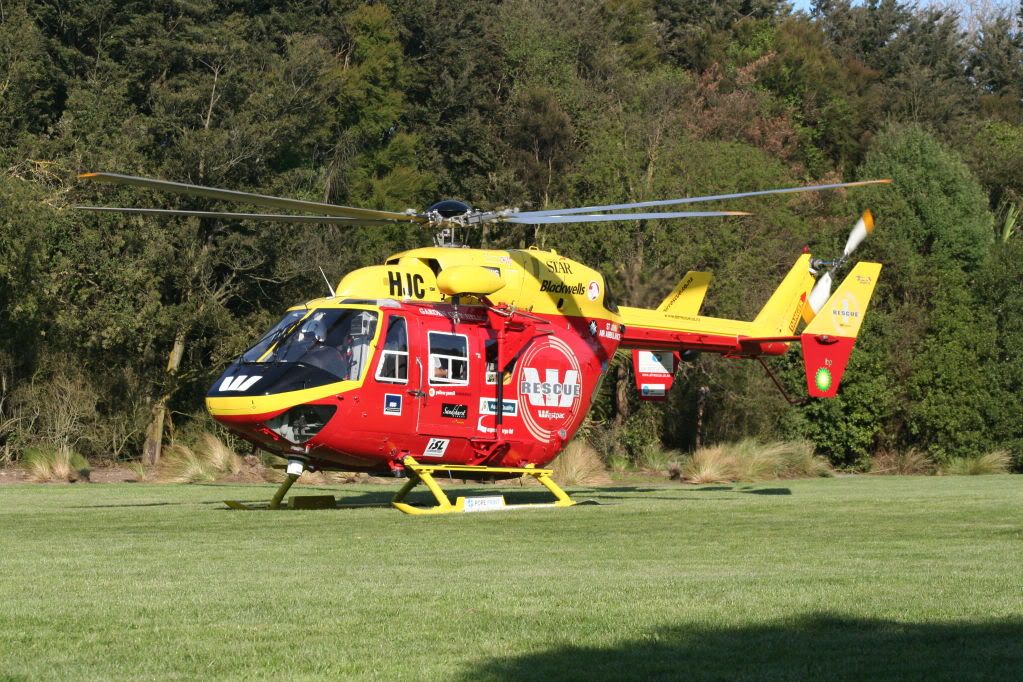 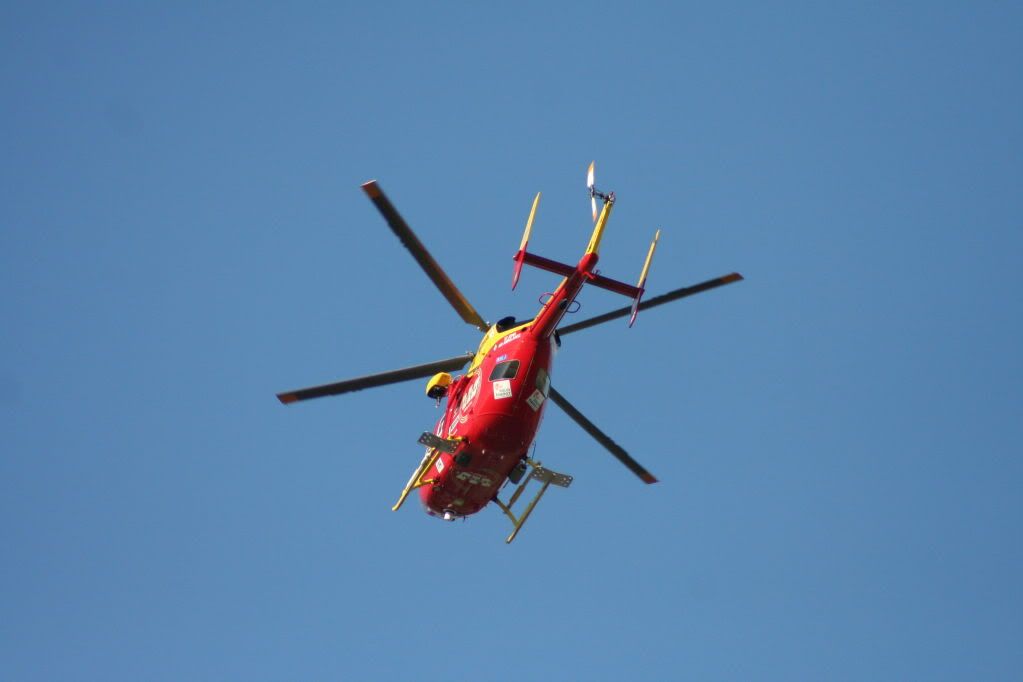 All the inspiration I needed!!! Cheers Anthony |
|
|
|
Post by Dave Homewood on Sept 25, 2010 22:03:31 GMT 12
It's not as detailed as your one.  |
|
|
|
Post by agalbraith on Sept 25, 2010 22:07:25 GMT 12
Glad someone noticed....................thanks Dave!
|
|
|
|
Post by flyjoe180 on Apr 13, 2011 21:09:26 GMT 12
I have to ask Anthony, how is this progressing? Or, as mush as I fear to ask, did it become an earthquake 'victim'? I hope not, but noticed no updates so just asking.
|
|
|
|
Post by agalbraith on Apr 13, 2011 22:17:01 GMT 12
Hey Joe, thanks for asking
No definately not a victim of an earthquake. I just got a little bogged down and couldnt see the woods for the trees.
The Skyhawk is a bit of change of pace to get me going again.
Never fear......I will be back to it!
Cheers
Anthony
|
|
|
|
Post by Dave Homewood on Apr 13, 2011 22:39:59 GMT 12
Did you ever finsih the Mustang and the Mosquito you were working on before this helicopter Anthony? Or are they too on the back burner?
|
|
|
|
Post by agalbraith on Apr 14, 2011 12:27:52 GMT 12
No Dave, I never actually finished that Mustang. In fact I was looking at it the other day along with a 1/48 Harvard I had been working on. I forgot how far along I was. I have a ton of resin ultracast bits and decals for it as well. Probably will never build it now as the new Tamiya 32nd one is coming out.
Dave J has my Mossie now.
Cheers
Anthony
|
|
|
|
Post by mstokes on Apr 26, 2011 15:27:47 GMT 12
Great work Anthony, you must have an inbuilt laser level for some of the detail you do. It is so fine yet realistic, I try to hold my detail up to your level but it really is in a class of it's own. Probably why when I dropped into Modelcraft and Hobbies in Wellington they knew you and your work.
|
|
|
|
Post by agalbraith on Apr 26, 2012 21:19:18 GMT 12
Yes indeed....there is a little life in the BK again! Ok so a small update. Actually the photo dosent actually show the time that went into getting her to this stage. I have a few projects on the go at once....surely this is normal! I now have the centre windscreen frame accurately centered and glued in place. I had to spend a lot of time figuring out how far the frame rebated back in so that it will all line up with the vac windscreen fitted. The floor was permanently glued in place, this now allows me to build up the photoetch centre consul. The top 'eyebrow' windows were also measured up with my vernier calipers and the inside edge trimmed to make both windows of equal size/shape. They are now ready for final framing to be added. Finally the small triangular piece at the forward door opening was measured and made out of 2 pieces of card to represent the door edge lip. The panel line running down the front pillar where that attaches was tidied up with a superfine razor saw blade and now only the bottom edge needs the superglue sanded back to blend. 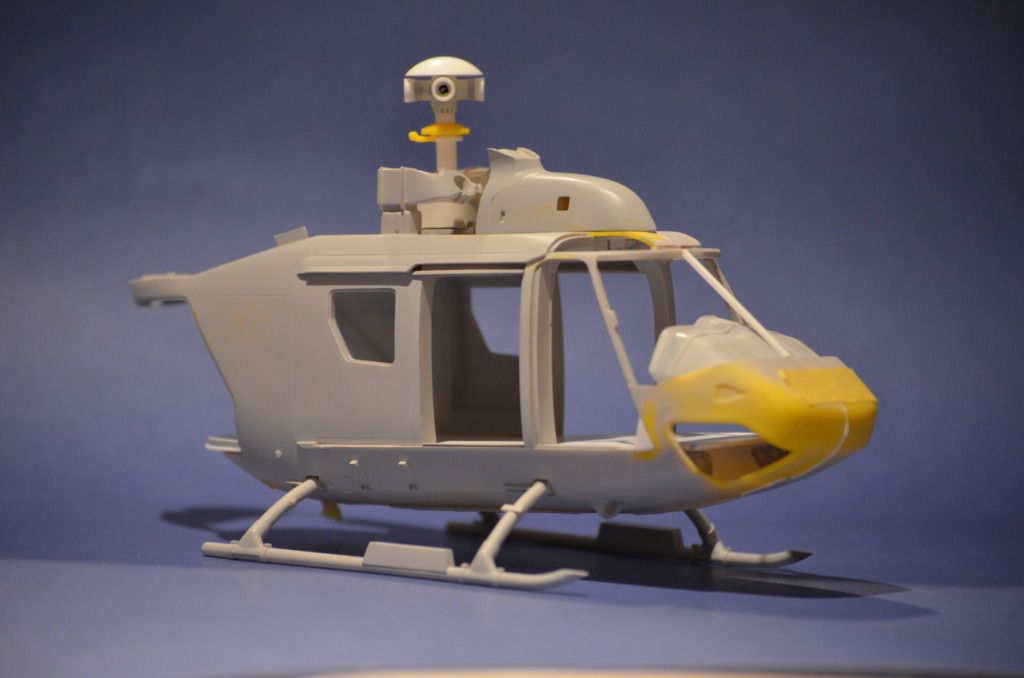 So....slowly but surely, work proceeds. Thanks for looking in Cheers Anthony |
|
|
|
Post by Dave Homewood on Apr 26, 2012 21:43:57 GMT 12
Yey! It's back!!
Great progress Anthony!
|
|
|
|
Post by ZacYates on Apr 27, 2012 4:40:29 GMT 12
My goodness. Do no more except paint it in approximations of natural aluminium and strontium and you'd fool so many people!
It may be "just small steps" but this will truly be a masterpiece. Bravo Anthony, and thank you for sharing each step with us.
|
|
|
|
Post by baz62 on Apr 27, 2012 13:01:52 GMT 12
Oi this is not getting the T7 finished! Or is the floor in the BK-117 practice for the Auster's one!! ;D
|
|
|
|
Post by agalbraith on Apr 27, 2012 23:00:52 GMT 12
Thanks guys
Heh, Baz I just knew you were going to say that!
Its good to be back working on it again. I am installing the mesh screens on the forward 'boat' fairing at the mo....
Cheers
Anthony
|
|


 ?
?


