|
|
Post by agalbraith on May 6, 2010 11:30:58 GMT 12
Thanks Dave, its been a nice change of pace and different chemicals to smell!!
|
|
|
|
Post by flyjoe180 on May 7, 2010 15:31:20 GMT 12
Coming along well Anthony.
|
|
|
|
Post by agalbraith on May 8, 2010 21:16:38 GMT 12
Thanks Joe
Great to be back into it I must say!
Cheers
Anthony
|
|
|
|
Post by Craig Sargent on May 10, 2010 10:11:56 GMT 12
Looking forward to seeing it finished and on the table in Christchurch in October...
|
|
|
|
Post by agalbraith on May 15, 2010 18:33:43 GMT 12
Heh...............I would love to see it finished then too!
I would bring my 1/48 14sqn Tamiya FG-1D Corsair........but I am no longer an IPMS member.
|
|
|
|
Post by baz62 on May 16, 2010 10:02:23 GMT 12
Thanks Dave, its been a nice change of pace and different chemicals to smell!! Ah HA! I knew there was more to model making than gluing bits together! Seriously its looking good Anthony, keep it up! |
|
|
|
Post by mstokes on May 17, 2010 23:22:43 GMT 12
Love the great work on the rotor hubs.
You must have a laser cutter Anthony, I don't know how you manage to keep such minor detail in such brilliant form. You must have a very steady hand mate.
Keep it up!
|
|
|
|
Post by agalbraith on May 22, 2010 14:57:40 GMT 12
Thanks Baz, Mike, no, no special tools. Just patience and like yourself.........being slightly crazy to do such things! Well, small (visual) update. I have superglued & MEK'd the starboard skid in now. I know it looks easy enough, but in order to get the weighted 'sit' I had to jig the fuselage and then attach the skids at the right angle. I have had to put them on now as they need 'cranking down and superglueing in order to get a strong bond etc. 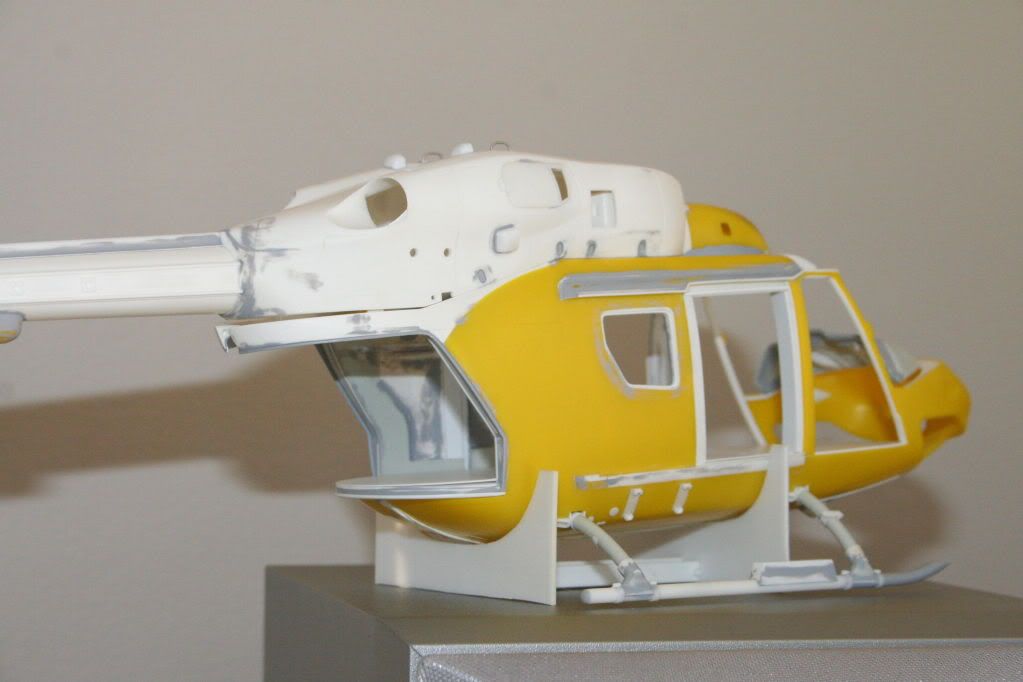 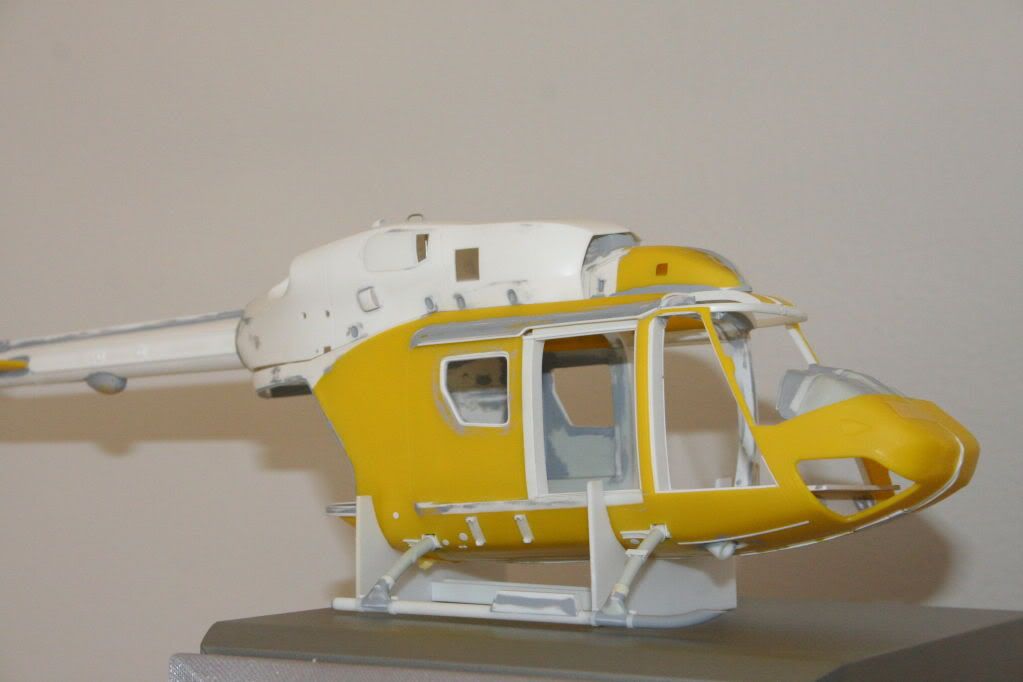 Well, I dont have the nervous energy to glue the other in just yet (anyway I have a couple of little things to add to that one), and my fingers are encrusted in superglue. Thanks for looking Cheers Anthony |
|
|
|
Post by agalbraith on May 30, 2010 11:02:03 GMT 12
OK here she is....................finally standing on her own feet! 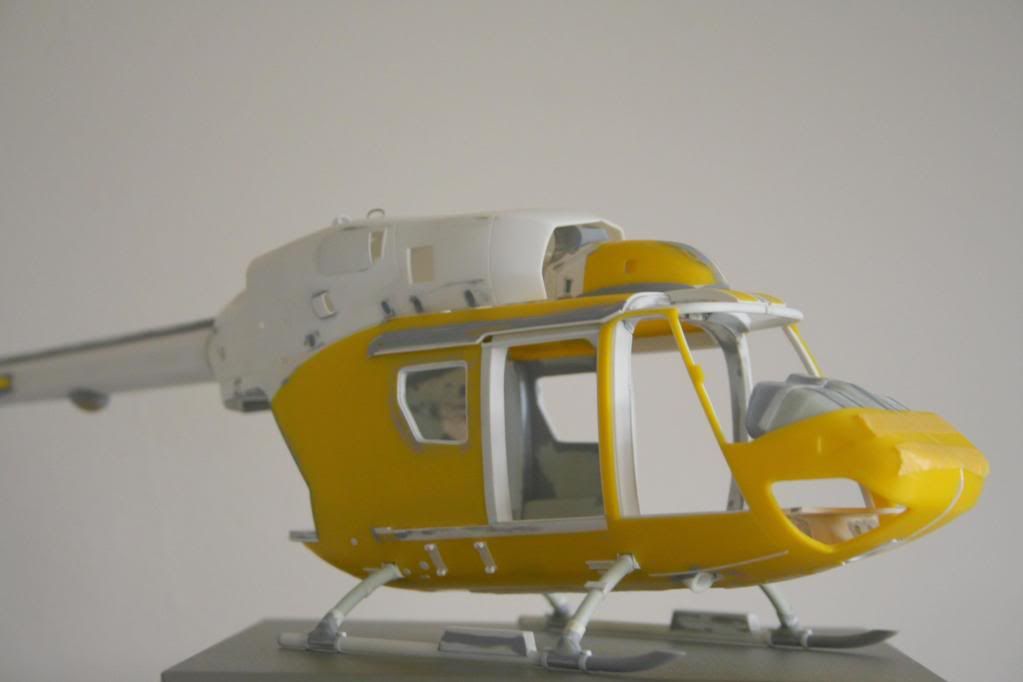 Seems quite nose heave so I 'may' not need nose weight. Thanks for looking Cheers Anthony |
|
|
|
Post by Damon on May 30, 2010 11:49:35 GMT 12
Thats quite something Anthony.looking Great!
|
|
|
|
Post by Dave Homewood on May 30, 2010 18:47:12 GMT 12
A wonderful milestone mate, well done.
|
|
|
|
Post by agalbraith on May 30, 2010 19:19:11 GMT 12
Thanks guys
Yep it feels like a small milestone too. I really didnt think when I started this project that it would end up being so extensive!
Cheers
Anthony
|
|
|
|
Post by flyjoe180 on May 30, 2010 22:40:54 GMT 12
Will the CofG of the model go rearward when the tail rotor and main rotors are fitted? It's looking fantastic Anthony. I'm intrigued though, maybe I have missed something, but how are you going to paint th einterior and put in seats etc with it all together like that? (That question from a 1/72 or 1/48 former modeller, no understanding of larger scales  ) |
|
|
|
Post by agalbraith on May 30, 2010 23:09:54 GMT 12
Hi Joe
At this stage it is all locked together like a jigsaw and I am getting close to spraying the interior. I will get a bit more done inside and sprayed before I glue the main fuse together. Then the upper engine cowl will be finished off and glued in.
Well.................thats kinda the plan!
Cheers
Anthony
|
|
|
|
Post by flyjoe180 on May 31, 2010 20:58:14 GMT 12
I see now, thanks Anthony.
|
|
|
|
Post by agalbraith on Jul 1, 2010 12:46:22 GMT 12
Well, back at the bench again after travelling and the BK madness continues. I really wanted to deal with the vertical stabs (or end plates as the engineers call them). I have the results of 3 attempts...........please dont make the same mistake as me! First off I checked the measurements and Revell got it right, however when I attached them to the tailboom it did not look right, I figured the angles were all wrong. So I set about trimming, filing shimming and sanding to get the correct angles. I test fitted it all up again, this time I fitted the cowl/tailboom unit to the fuse. You guessed it................it looked awful! What I had done was change its shape to look right in the 'flight' position, but when it was all together it was at the completely wrong angle when sitting on the ground! OK I thought, I will just make new ones out of 1mm card (the real ones are convienently 32mm thick) but ended up messing those up. OK lets look in the spares box............aaah a spare set of kit ones. This time I just cut all of the detail off and sanded it all flat. I put new leading and trailing edges on them and trimmed them back to slightly wider than the stabs themselves. The real ones have some kind of strengthening plates/panels on both sides of them which I replicated by glueing with liquid glue some very thin (like paper) sheet I had in 2 layers. On the real ones again there is a very slightly scalloped shape to them at the leading edge. In fact it is hadly descernable, but you need to do it to get the strengthening plate effect to work. Once this was done I blended it all together with Mr Surfacer again, slowly building it up at the leading and trailing edges. Here is the real part, notice the subtle detail I am talking about (you probably wont notice the scalloped face in the shot though)  As you can also see, there are shaped plates that go between the horizontal parts and the vertical stab. Here are mine made up ready to accept the vert stab.  And finally, the completed parts. I am just about to go away and spray the vertical stabs soon, with a heavy coat of Mr Surfacer to blend it all together.  Hopefully all goes well and I get the desired result, and there wont be tears! Thanks for stopping by Cheers Anthony |
|
|
|
Post by agalbraith on Jul 2, 2010 9:42:44 GMT 12
There were tears! Well, I just couldnt go to bed last night untill I sorted the problem out! The end plates I made looked awful under a coat of primer, it was uneven, blotchy etc. As you can see I made new ones completely. I used Dymo tape and masked off the strengthening plates and buffed the plastic down on one side, creating a nice even ridge. Anyway I wasnt happy until I had it all glued up on the model and the alignment sorted. Actually I am really pleased how it turned out in the end. I might need an afternoon nap though! Here is how she sits now............... 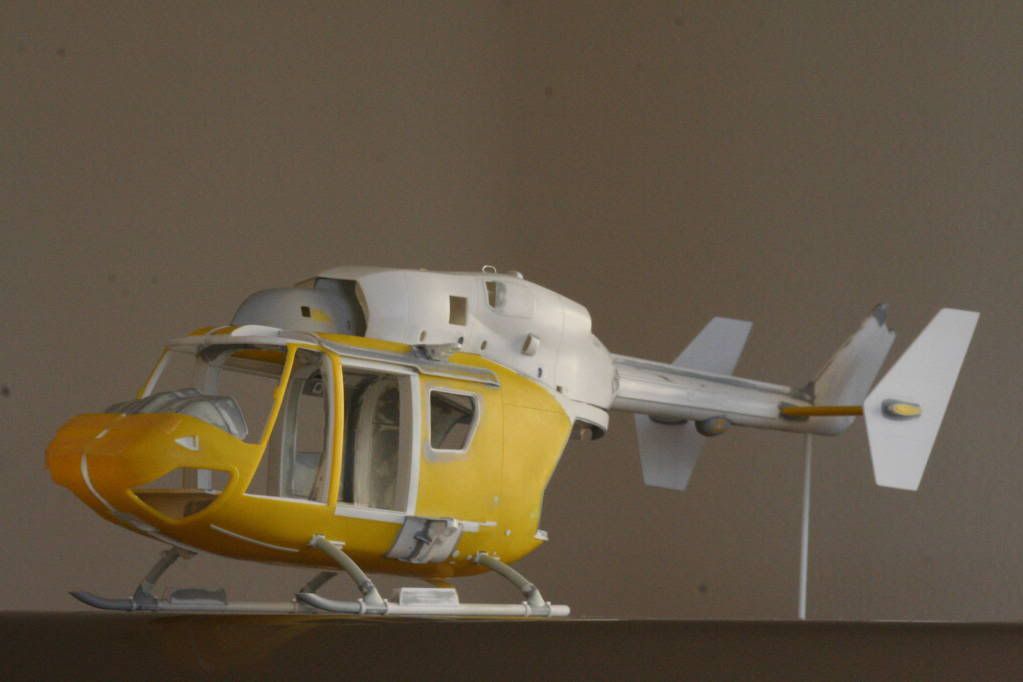 Cheers Anthony |
|
|
|
Post by baz62 on Jul 2, 2010 15:08:48 GMT 12
Thats looking really good Anthony. I admire your perseverance!!  |
|
|
|
Post by Dave Homewood on Jul 2, 2010 15:42:53 GMT 12
Amazing workmanship once again, well done.
|
|
|
|
Post by agalbraith on Jul 7, 2010 13:32:23 GMT 12
Thanks Baz, Dave OK, here is a pic of the actual hub (thanks Joe - flyjoe180). 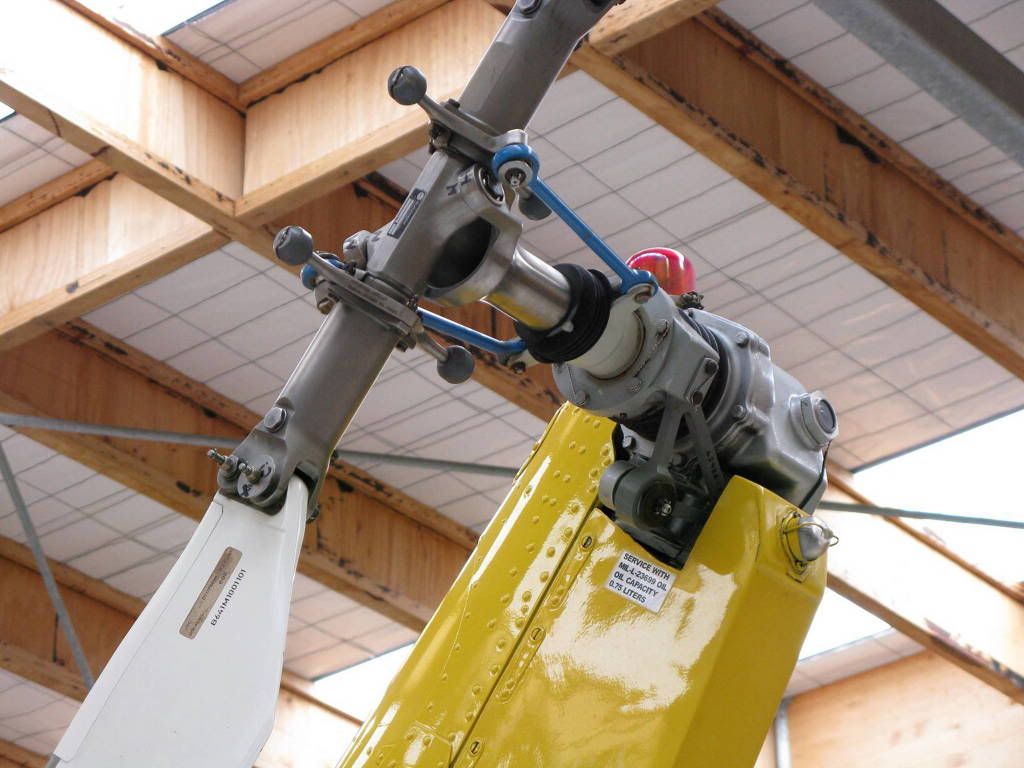 And here are the kit parts and the modified Reniassiance parts. 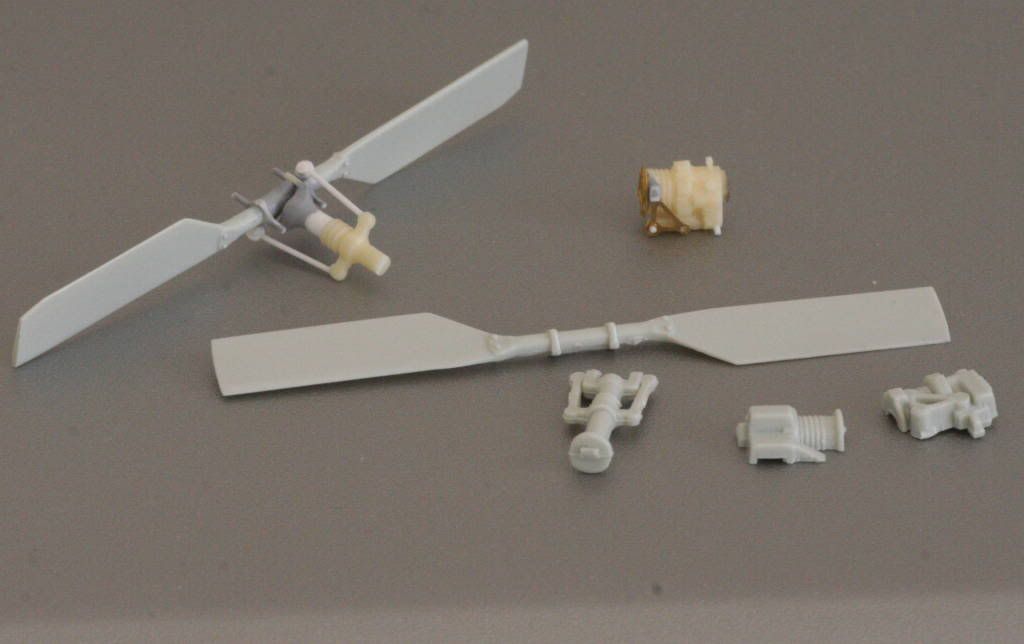 I modified the profile/shape of the blades and tidied up the hub. I then used the Resin and etch from the detail set. It has much finer details than the kit part. I added what appears to be a drain plug from the gearbox and a few smaller items. Then added the photoetch. One small detail for those that have the detail set is that the resin tailrotor shaft has the end piece moulded at 90deg wrong. I had to cut this piece off, add a new shaft and then reattach the end. This gave me an opportunity to get a more accurate shape between the 2 as well. The Reniassiance set is beautiful, but the trouble with photoetch in some instances is that it is one dimensional. I decided not to use some of the linkages as they just didnt look right. So I made new ones using rod and my Waldron Sub Minature punch and die set to get a more realistic look. There are in total 17 new pieces added to the tailrotor unit and I still have to add the mass balance 'balls' to the tips of those 4 pointed shafts. I am still looking for something suitable there. My wife needed to go to the local craft shop so I went along, but even the smallest beads were too big. I will find something. I am really happy how it turned out, it took quite a few hours hunched over my desk and staring at photos making sure I didnt miss anything and it looked right. Cheers and thanks for looking Anthont |
|


 )
)
