|
|
Post by agalbraith on May 9, 2006 23:18:29 GMT 12
Well here we go again This is what I am working on at the moment. It is the Tamiya kit with Aires wheel wells, part of cockpit(with some scratchbuilding too-see armoured glass panel that sits behind windscreen etc), Ultracast seat etc. 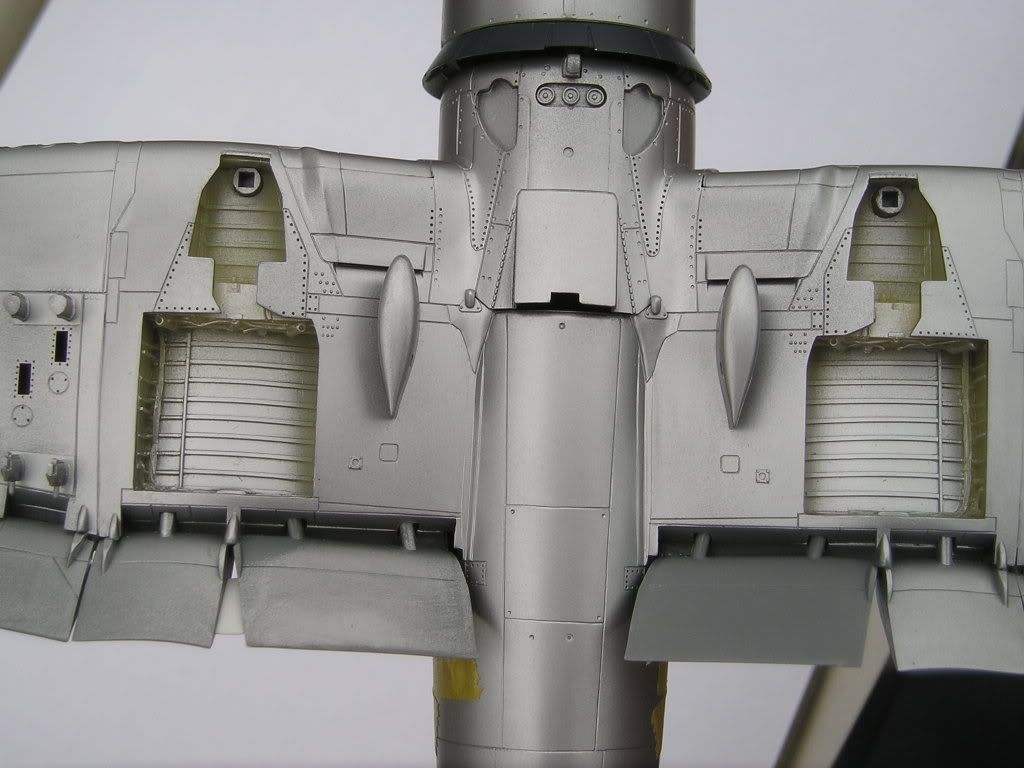 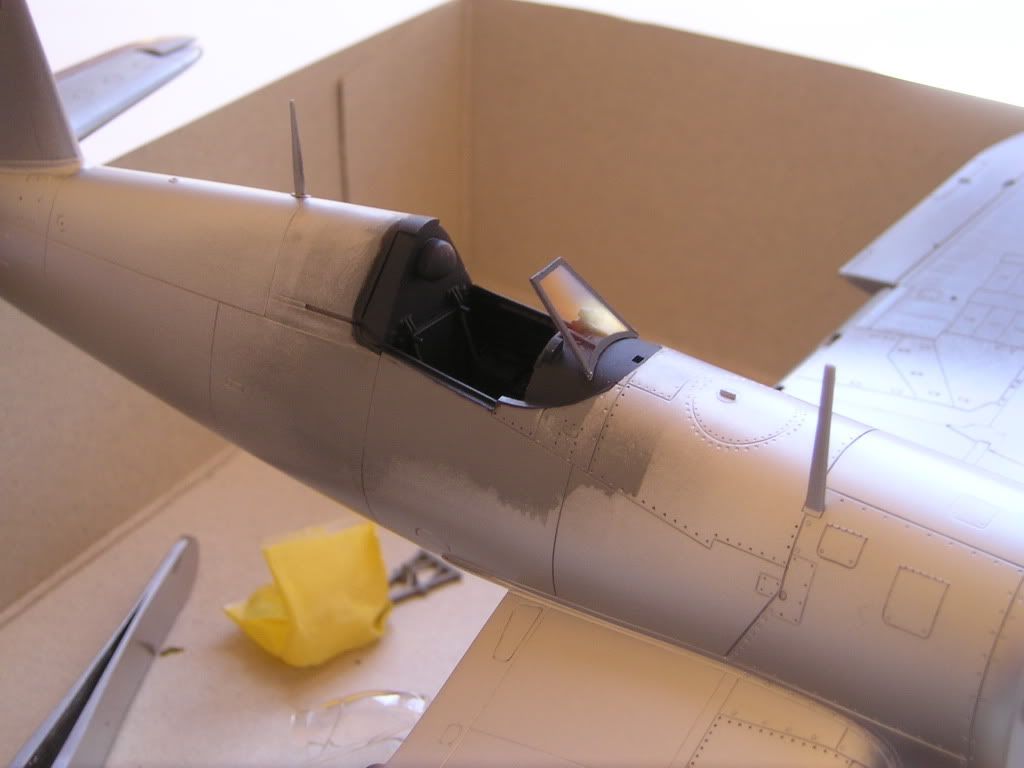 Just airbrushed the overpainted US/RNZAF wing & fuse markings and started some weathering on the stbd wingroot, still lots more to go without hopefully going overboard!  hope you like it Cheers Anthony |
|
|
|
Post by agalbraith on May 9, 2006 23:25:00 GMT 12
last go before bed! 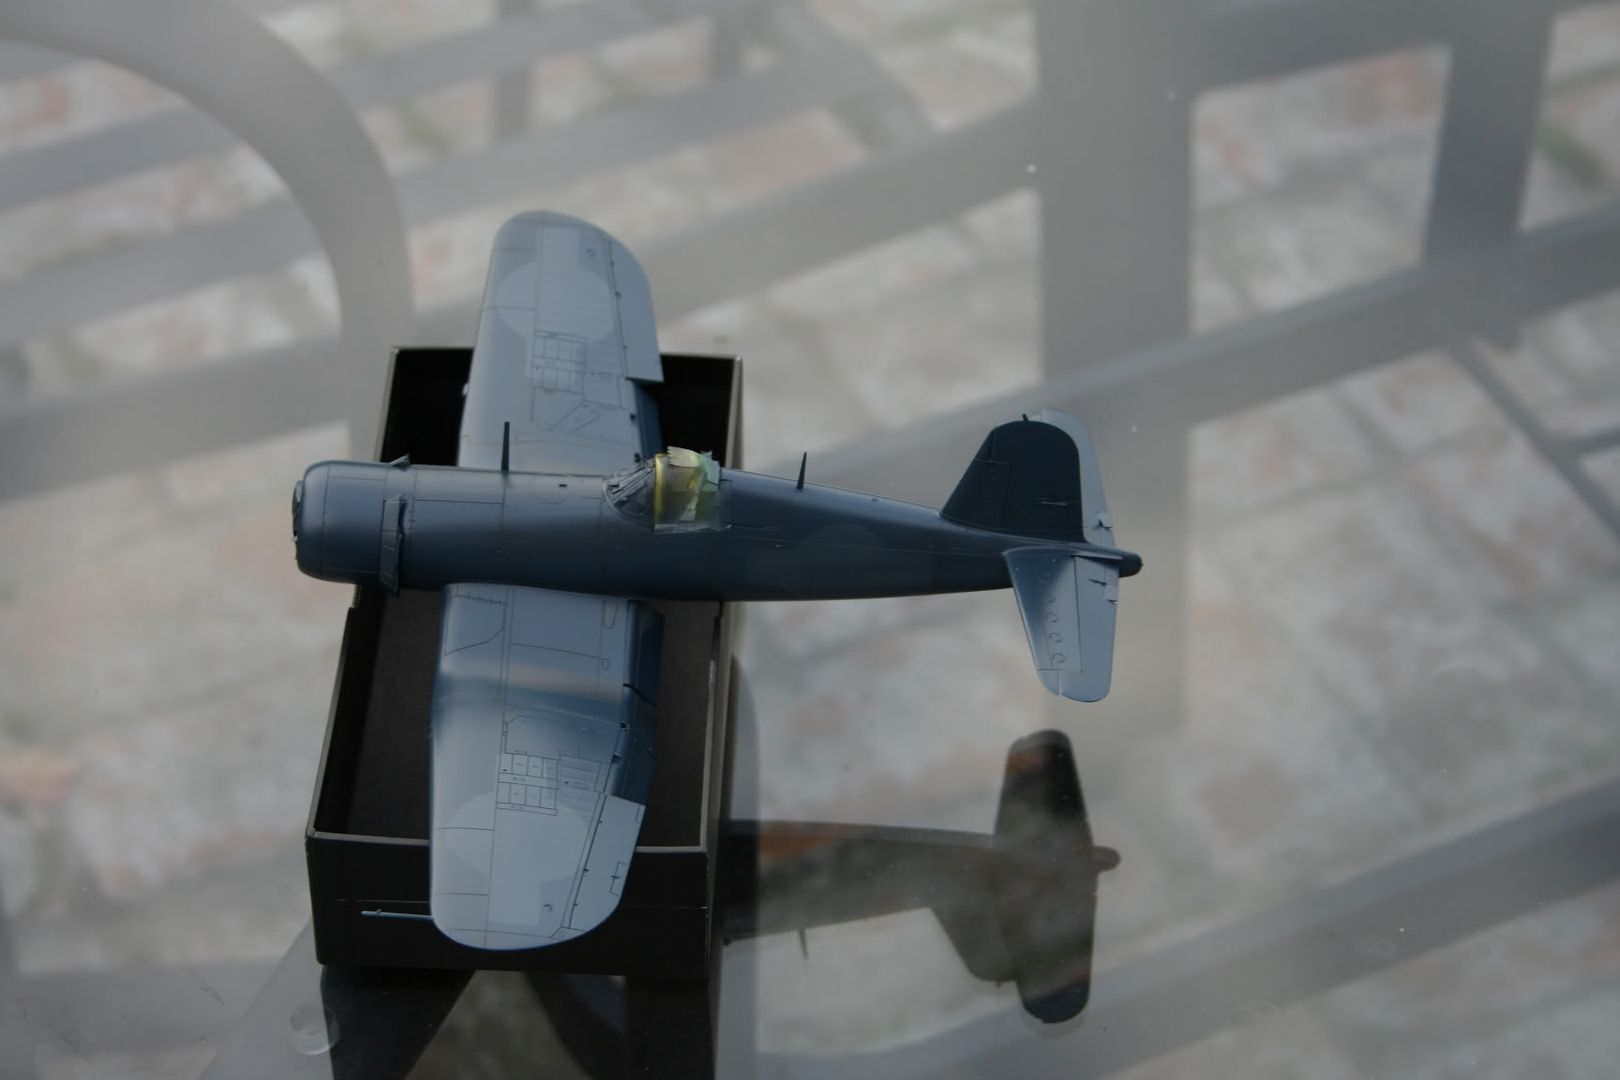 |
|
|
|
Post by corsair67 on May 10, 2006 9:30:35 GMT 12
Anthony, that's looking great: and I'm not just saying that because I'm a Corsair fanatic! ;D Have you decided which particular 14SQN aircraft you are going to depict with this kit? I'm glad you've gotten to grips with Photobucket, and I am certainly looking forward to seeing more photos of your collection and of the progress on the FG-1D. Thanks for sharing.  |
|
|
|
Post by agalbraith on May 10, 2006 20:30:22 GMT 12
Thanks for the nice comments about my Corsair and your help with photobucket, it was actually quite easy(to post multiple pics the same!!) once you follow your links etc. Thanks
I have had Peter Mossong who is a great friend print me up some decals & stenciling to do NZ 5639"KATHLEEN" or NZ 5660"GREMLIN". I have got to choose which one soon so I can weather her as per pics I have.
I will hopefully get some more airbrushing done this weekend.
Cheers
Anthony
|
|
|
|
Post by Calum on May 10, 2006 20:41:54 GMT 12
beautiful work
|
|
|
|
Post by Dave Homewood on May 10, 2006 20:45:39 GMT 12
Anthony, the model looks fantastic. Keep us updated as you go. I have modified the thread a little to delete the multiple repeated same photo, and also added the necessary ![]() and [/IMG] tags the link needs to bring that last photo up on screen. I hope you don't mind. GREMLIN sounds like a great option to me. |
|
|
|
Post by agalbraith on May 10, 2006 21:27:31 GMT 12
Thanks Dave!
I was going to PM you to ask if that can be done, so thank you.
I definately will keep you posted on her progress.
'60' I think is a good choice too as she was the last one. All I have to do is remove the antenna attach point off the rudder as on that bird it went into the fin tip.
Cheers
Anthony
|
|
|
|
Post by Calum on May 11, 2006 0:16:11 GMT 12
How did you do the "overpainted Decal" effect . (don't say I painted ove a decal) ;-)
|
|
|
|
Post by agalbraith on May 11, 2006 22:26:17 GMT 12
Thanks Calum
I cut out a US insignia shape (slightly oversized from the kit ones) trying not to be to neat and then rolled up some blu-tak and stuck it onto the bottom of the mask so as to keep it slightly proud of the surface. I have a couple of good pics from Wigrams archives showing the US/RNZAF pacific markings oversprayed. Then the area was sprayed with a lightened shade of the base blue which I mixed up myself using automotive laquer thinned with AAA Thinner.
Hey presto, when the paper mask is removed you are left with a slightly fuzzy demarcation line, much as Mumbles did on his 72nd Skyhawks on this site.
I plan on doing the fuel spill staines around the forward tank that run down the fuse on a slight angle that you so often see in a similar manner too. I thingk the trick will be to try and be subtle as this sort of weathering is new to me.
Hope this helps
Anthony
|
|
|
|
Post by agalbraith on Jun 17, 2006 19:27:02 GMT 12
Just a quick update if anyone is interested, I have been weathering it lately with varying shades of blue. Very slightly lighter shade to simulate the rib structure underneath, lightening the upper surfaces generally, darker cowl ring and slight fuel staning down the fuse side from the forward tank.
Also masked and sprayed the white pitot tube and step indicator line.
She is now going to be "17" VERNA as she appeared later in her life just before her gear up landing. It seems she had a tidy up and the name repainted in a different style etc.
I took some pics tonight as I am really pleased how it looks at the moment but the flash blew everything out and you cant see much of what I did. I will try again tomorrow in natural light.
The trick is "less is more!"
Cheers
Anthony
|
|
|
|
Post by agalbraith on Jun 18, 2006 21:17:45 GMT 12
Here she goes so far 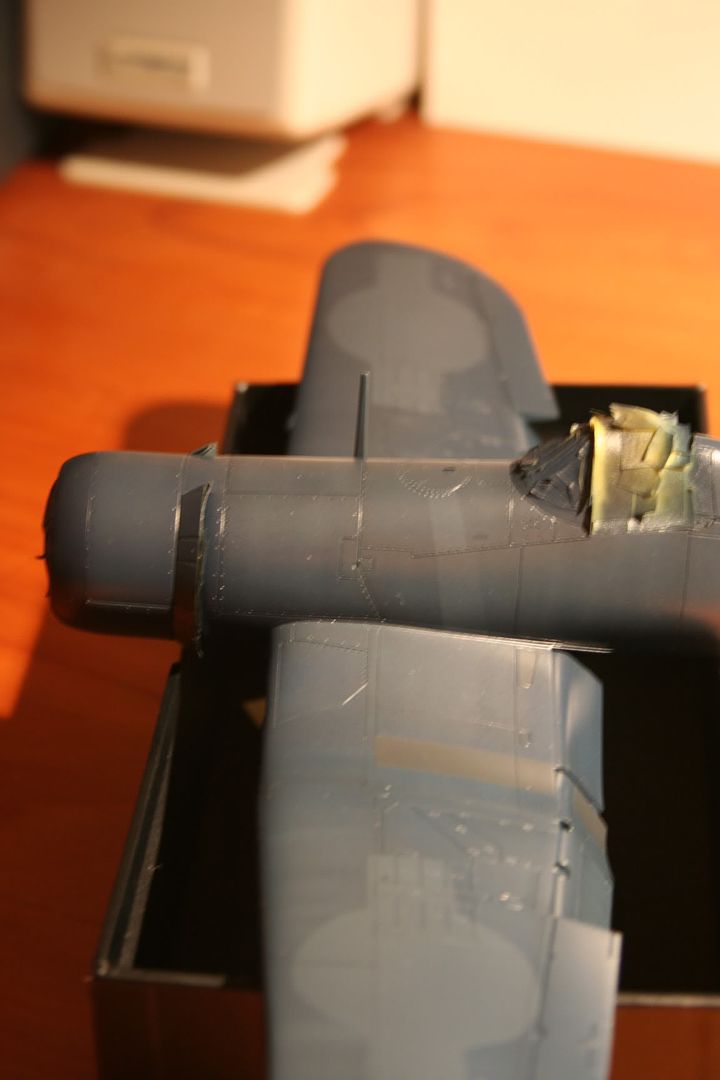 Cheers Anthony |
|
|
|
Post by agalbraith on Jun 18, 2006 21:19:00 GMT 12
Eek sorry about the pic size!
|
|
|
|
Post by agalbraith on Jun 18, 2006 21:37:18 GMT 12
OK, lets try this one........... 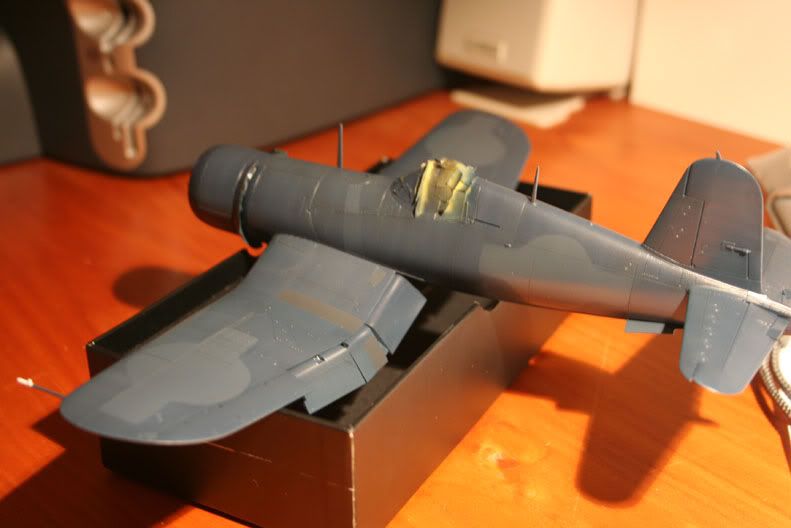 As you can see, this is a bit new to me Anthony |
|
|
|
Post by agalbraith on Jun 18, 2006 21:44:41 GMT 12
Last one 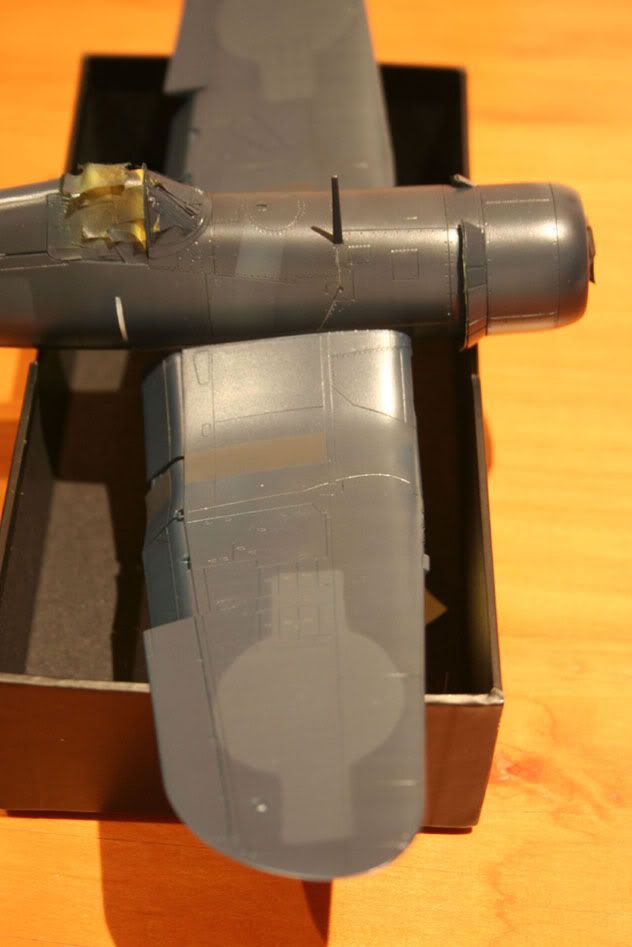 Mmm I dont know, I dont have the hang of this camera yet, it looks better in the flesh I think. Any comments welcome Thanks Anthony |
|
|
|
Post by Dave Homewood on Jun 18, 2006 23:59:09 GMT 12
I am enjoying seeing the progress reports. It's coming along very nicely. Keep up the good work and keep reporting back every now and then.
|
|
|
|
Post by corsair67 on Jun 20, 2006 9:30:54 GMT 12
Yep, excellent work; she certainly is looking good. Keep those updates coming, Anthony.
|
|
|
|
Post by agalbraith on Jun 20, 2006 22:22:10 GMT 12
Thanks for the nice comments guys, I really appreciate it.
Anthony
|
|
|
|
Post by agalbraith on Aug 2, 2006 22:07:27 GMT 12
Hi guys Well I have got the Decaling done, thanks Pete for your help with the serials and stencilling.  Cheers Anthony |
|
|
|
Post by agalbraith on Aug 2, 2006 22:19:44 GMT 12
I seem to have my image sizing all over the show! This is kinda new to me as you can see.
I had a different blue roundel because I liked the shade.....................but it wasnt right and these corsairs had a paler blue(it actually dosent look that bright as it has come out in the pics as it does in real life). So I changed it. Now it is the correct shade and not the colour I decided would look good.
Going to spray some future on hopefully on the weekend ready for a panel line wash.
After that a matt/satin finish etc
Cheers
Anthony
|
|
|
|
Post by corsair67 on Aug 3, 2006 9:27:30 GMT 12
Anthony, that looks great; and I'm not just saying that because I'm a Corsair fanatic! |
|